


I’ve mentioned it before: the secret to beautiful photos is in the edit! This is why you need Adobe Lightroom (you can read more about that here.) The thing is, once you start importing your hundreds, maybe even thousands of photos, it can get really disorganized and tedious to edit all of them. I’m going to share some of my favorite Lightroom shortcuts so that you can edit your photos faster and have more time to shoot!
Some of these links are affiliate links. This means if you make a purchase through that link, I receive a small commission at no extra cost to you. Read my full disclosure!
Adobe Lightroom Shortcuts
Presets


The godsend of all Lightroom shortcuts – presets. Presets are saved versions of the settings you’ve adjusted on a photo that you can then apply to any other photo with just a click of a button.
The main benefit of presets is that you can keep a consistent style to all of your photos and not have to individually adjust every photo to the settings you just came up with.
You can create a preset by going up to the top menu on your computer. Hover over the ‘Develop’ tab and select ‘New Preset.’
Your saved presets or the presets that you download from others will be saved on the left column of your Develop tab under ‘User Presets.’
And good news!
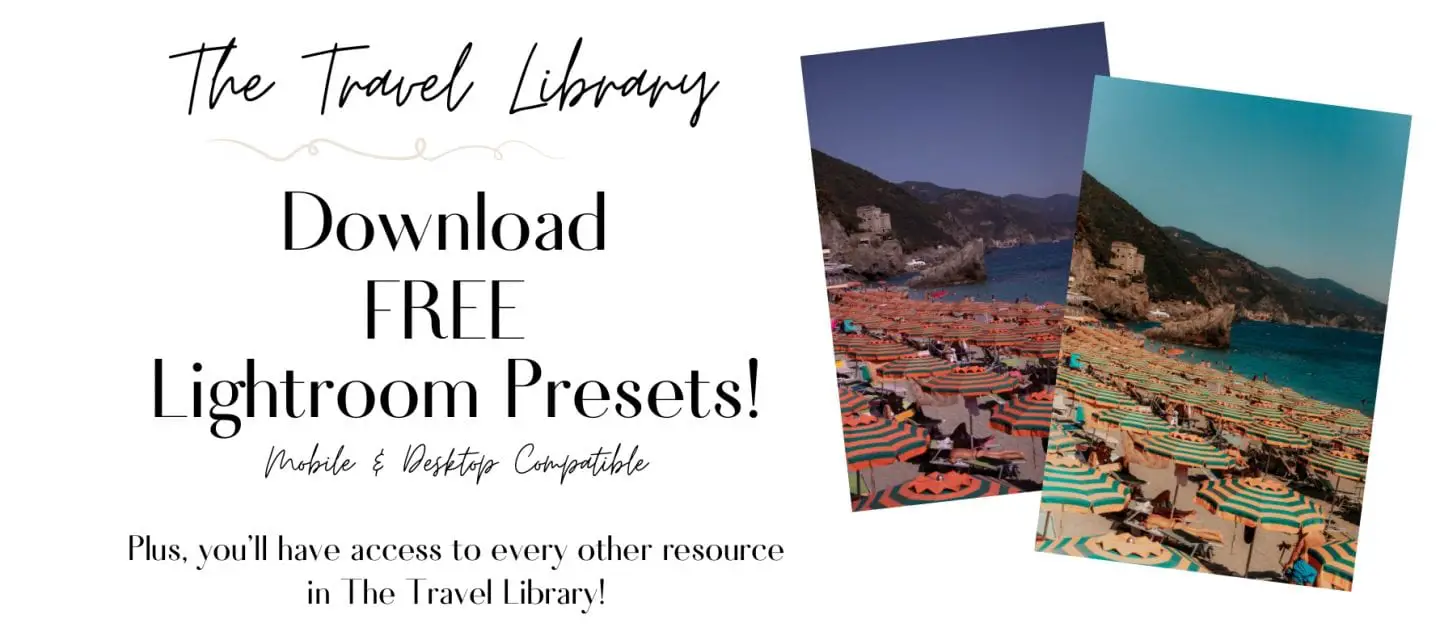
You can download some of my presets for Desktop and Mobile for free! Enter your email for access to The Travel Library to download your free presets!

Copy & Paste Settings


Now, here’s a keyboard Lightroom shortcut that resembles the idea of presets without actually having to save the edit.
Whether you’re trialing a potential new preset on different photos or you only have a few photos that you need to be edited with these settings, you can simply ‘copy & paste’ those settings using your keyboard.
This way again you’re not wasting time adjusting all of your sliders and filters. You can make small adjustments while editing to figure out the perfect combination of settings for your various photos.
The keyboard trick on a Mac is to Shift-Command-C to copy and Shift-Command-V to paste. (For Windows, replace the Command with Control.)
Name Your Folders
I’m going to dive into organizing your photos a bit because it’s almost as important as the actual editing process. You don’t want photos getting lost upon import. Or worse, way down the line you’re looking for a photo and you can’t seem to find it.
The first thing you should do upon importing photos into Adobe Lightroom is to give that folder a name. I usually relate it to the location of the photos.
Without giving your folder a name, it becomes so easily lost. You waste precious time digging through your library to find the photos you’re looking for.
It may not seem like much, but it makes the editing process way faster and more efficient to organize your photos as soon as possible!
Quick Collection


One of my favorite Lightroom shortcuts when it comes to photo organization is ‘Quick Collection.’ This tool is a bit hidden. You’ll notice at the bottom of your Lightroom window the carousel of photos either of the folder you’ve opened or your total photos imported into the software.


When you hover in the upper right corner of a photo’s thumbnail, a small circle appears. Click that circle and another square symbol sticks to the photo. It is now in what is called your Quick Collection.
This is a folder of photos you can access from your library that will include any photo you’ve clicked that circle on. It is a great place to put your best shots no matter what individual folder they’re located in.
It’s also a great tool for when you have many photos you’ve just imported and you’re going through them one by one to see which are the best shots.
Just flag them into your Quick Collection while you’re searching through them the first time, and then you don’t have to search through hundreds of photos again looking for the best one!
Sync to Lightroom Mobile
A Lightroom shortcut that makes editing on the go easier is syncing your Adobe Lightroom Desktop account with the Lightroom Mobile app.
Sometimes you want to edit photos on the go (I love to do it on planes! You don’t need internet to edit on Lightroom mobile.)
But what if you don’t have access to the photos you really need to work on, which are on your computer.
By syncing your account, you have access to your photos in two places now, which only makes editing more accessible and your photos more secure.
SD adapter for iPhone

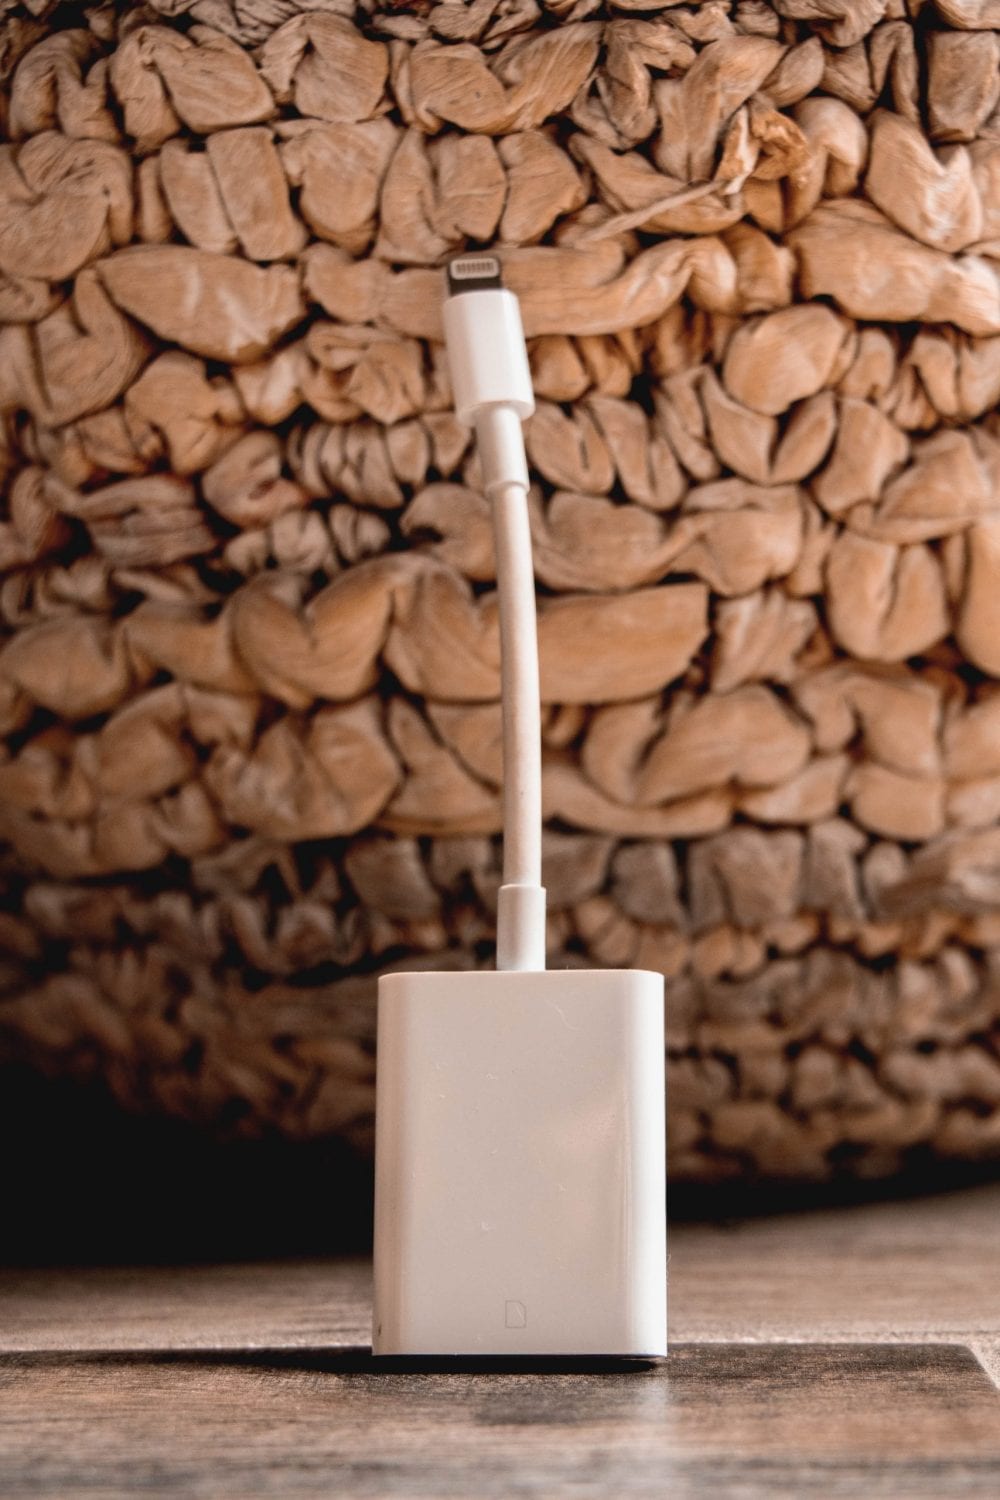
This Lightroom shortcut actually doesn’t have to do with Lightroom specifically at all. But it’s one of my all-time favorite photography hacks – something that makes my life so much easier!
I’m talking about an SD adapter for iPhone. This adapter allows me to take my SD card and upload the photos on my DSLR straight onto my iPhone.
It’s the ultimate solution to editing photos on-the-go and it’s a backup place to store your photos.
This has become an essential for me when it comes to photography gear and it doesn’t blow the budget. Check out my other photography gear essentials, including which things to invest in and which you can get budget deals on.
Create Virtual Copy


When you’re editing your photos, there are so many possibilities as to what direction you can take the edit in. You can end up with completely different looks on a photo but both equally as beautiful!
When I have a favorite photo and I’m trying to decide between looks, I ‘create a virtual copy’ of that photo.
You can do this by right-clicking the thumbnail of a photo and select ‘Create Virtual Copy.’
That just means instead of re-editing the same photo and potentially forgetting the adjustments I had made, I make different versions or copies of the same photo.
This way I can edit them differently side-by-side, compare them, and save different edited versions of the same photo.
Don’t forget to save these Lightroom shortcuts to Pinterest!


I hope you learned a helpful new thing or two about editing your photos! Take advantage of all the amazing tools of Adobe Lightroom! Keep in touch with the blog for more Lightroom shortcuts, tutorials, and photography tips!
XOXO
Michela