

Lightroom Presets are a magical one-click photo-editing tool to transform your photos in an instant. There are many reasons to create, buy, and use presets to enhance your photo editing skills. This quick and easy tutorial will show you how to create Lightroom Presets on both the Mobile and Desktop version!
Adobe Lightroom is the most capable photo-editing software available. You may be wondering the difference between Adobe Lightroom and Photoshop, but that is all covered in my complete guide to why you need Adobe Lightroom.
The user-friendly platform makes photo-editing intuitive and creative with easy-to-use tools – one of those being presets. Let’s get into why you should create Lightroom Presets and how to do it!
Some of these links are affiliate links which means if you make a purchase through them, I make a small commission. Read my full disclosure!
What are Lightroom Presets?
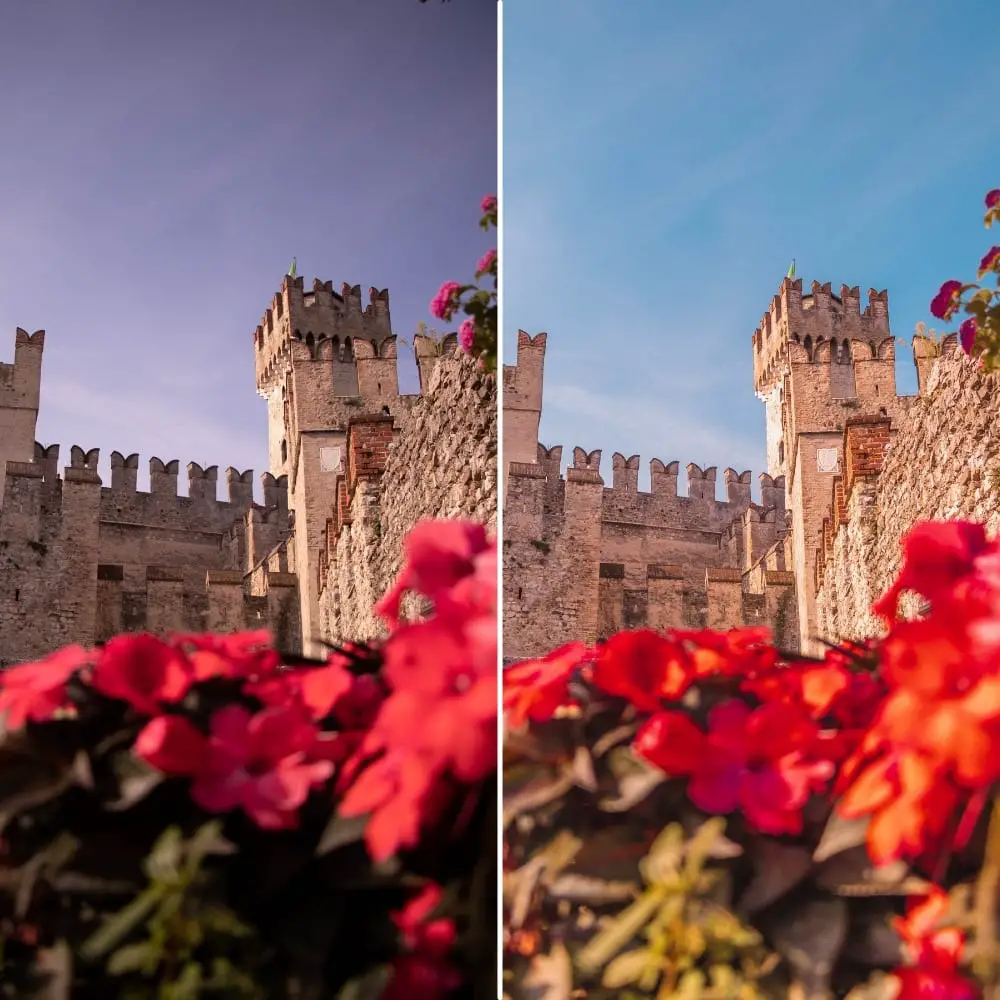
Lightroom Presets are essentially the settings of the edits you’ve made to one photo saved as an entity that you can then apply to any other photo by simply clicking to apply the preset.
So, once you’ve edited one photo and you like the way it looks, you can save the edits as a preset and then use that preset on other photos to achieve a cohesive style and consistent look.
However, not all presets and photos are made equal. The way a preset looks from one photo to another may be drastically different based on certain conditions that I’ll expand on in the next section.
This is something to keep in mind and why creating multiple different presets is a good idea!
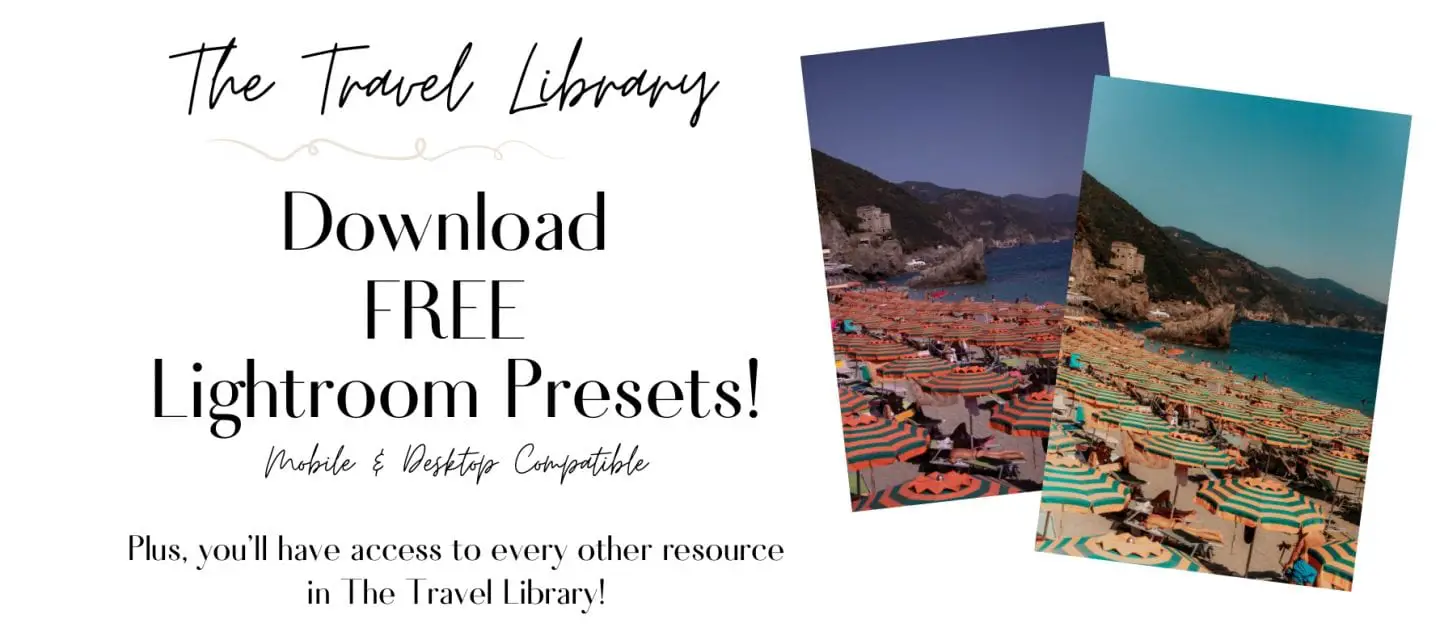
If you want to start playing around with presets as you’re creating your own, check out my free presets available for you to download in The Travel Library!

Why Create Lightroom Presets?
There are several reasons everyone, from professional photographers to people posting on Instagram, might want to create their own Lightroom Presets. Here’s an overview of why Lightroom Presets are so effective and why you create them:
Save Time Editing Photos
Using presets is one of the best photo-editing shortcuts for expediting the process. Truthfully, I take thousands of photos at a time, so using presets drastically cuts down the time I would be spending editing each individual photo!
Of course, there are touch-ups only devoted attention can make. However, by applying my pre-programmed settings as presets, I already have a head start on photo editing.
Establish a Consistent Look Across Photos – Most of the Time
One of the major reasons Instagrammers and photographers use Lightroom presets is because they help create a consistent look across photos. This translates to a cohesive-looking portfolio or Instagram feed.
However, as I mentioned, not every preset works for every photo.
For example, different lighting conditions, camera settings, and colors present in the photo can all affect how a preset looks when applied. Presets are not a one-size-fit-all tool – they are a tool to develop consistency, style, and to quicken the editing process.
Then how do you make a preset work on a photo when it’s not looking great after just one click?
You will have to make individual adjustments to the photo once you’ve applied the preset. Again, there’s no one-setting-fits-all trick for photos. So, you will have to play around with sliders to adjust the light and colors that will work for the individual photo.
To start with, you can avoid adjusting settings like the tone curve so that the overall highlights/shadows/blacks/whites adjustments are retained, but edit the HSL palette to color correct where the photo is not looking as great.
Start Cultivating Your Own Editing Style
Creating Lightroom presets aids you in finding your own style as a photographer. More often than not, you’re going to follow a similar pattern once you figure out what you like your photos to look like.
So, you’ll probably end up with presets that are similar to each other, with only slight adjustments made between each one to apply to those off-photos that we just talked about.
Selling Presets as a Side Hustle
In recent years, aided by the rise of Instagram photography and influencers, selling Lightroom Presets has become a lucrative side hustle.
If someone likes the way you edit your photos, you can sell your presets either individually or as a bundle for a user to download and install on their Adobe Lightroom desktop or mobile app.
You can either sell on your own website, or through third-party platforms like Etsy or Shopify!
How to Create Lightroom Presets on Desktop
Pro Tip: Shoot in RAW image format to have full editing control of the image in post-production.
To create Lightroom Presets, you’ll start in the Develop module of Lightroom.

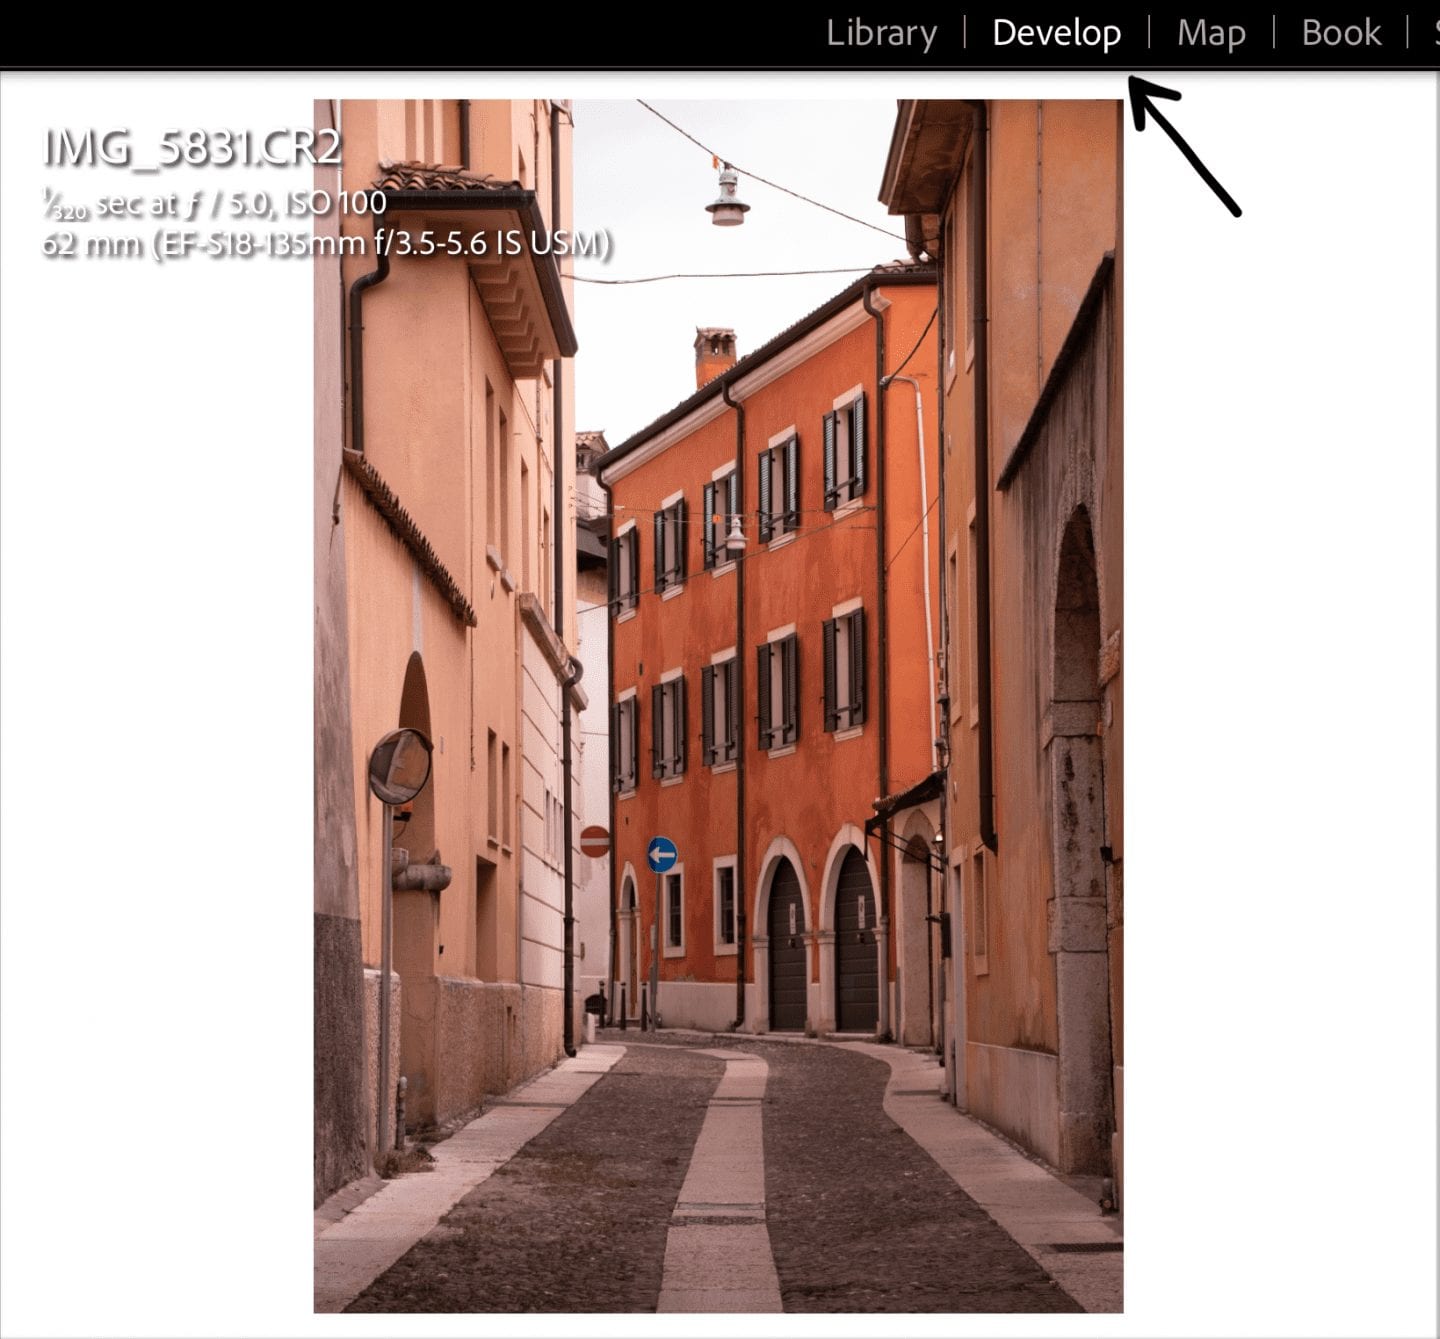
Here is where you will make the adjustments to your photo – anything from the tone curve to transform tool.
You will see on the lefthand side the panel where both pre-programmed presets by Lightroom are located and also your User Presets, or the presets you’ve created.
Once you’ve edited your photo to the way you want it follow these steps to create your own Lightroom preset:
- Scroll up to the Develop Tab on your Desktop/Laptop computer, not the Develop tab that you’re editing on in Lightroom.

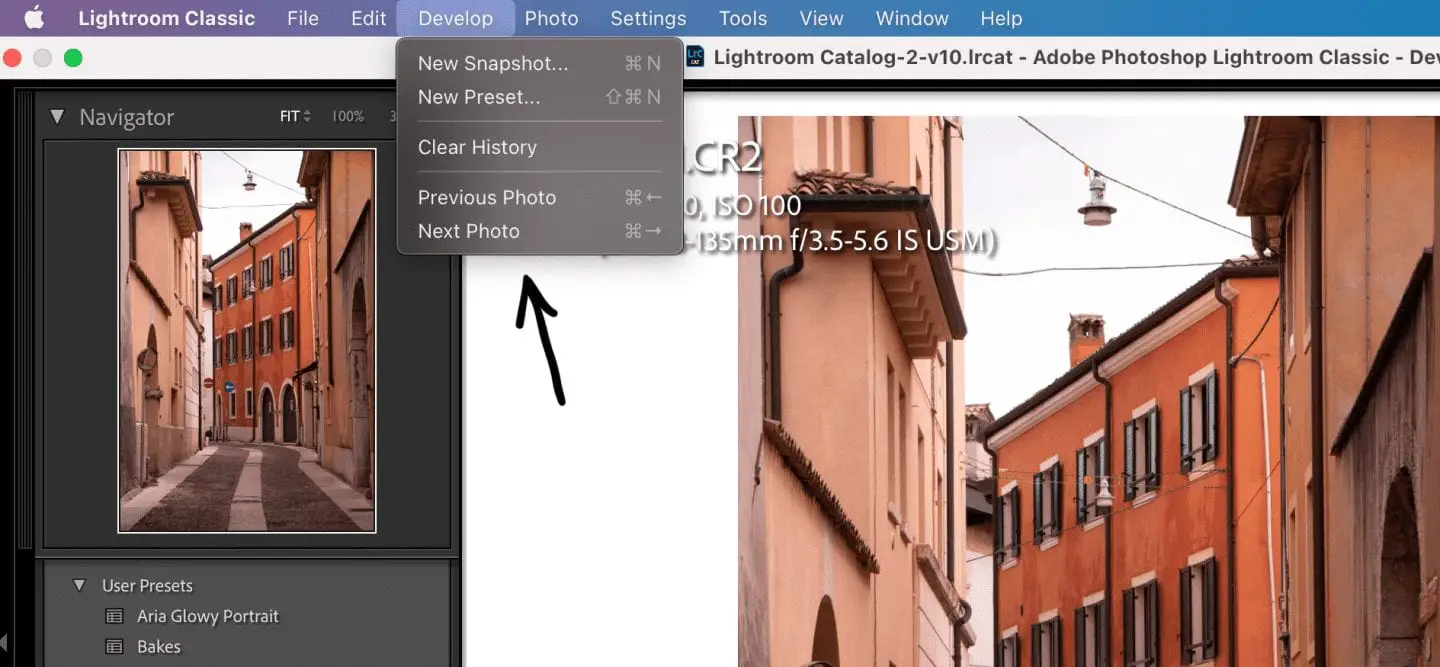
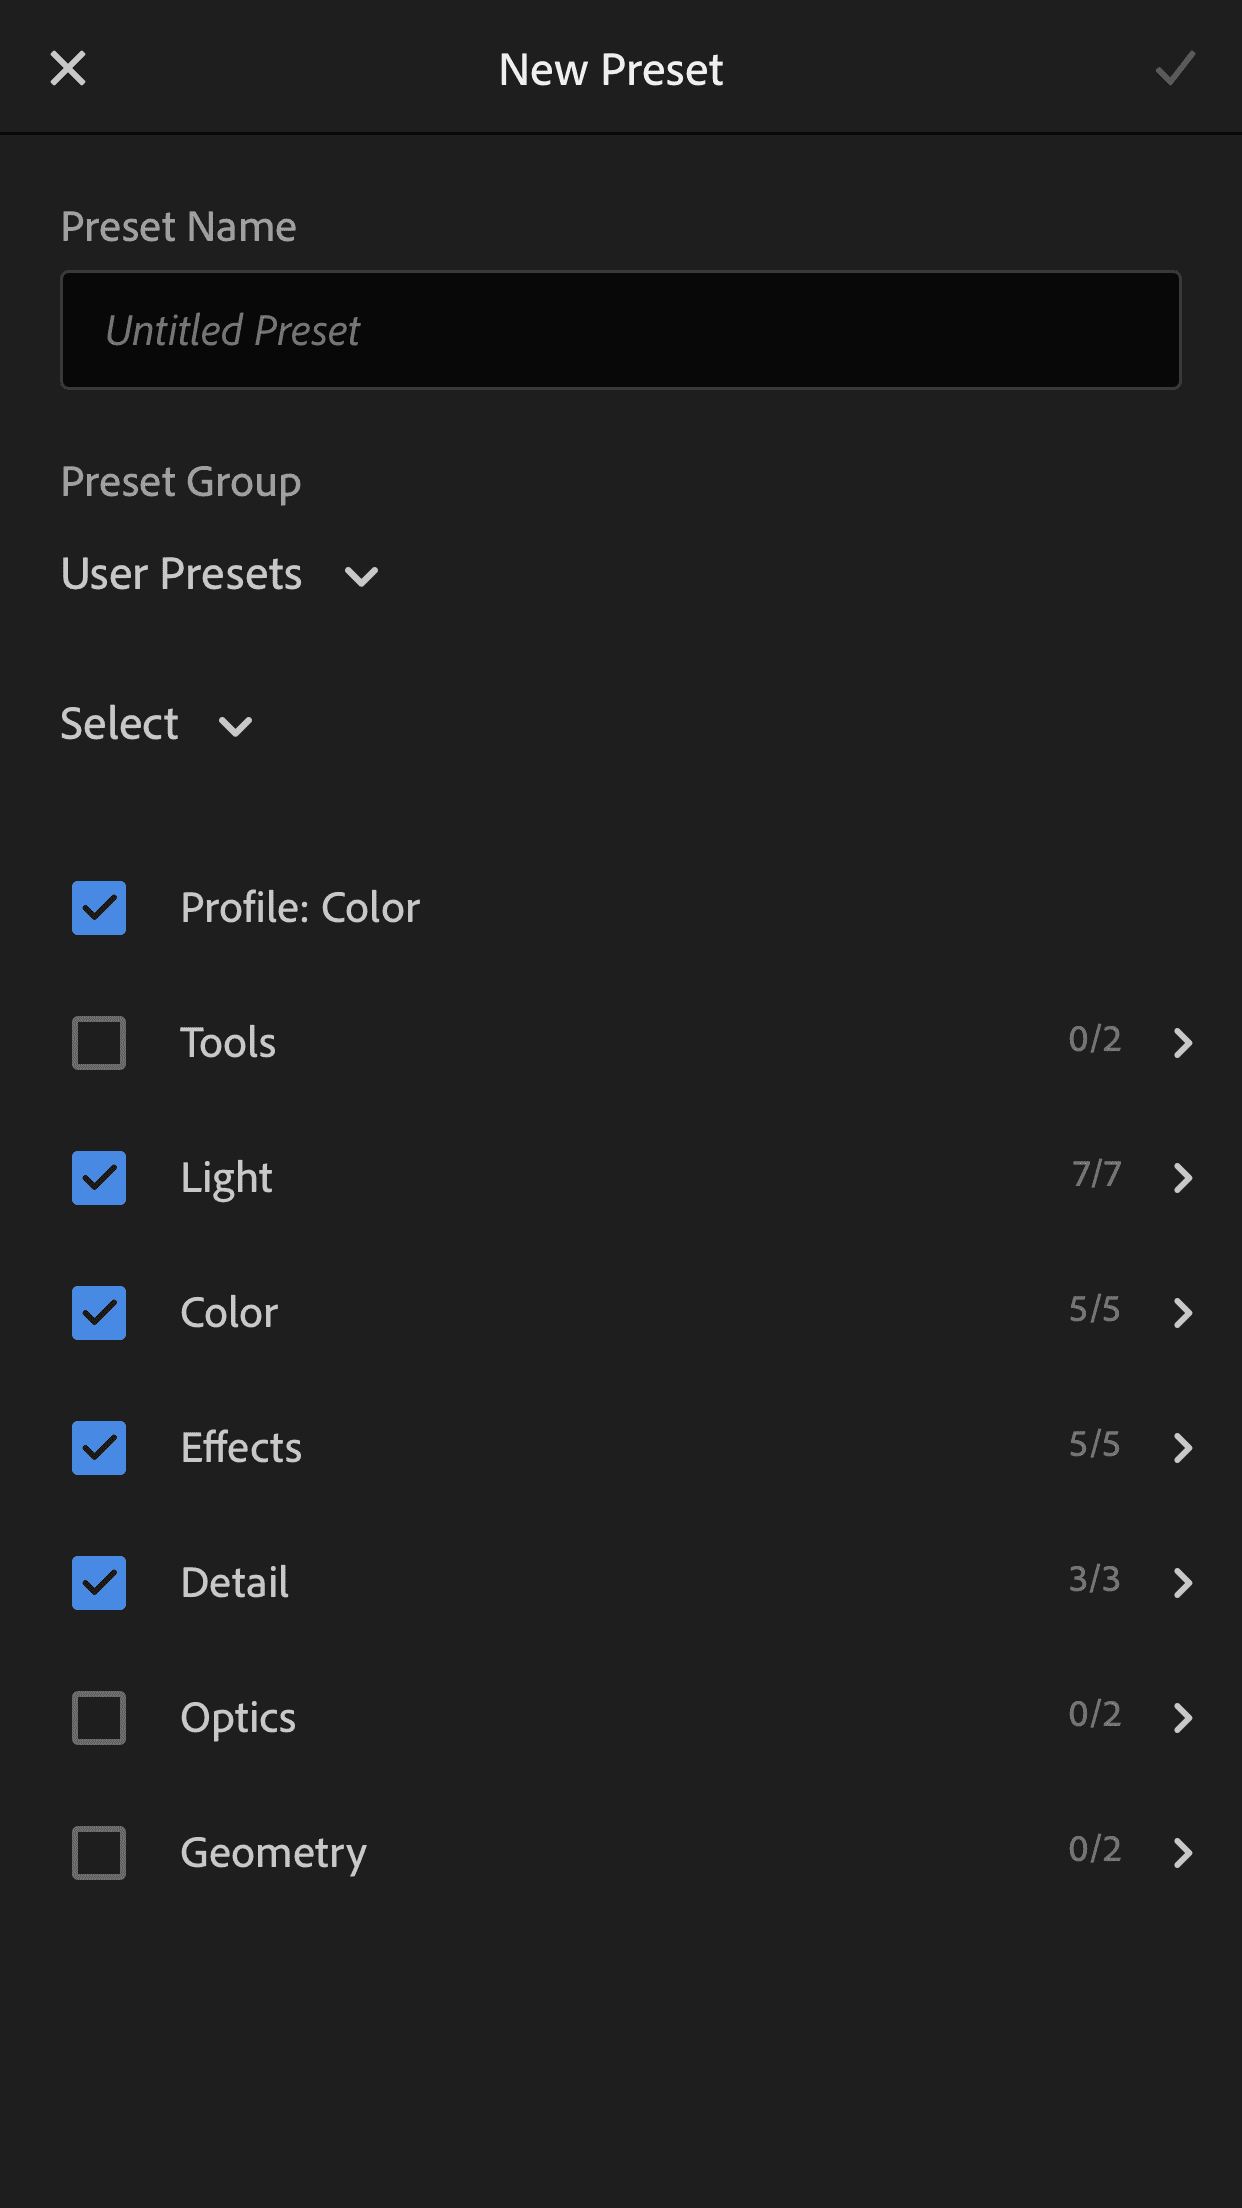
2. Click the Develop tab and select “New Preset…”


3. A panel will then pop up where you can input the following information:
Name your Lightroom Preset something creative or based on what it does to the photo i.e. Blue Preset or Warm Tones. The latter option could make it easier to navigate your presets when you have a lot of them.
Choose what folder to put your preset in or you can simply keep it in User Presets. Again, when you have a lot of presets, you may want to keep organized by adding folders.
Select what settings should be a part of your preset, meaning if you want to leave some settings out, this is where you have the chance to do so.
There may be specific edits you needed to make to the individual photo you were working on that you don’t want added into your preset to be applied to other photos. Common examples of this are noise reduction, the transform tool, and filters.
Those are just examples, but you can play around with selecting/deselecting different tools to see the effects on your photo.
4. Click Create.
You just created a Lightroom Preset! The presets will be under User Presets in the left panel, or in the folder you selected in the previous step.
Now with one click, you can apply presets on any photo in your Lightroom Library!
You can delete presets by simply right-clicking on the preset name and clicking Delete from the pop-up menu.
How to Create Lightroom Presets on Mobile
Many people will prefer photo editing on their phone over a laptop since you can do it on the go. Plus, the basic version of Lightroom Mobile is free.
Personally, I am biased to the Lightroom Desktop version. I love being able to see every detail of the photo and having a holistic view of the settings and tools in front of me!
Nonetheless, I am a sucker for the convenience of popping my SD Card adapter into my iPhone, uploading photos straight into Lightroom Mobile after a shoot, and editing away.
Now, I’ll go over the simple steps on how to create Lightroom Presets on Mobile!
- Download the Lightroom Mobile App. (It’s free!)
2. Open up your photo and make your edits!
3. Head up to the righthand corner and click on the circle with three dots.

4. Choose Create Preset.

5. Similarly to the Lightroom Desktop version, a panel will pop up where you can choose what settings to include or not include in your preset.
This is also where you will name your preset and assign it to a new folder or the default User Presets folder.
6. Click the checkmark in the top right corner and voila! You created your own preset in Lightroom Mobile!
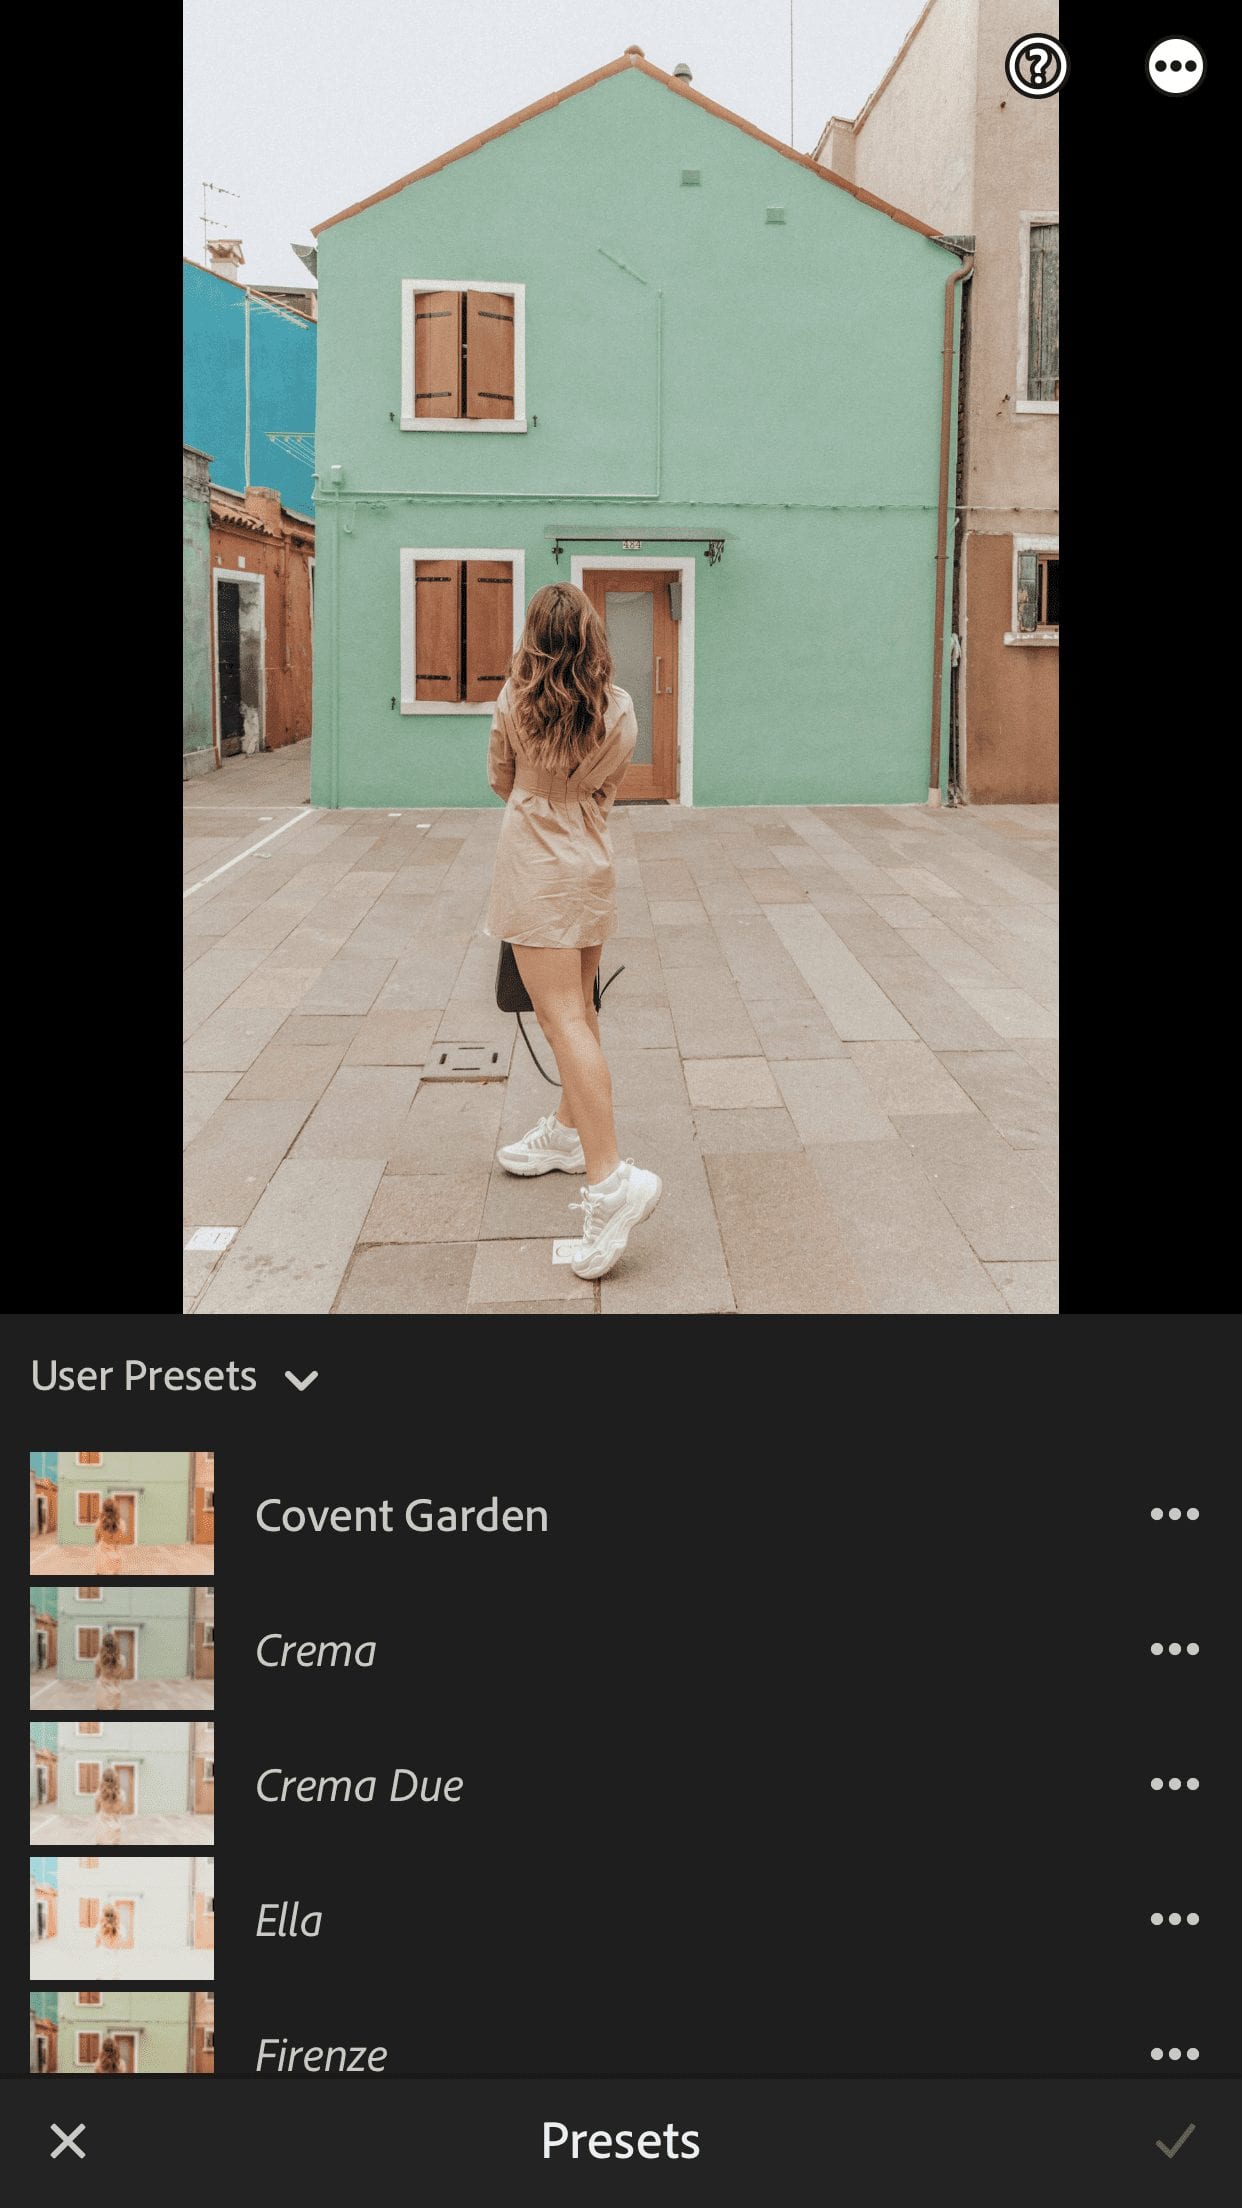
Your Lightroom Mobile presets are accessible from the bottom editing panel. Scroll over all the way to the right and you will see Presets.
*UPDATE NOV 2021: The Presets tab is no available on the left-hand side of the editing panel, next to the “Crop” tool.
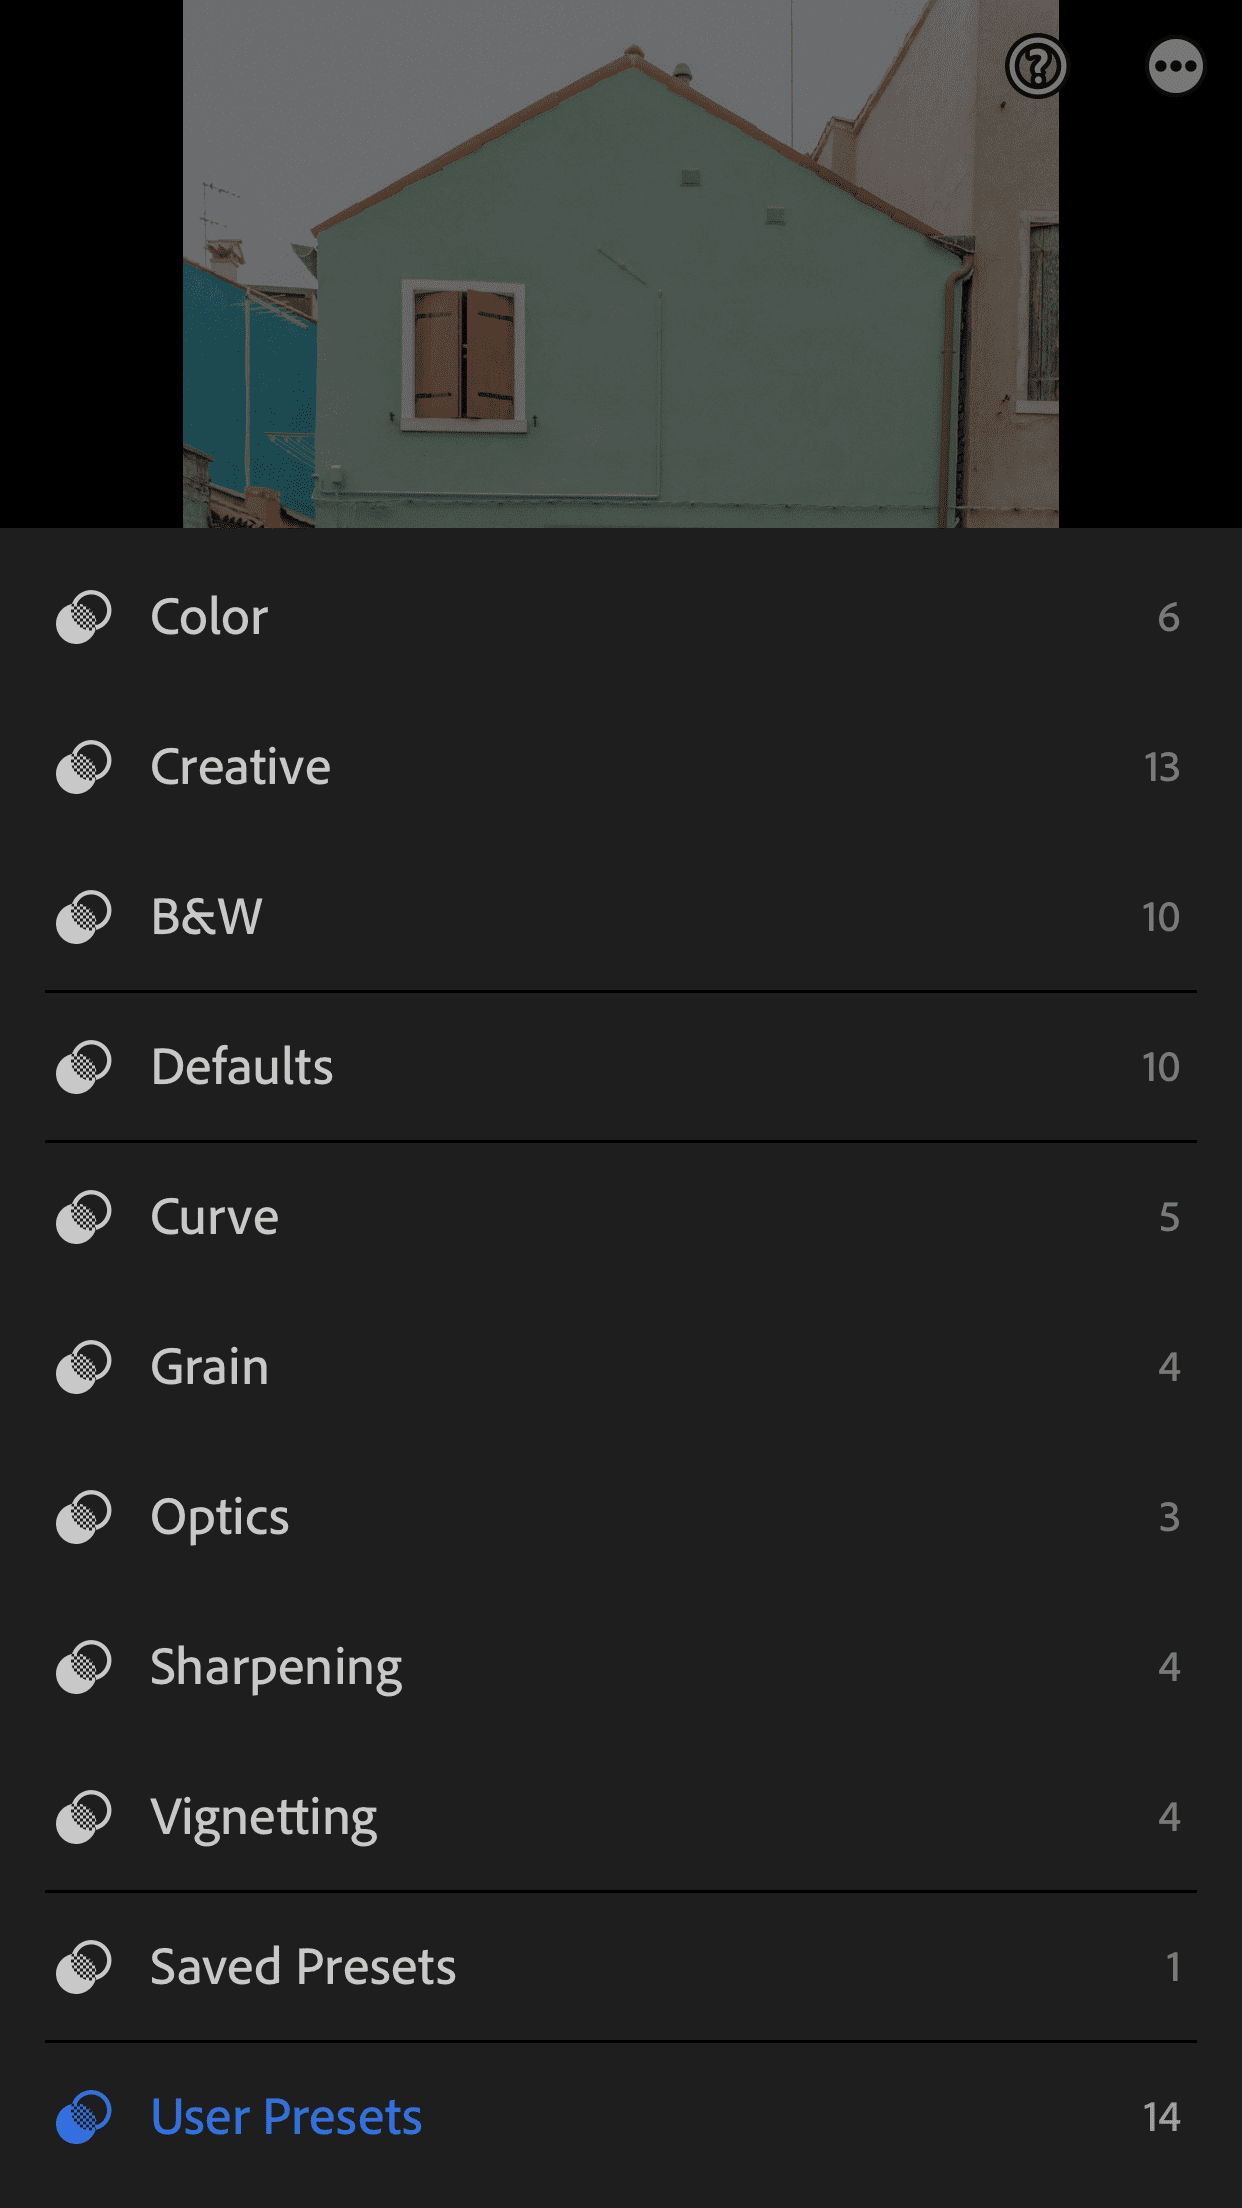
Again, there are pre-programmed presets from the Lightroom application and then a folder for User Presets.
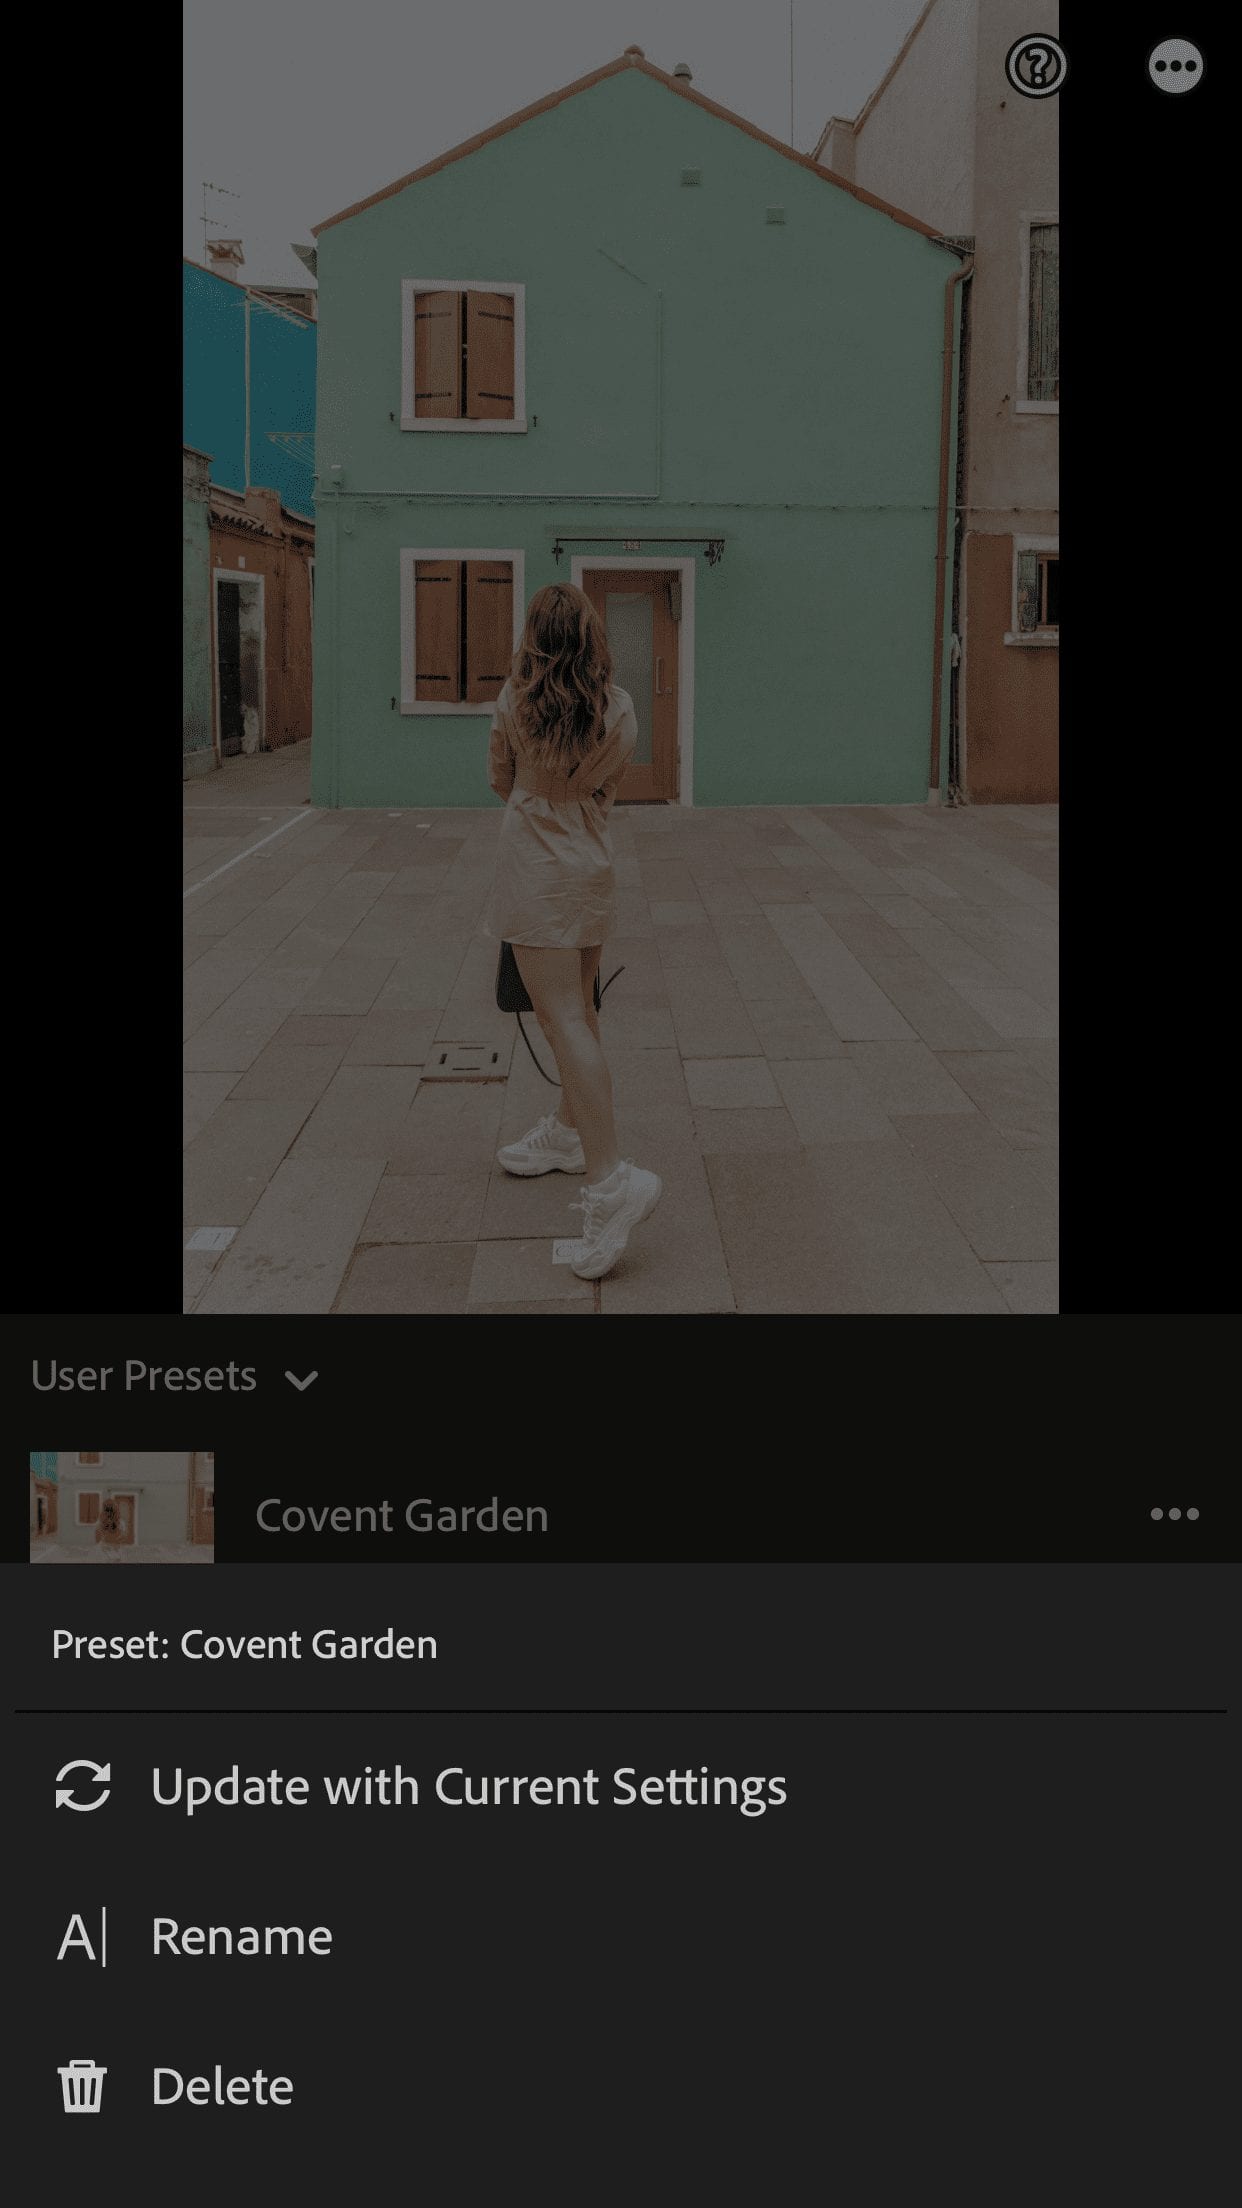
You can edit or delete a preset by clicking the three dots to the right of your preset name. A menu pops up where you can choose to either update the preset settings, rename it, or delete it.
Final Thoughts
The ability to create your own Lightroom Presets is a necessary skill to be a well-rounded photographer today.
If you just want to spruce up your photos, presets are useful tools to edit consistently and quickly.
I will have more Lightroom guides, specifically for presets, posted soon and will add them here when they are published. For now, check out some of my other Lightroom guides to step up your editing game:
- How to Make Eyes Pop in Lightroom
- Lightroom Tricks for Editing Travel Photography
- How to Fix Overexposed Photos in Lightroom
I have my own presets available to shop, as well as some available as free Lightroom Presets to download that I mentioned at the beginning of this post! They can help you understand right away what a preset is and how to work with them!
They are part of The Travel Library and instantly available to you upon signing up, in addition to other free travel and photography downloads.
Let me know in the comments your journey to creating your own Lightroom Presets!
Save this guide on Pinterest for easy reference!
Hopefully this guide was helpful & you’re opening up Lightroom now to start making presets! I can’t wait to share more photo editing tips & guides with you!
XOXO
Michela