


Whether it’s a professional shot or a selfie, the focal point in any portrait is always the eyes. Photography tells a story and the eyes just happen to be the window to the soul! This is why adding some extra oomph to your eyes not only aids in creating a crisp and stunning portrait, but also adds to the storytelling effect and improves your photography style. Of course, even if you’re just editing for Instagram and not professionally, we could all use some tricks to look better in and create better photos. I’m sharing essentials tips and methods on how to make your eyes pop in Lightroom using my editing process.
The eyes are one of the key features of a beautiful portrait photo. If the focus isn’t right or the sharpness of the photo is compromised, you can often lose the definition of the eyes.
Luckily, the post-production process of photo editing is where you can really bring out the eyes with a few easy-to-learn tools.
I swear by Adobe Lightroom for editing (read all about why you need Lightroom), so I’ll be using Lightroom terms and tools to showcase all the different ways to make your eyes pop in photos. You should be able to use most of these tricks in other photo editing apps or in Photoshop if you prefer.
Improve your photos even more by using presets! You can download several of my presets I have in my shop for FREE in The Travel Library!


Some of the links in this post are affiliate links. This means if you make a purchase through that link, I receive a small commission at no extra cost to you! See my full affiliate disclosure.
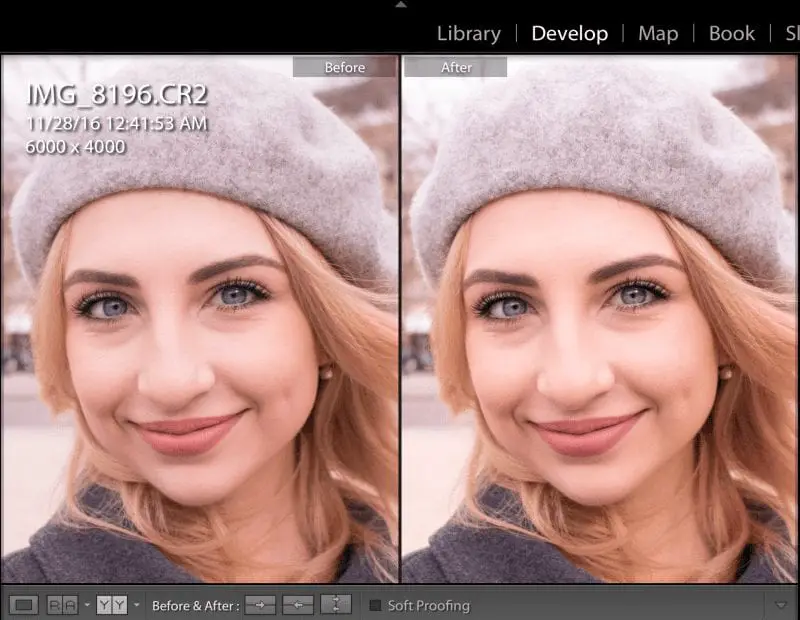
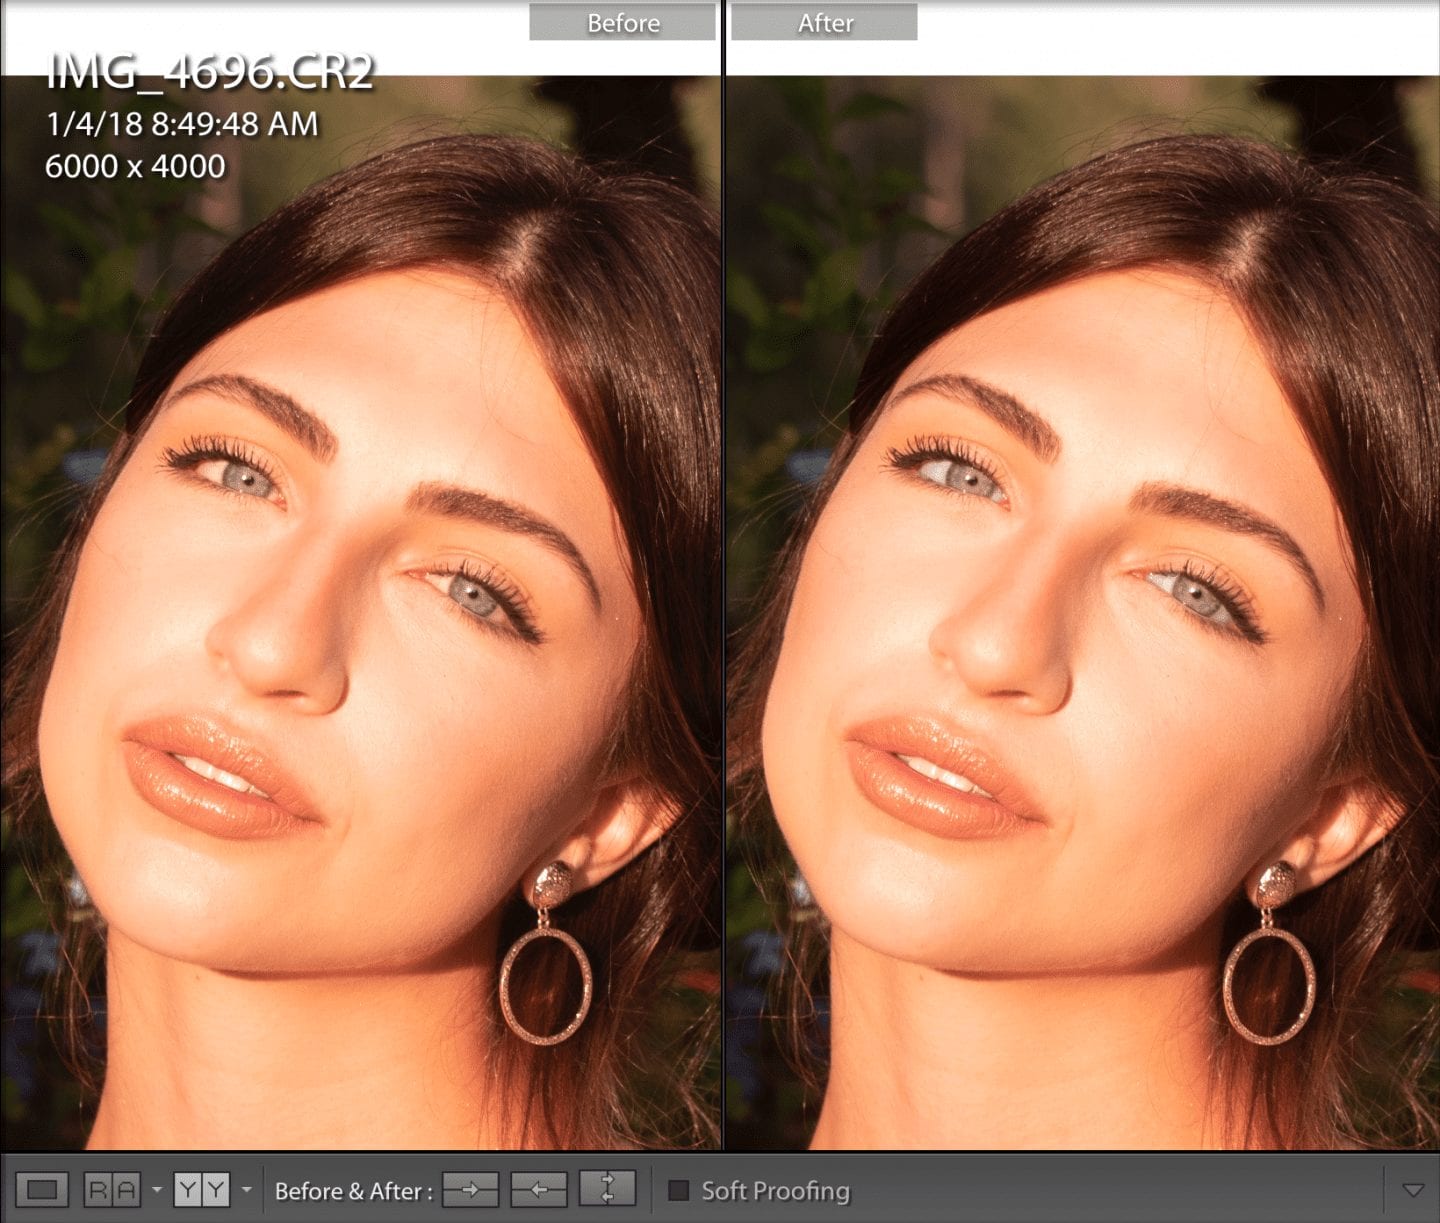
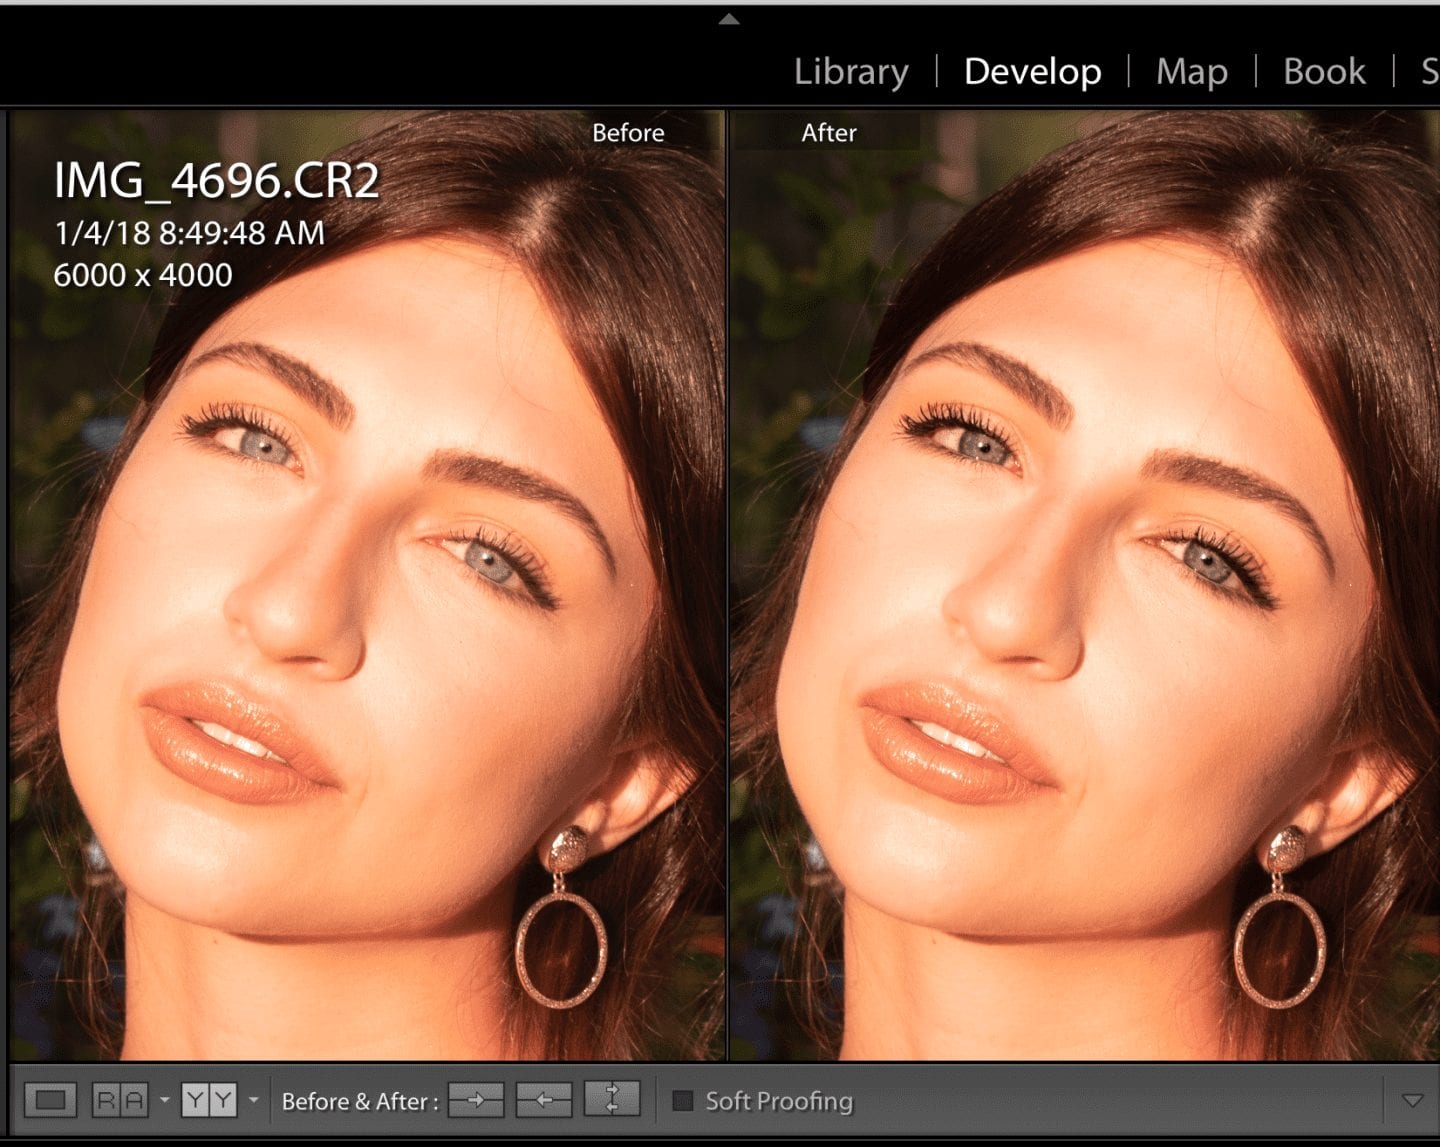
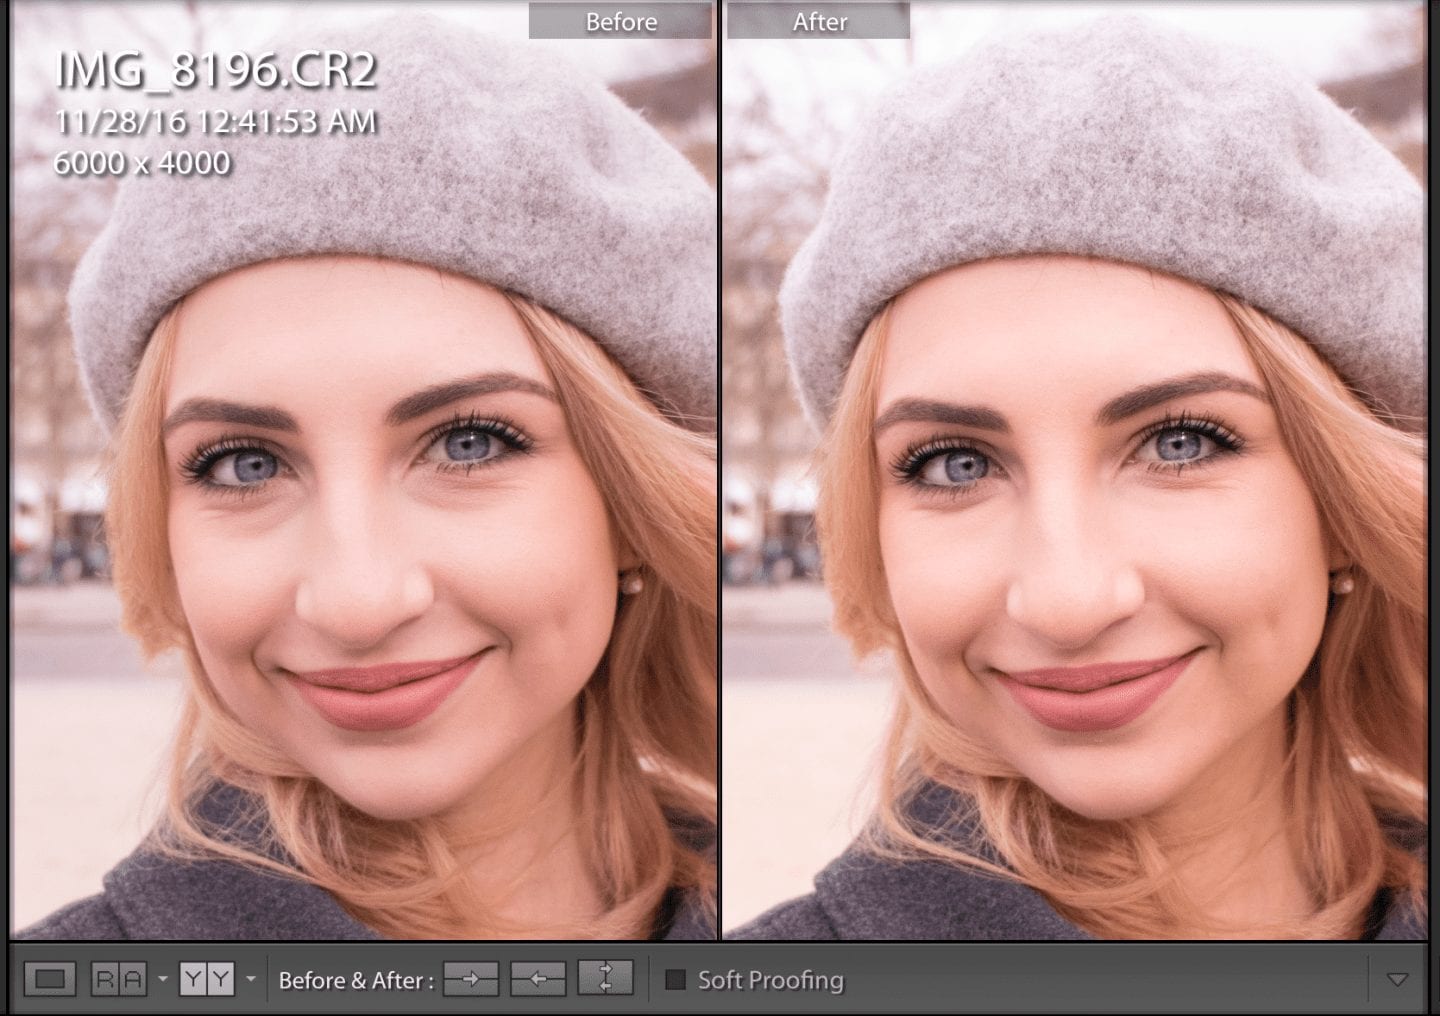
First, for the purpose of this post/tutorials, I’ve only used two different photos so it’s easier to see the techniques. Plus, I have done nothing to the photos besides the editing that I talk about – no skin retouching, etc.
Tools
Before I get into the techniques, I wanted to cover the two main tools used to implement them.
Those are the Radial Filter and the Brush tool.

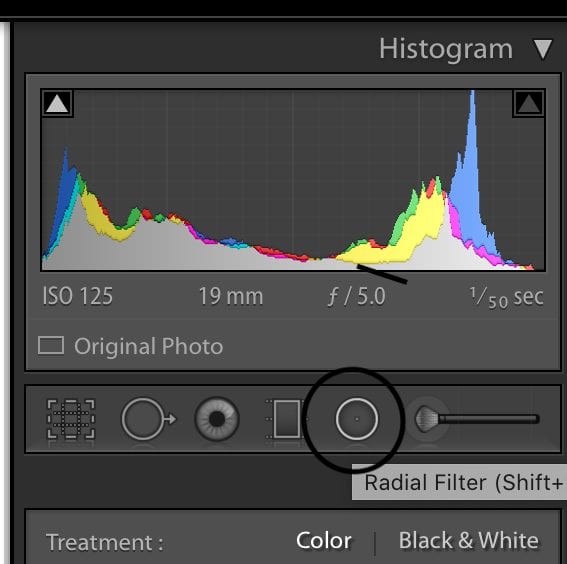
The Radial Filter allows you to draw a circle with your mouse or keypad on the photo. Within the area of the circle, you’re able to manipulate the photo using the sliders on the right-side panel.
This tool is great for controlling your edits, ensuring nothing is sloppy. Place your filter over the eye shape or just the iris to control where adjustments are made.

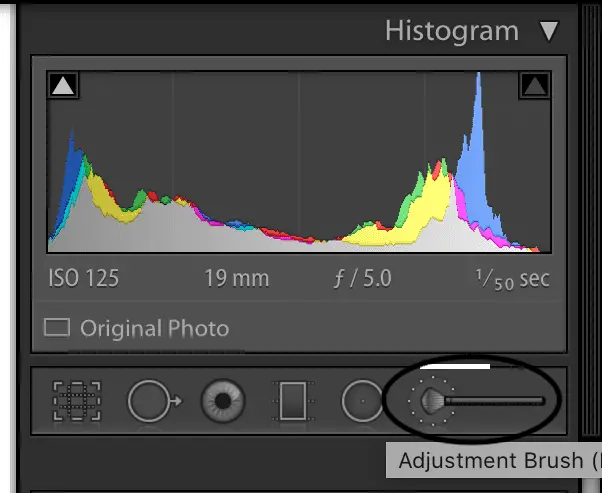
The Brush tool can allow you either more or less control than the Radial Filter. In theory, it gives you more control to brush over individual areas of the photo.
For example, if you wanted to only edit the whites of the eyes, you could brush over only that area. The Radial Filter would be hard to manipulate to just the whites of the eyes because of the shape and size.
However, be attentive to what you’re actually editing with the Brush tool.
A lot of times it can be tempting to just edit quickly with the Brush tool. Then, you end up making sloppy edits by not considering the Size and Feathering of your brush.

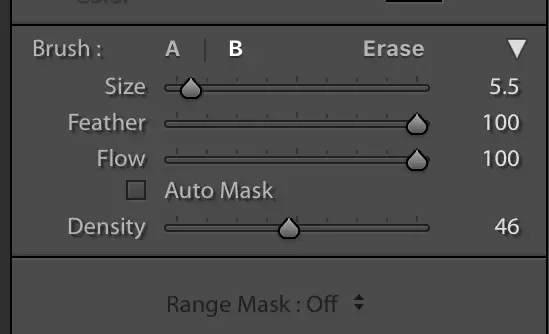
Essentially, your edits on the eye could spill onto the skin, eyelid, or other areas if you’re not careful!

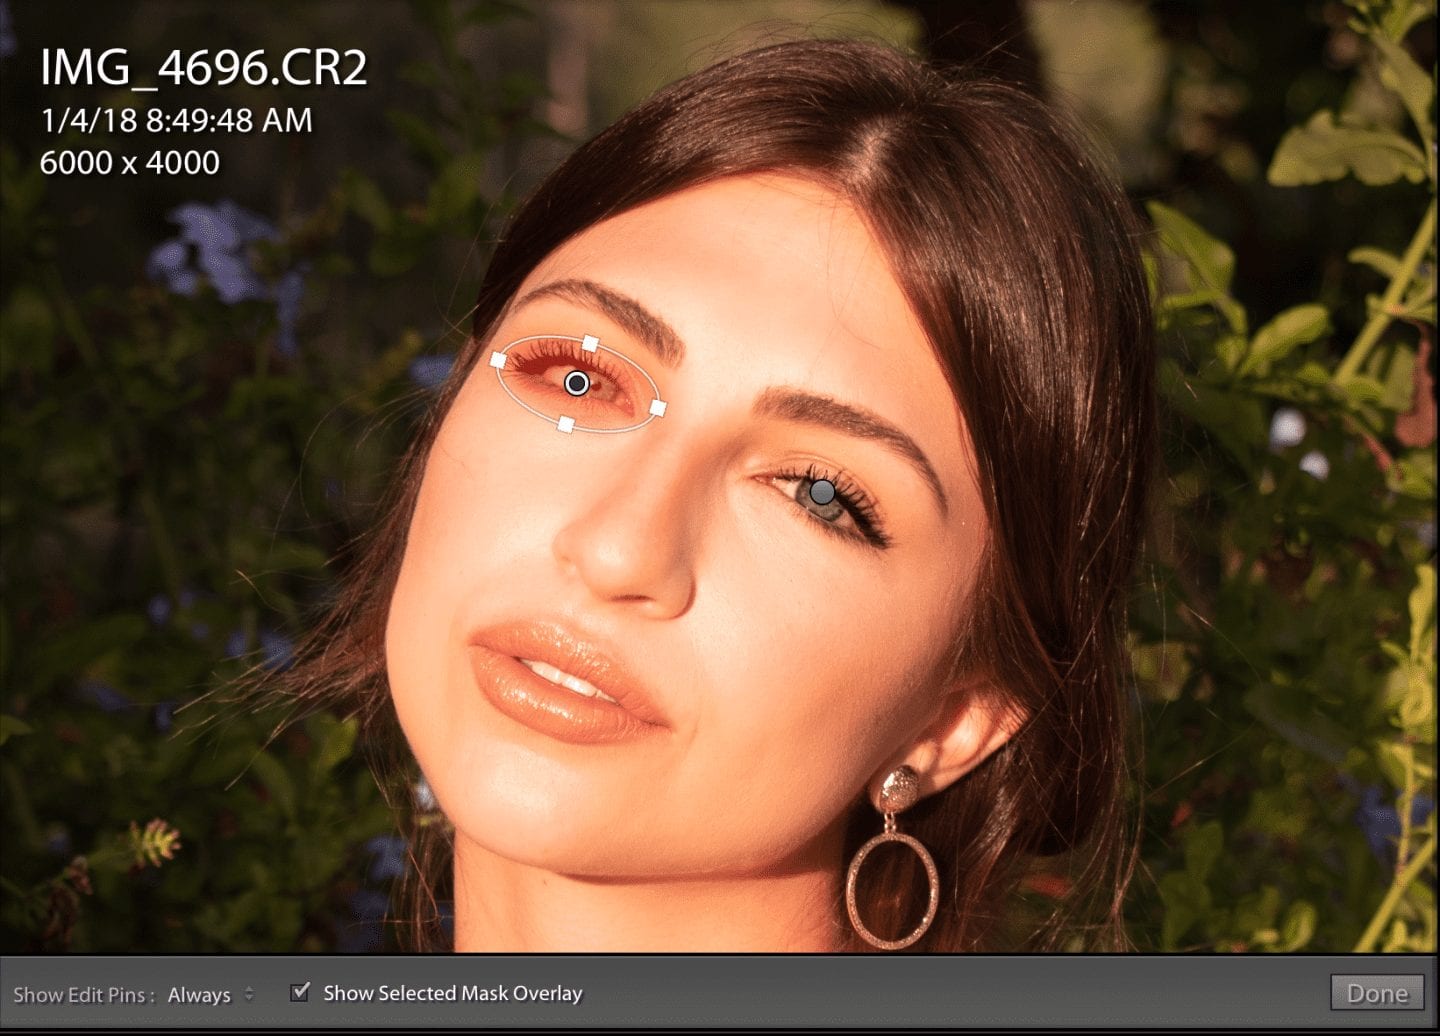
Pro Tip: Check off the “Show Selected Mask Overlay” option at the bottom of your photo on the Develop page. Now you can see exactly the area your Brush tool or Radial Filter will be affecting.
Iris Enhance Tool

Lightroom already has a setting that is designed to make your eyes pop in photos using either the radial filter or brush tool.
You can find Iris Enhance on the drop-down menu that appears at the top of the panel once you select the radial filter or brush tool.

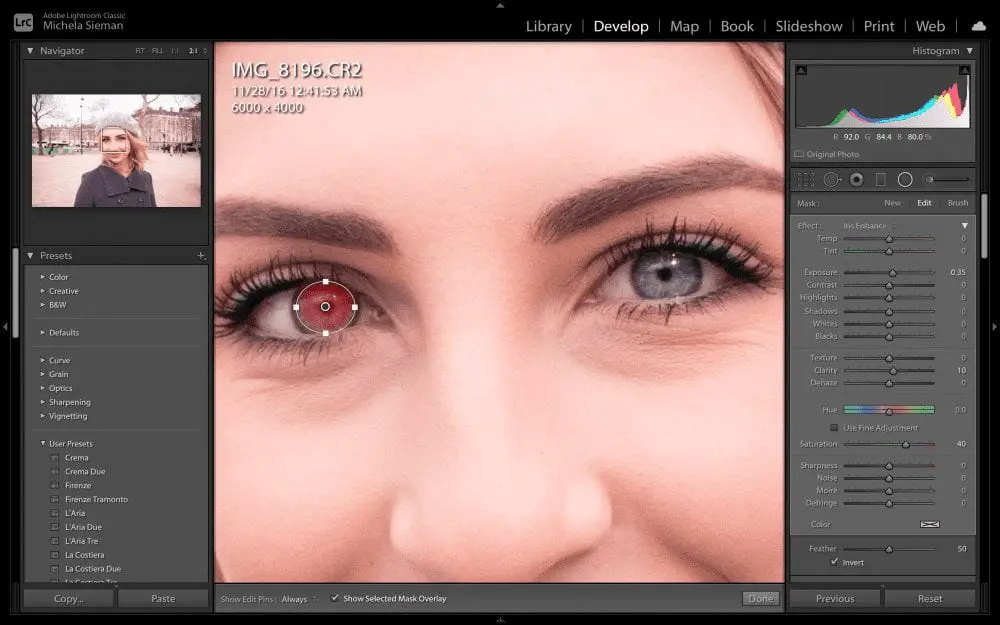
It’s designed for the iris, so I would only place this tool on the pupil and not on the entire eye. You’ll see the settings change on your sliders once you apply the tool. It raises the exposure and saturation to a pre-determined level.
Pros of Iris Enhance
The benefit of using this tool is that the settings have already been curated with mindfulness to editing the eyes. It’s one of the easiest ways to make eyes pop in Lightroom If you over-edit eyes on a photo, it can be very obvious. So this tool prevents you from over-editing!
At the same time, you can also adjust the settings as needed once you apply the Iris Enhance tool.
Another great benefit is that it ensures equality between the eyes. The numbers are exact wherever you apply them using this setting, so you don’t have to worry about imbalances.
Often when I’m editing quickly, I forget to pay attention to the exact measure of how much I’ve raised or lowered a slider. This can be really significant when editing the eyes! Even the slightest bit off of the same number can make one eye pop more than the other, and that is not the look we are going for!
Cons of Iris Enhance
If you were wanting to make your eyes pop in photos and they are under different lighting circumstances (aka shadows on the face, etc.), you may need different settings on each eye to make it look equal. That makes the Iris Enhance tool not your best option if you want to customize the edit as much as possible.
It’s also a tool that is made by Lightroom. So if you’re not editing with Lightroom, then this isn’t the option for you! Check out the other tactics below that apply more generally to photo editing apps.
Desaturation
One of my favorite ways to make eyes pop in photos is by bringing out the whites of the eyes.
People often have redness there that takes away from their iris standing out. Moreover, depending on the position of the person, lighting may be hitting the eyes differently.
Adding balance to the light and color on the eyes in this case is one goal when editing portrait photos!
Instead of going crazy with the Exposure on the eyes, which will probably look unnatural and is more difficult to match when editing two separate areas like the eyes, the secret is Saturation.
You can actually make the eyes brighter without touching the Exposure at all. You do that by lowering the saturation on the whites of the eyes.

I use the Brush tool for super-specific placement of the area I want to edit. This is because the whites of the eyes are not usually a uniform shape like a circle and they can be a small area to edit depending on the photo.
From there I select Saturation from the drop-down menu options and bring the slider almost all the way down.
This eliminates that redness without adding any brightness, which makes the eyes pop but also look natural!
Sharpen
The sharpen tool is amazing for defining the eyes. Sharpen should be available on most photo-editing apps so this is a great trick for anyone.
I like to brush over my top lash line and bring the sharpness all the way up. In the photo below, you can see the red mask on my lash line showing where I dragged the brush tool.

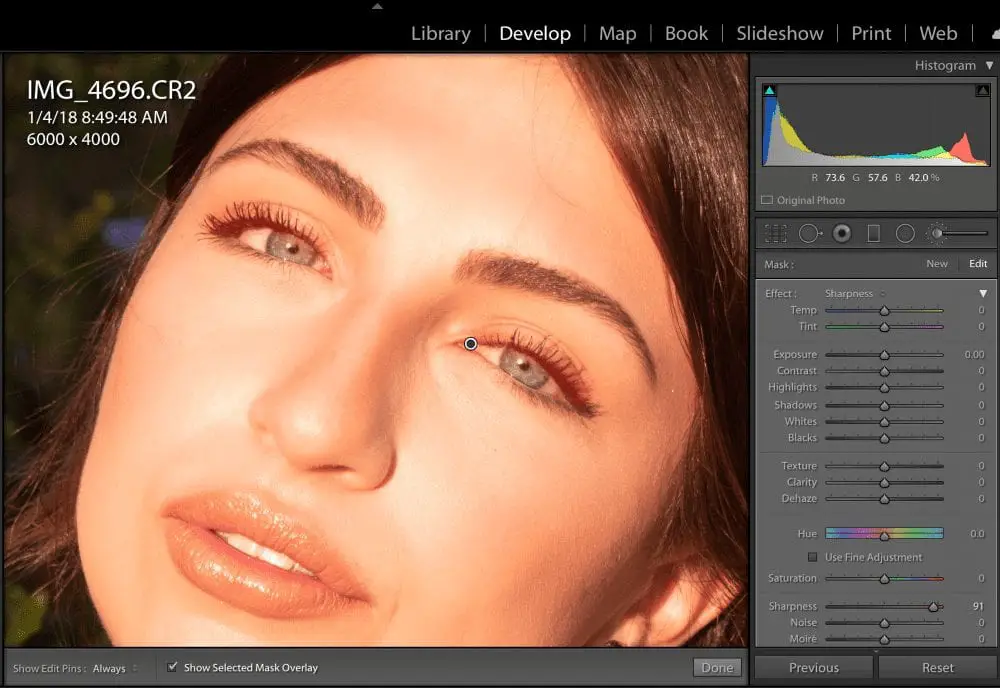
The sharpening tool adds definition, without altering any of the colors of the photo.
I love that it’s a subtle definition. If I’m trying to stay as natural as possible, it makes the eyes pop without going anywhere near an over-edited look.


By using the sharpen tool on just one area of the photo, it doesn’t give you an overly sharpened look on the overall picture. Sharpening the whole photo makes it look obviously edited and doesn’t enhance the actual quality of the picture.
Clarity
I head to the Clarity tool when I really want to make my eyes POP in photos!

Clarity gives an intense definition to your photos. I often raise it on my travel photos as a whole, to bring out the subject in a photo, & tons of other uses as it’s one of my top Lightroom editing tricks.
While Clarity has all these amazing uses for editing, in my opinion, it’s no surprise it’s also amazing to use when learning how to make eyes pop in Lightroom!
Again using the radial filter or brush tool, I raise the Clarity slider to really as high as I feel like. I personally think because Clarity is so good for bringing elements of a photo forward, it’s not bad to take the slider all the way up!
Of course, this is when your personal editing style comes in and you can decide how much of the Clarity setting you need to manipulate.
Fixing the Under Eye Area
One way to make eyes pop in photos is to focus on the area around the eye. We all have our fine lines, our dark circles, or whatever it may be! You can even see mine in all of these sample photos since I haven’t edited them.
The thing is it’s normal and beautiful to have in a photo. I think it humanizes a person more. I’d rather have lines around my eyes from smiling so big than not be smiling at all!
In the same breath, it’s also completely okay if you want to touch it up! It not only gives your face a lifted look – it enhances the focus to be just on your eyes, right where we want it.

In Lightroom, use the Clone Tool and brush over the under-eye area you want to adjust. The trick to making it look natural is going to depend on your Opacity and Feather settings under the Clone Tool on the right-side panel.
I almost always Feather mine 100% so there are no sharp lines and I bring the Opacity down about halfway to blend what I’ve just cloned.
The best part about it is you can do it without looking fake or over-edited.
This kind of edit adds a little extra oomph to the photo without changing your face. Plus, it immediately highlights the eyes without actually having to adjust the eyes at all.
Combining Tools
My last trick to make eyes pop in photos is to combine the tools I’ve used above. Now – word of caution – it can be easy to overdo it when you start adjusting so many settings!
I usually only stick to doing two or three tools to avoid looking over-edited.
In the photo below, I used a radial filter to bring up the Clarity all over the eye. I also sharpened the upper lash line and desaturated the whites of the eyes.

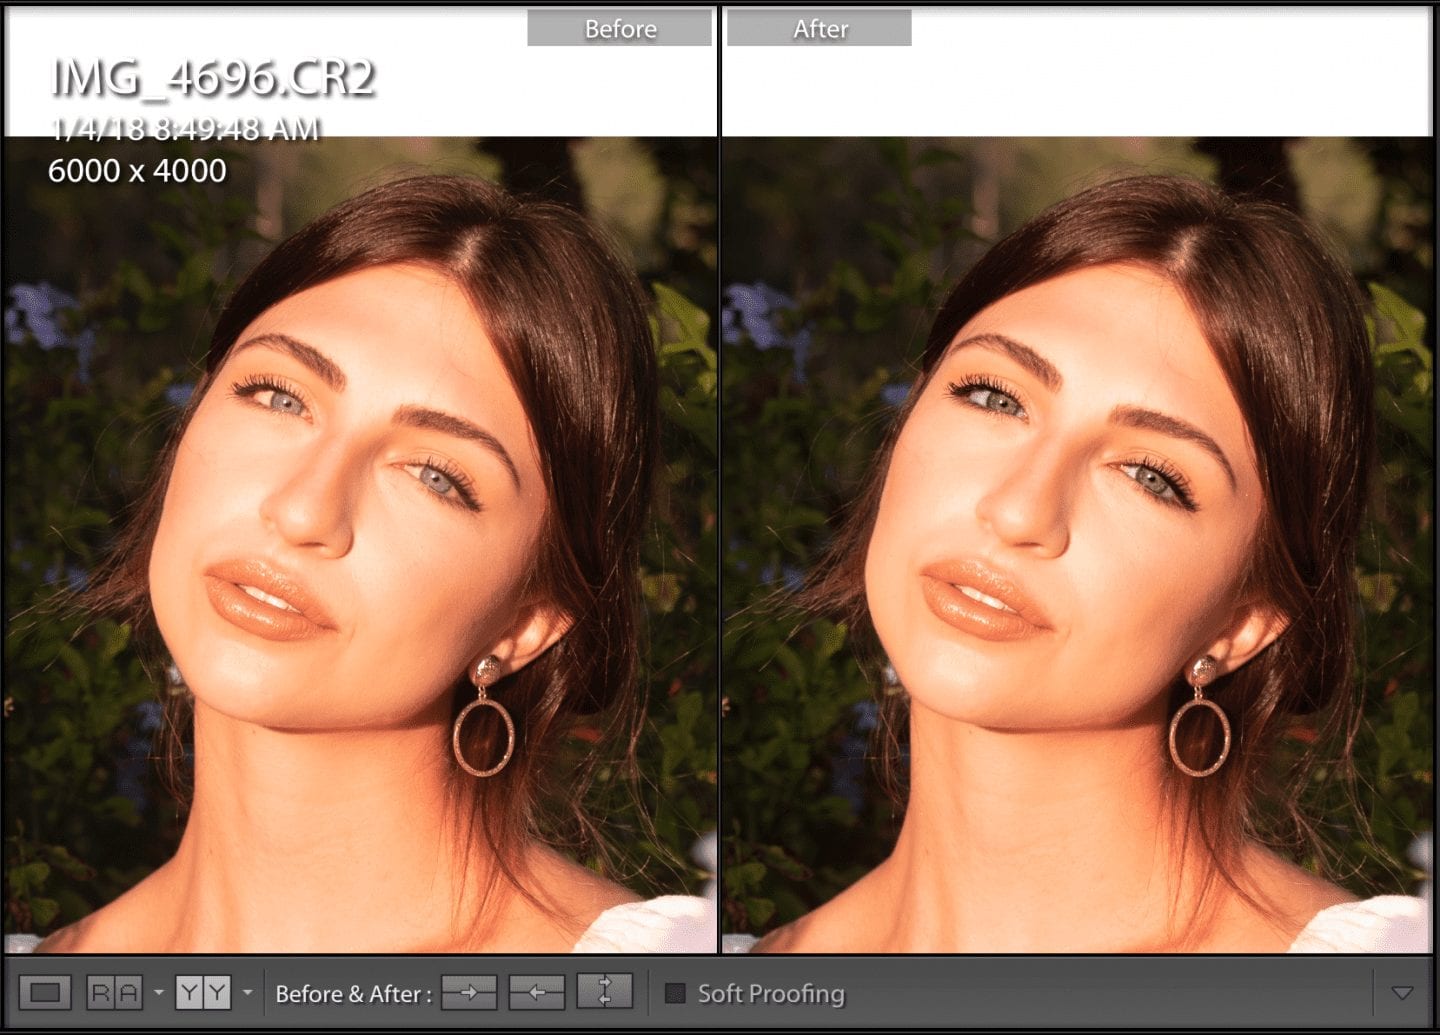
Honestly, it looks a bit much to me. I would skip the Sharpen tool and just do Clarity if my goal was a bold definition. For more subtle definitions the Sharpen tool would work just great!
All in all, eventually you’re going to have the eye for deciding what works well together and what doesn’t! But it never hurts to have a few more tips up your sleeve to improve your editing skills!
Do you have any tips on how to make eyes pop in Lightroom? Leave a comment below and share them!
Don’t forget to pin this post for easy reference to these Lightroom tools!
The important thing about photo editing is you have to just practice. Play around with the tools, click new buttons, and check new boxes to get a feel for what everything does.
Hopefully, you can try out a few new tricks after reading this post the next time you go to edit a photo!
XOXO
Michela