

Heading on new adventures and want to capture every moment on-the-go? Do your vacation photos all look the same and need leveling up? Or are you hesitant to invest just yet in a costly camera? No matter what category you fall into, iPhone travel photography is for you. But how exactly do you do it well? I’ve jam-packed this post with tips and tricks for iPhone travel photography to help you make the most of what you have and capture incredible photos and videos on your adventures.
If you’re here, you’re probably wondering: is an iPhone good for travel photography? Nowadays, the quality of iPhone cameras make them a convenient way to shoot while you travel, without buying an expensive camera or lugging heavy photo equipment around.
Personally, I love using a mix of both iPhone photography and my DSLR camera, along with all my favorite travel photography gear. iPhone camera quality has much improved over the years but a DSLR or mirrorless still provides the highest-quality, smoother, and more detailed photographs – which is exactly why they cost so much.
If you are looking to get into photography and step up from your iPhone one day, take a look at my resources on how to do photography on a budget, choose your first lens, and make money with photography right now.
For everyone seeking how to take the best vacation pictures with your phone right now, follow these tips!
Some of these links are affiliate links. This means if you make a purchase through that link, I receive a small commission at no extra cost to you. Read my full disclosure!
Tips for Taking Travel Photos with an iPhone
Let’s start with a brief introduction to taking photos on your iPhone before I jump into how you can make them even better! Access your camera app and become familiar with the settings you have available to you. Some of the tips I’ll talk about are related only to model iPhone 11 and up but many apply to all iPhones.
You’ll also be able to control important camera settings from the Settings app on your phone. I’ll dive into some of the most useful within the tips so you can make the most of your “equipment!”
Curious about what phone I use to take all my videos and some of my photos on Instagram? It’s the iPhone 13.
I’ll be covering tips that apply to technique and creativity, as well as tangible things you can start doing right now to take better travel photos on iPhone.
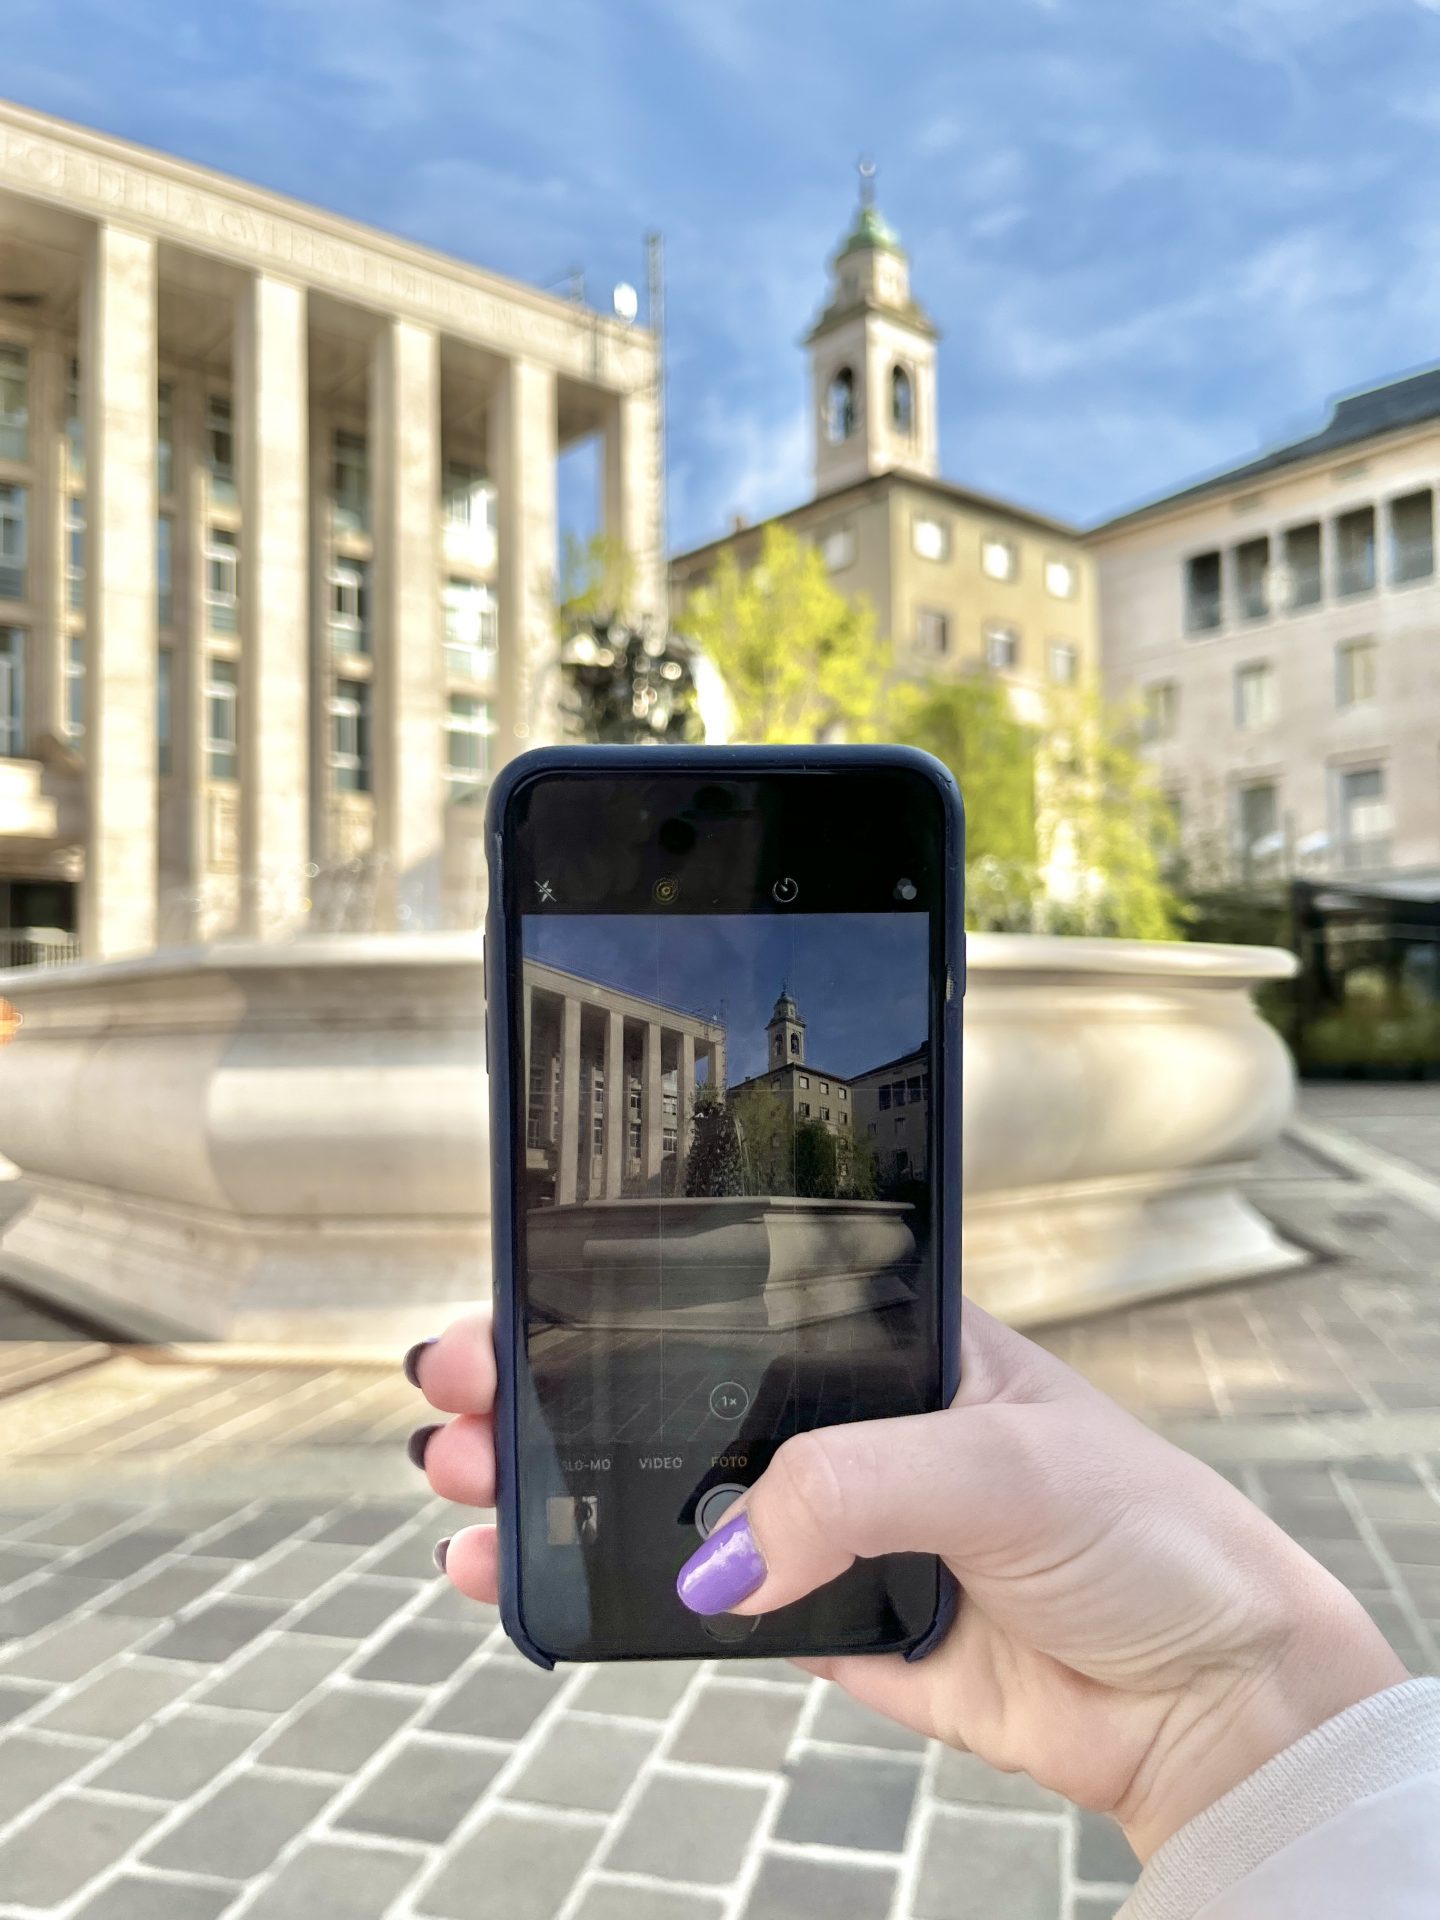
1. Use the Grid Feature for Composition


One of the most important concepts in photography is composition, or how the elements in your photo are arranged. The grid tool on your iPhone camera can help sharpen your composition skills.
For example, a common composition rule is the Rule of 3s, which states when dividing the photo into thirds, horizontal and vertical, the subject is placed along one of the lines or at their intersection. Turning on the grid feature on your iPhone camera will allow you to start practicing these rules easily, showing you exactly where the grid lines are to help frame your photo.
You can turn on the grid by going to Settings > Camera > Grid (under the Composition category) and toggle on the grid.
2. Avoid Shooting in Direct Sunlight
Lighting is another one of the most important elements that affects how your photo turns out. The softer the light, the more even the colors, shadows, and highlights will appear in your photo.
Harsh light creates large differences in color, shadows, and highlights that can be difficult to edit in post-production.
If you are shooting in direct sunlight and facing the sun, your foreground will be shadowed and the look of the photo may be ruined. Instead, face away or to the side of the sun to attempt a picture that is more evenly lit.
It’s also something you’ll have to pay attention to if you are shooting in the shade. For example, in the photo below, I wanted to create leading lines with the river rocks leading up to the church. But as you can see, the sunlight at the top of the photo contrasting with the shade in the foreground of the photo is really distracting.
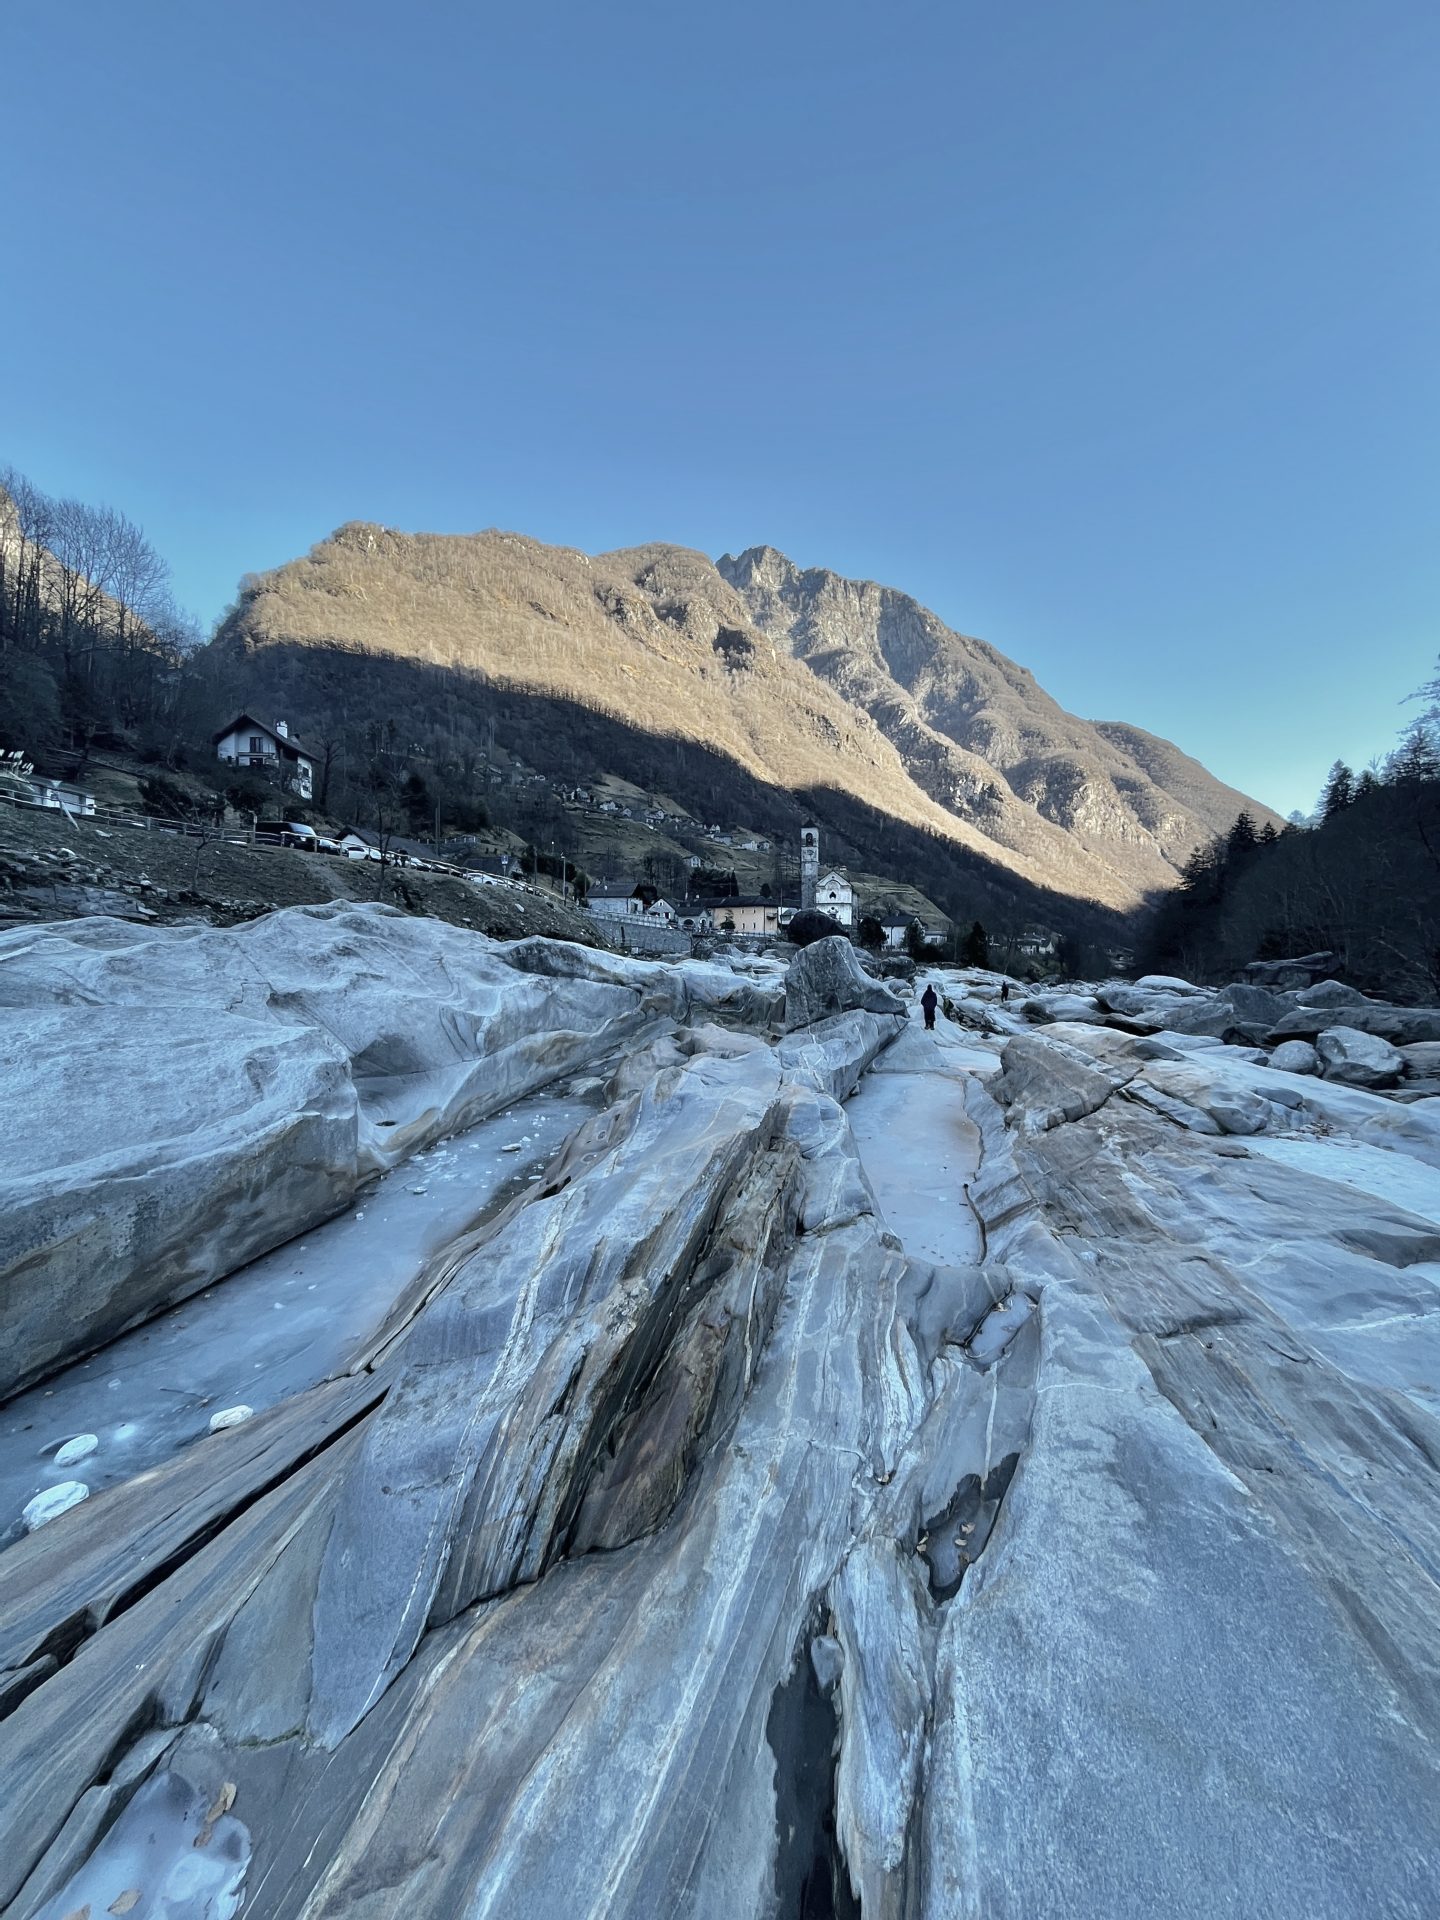
Sometimes you really can’t help the lighting conditions you are in for shooting, so you just have to try your best to find the right angle or think outside the box to capture a more creative take on your location.
3. Always Shoot With Live Photos On

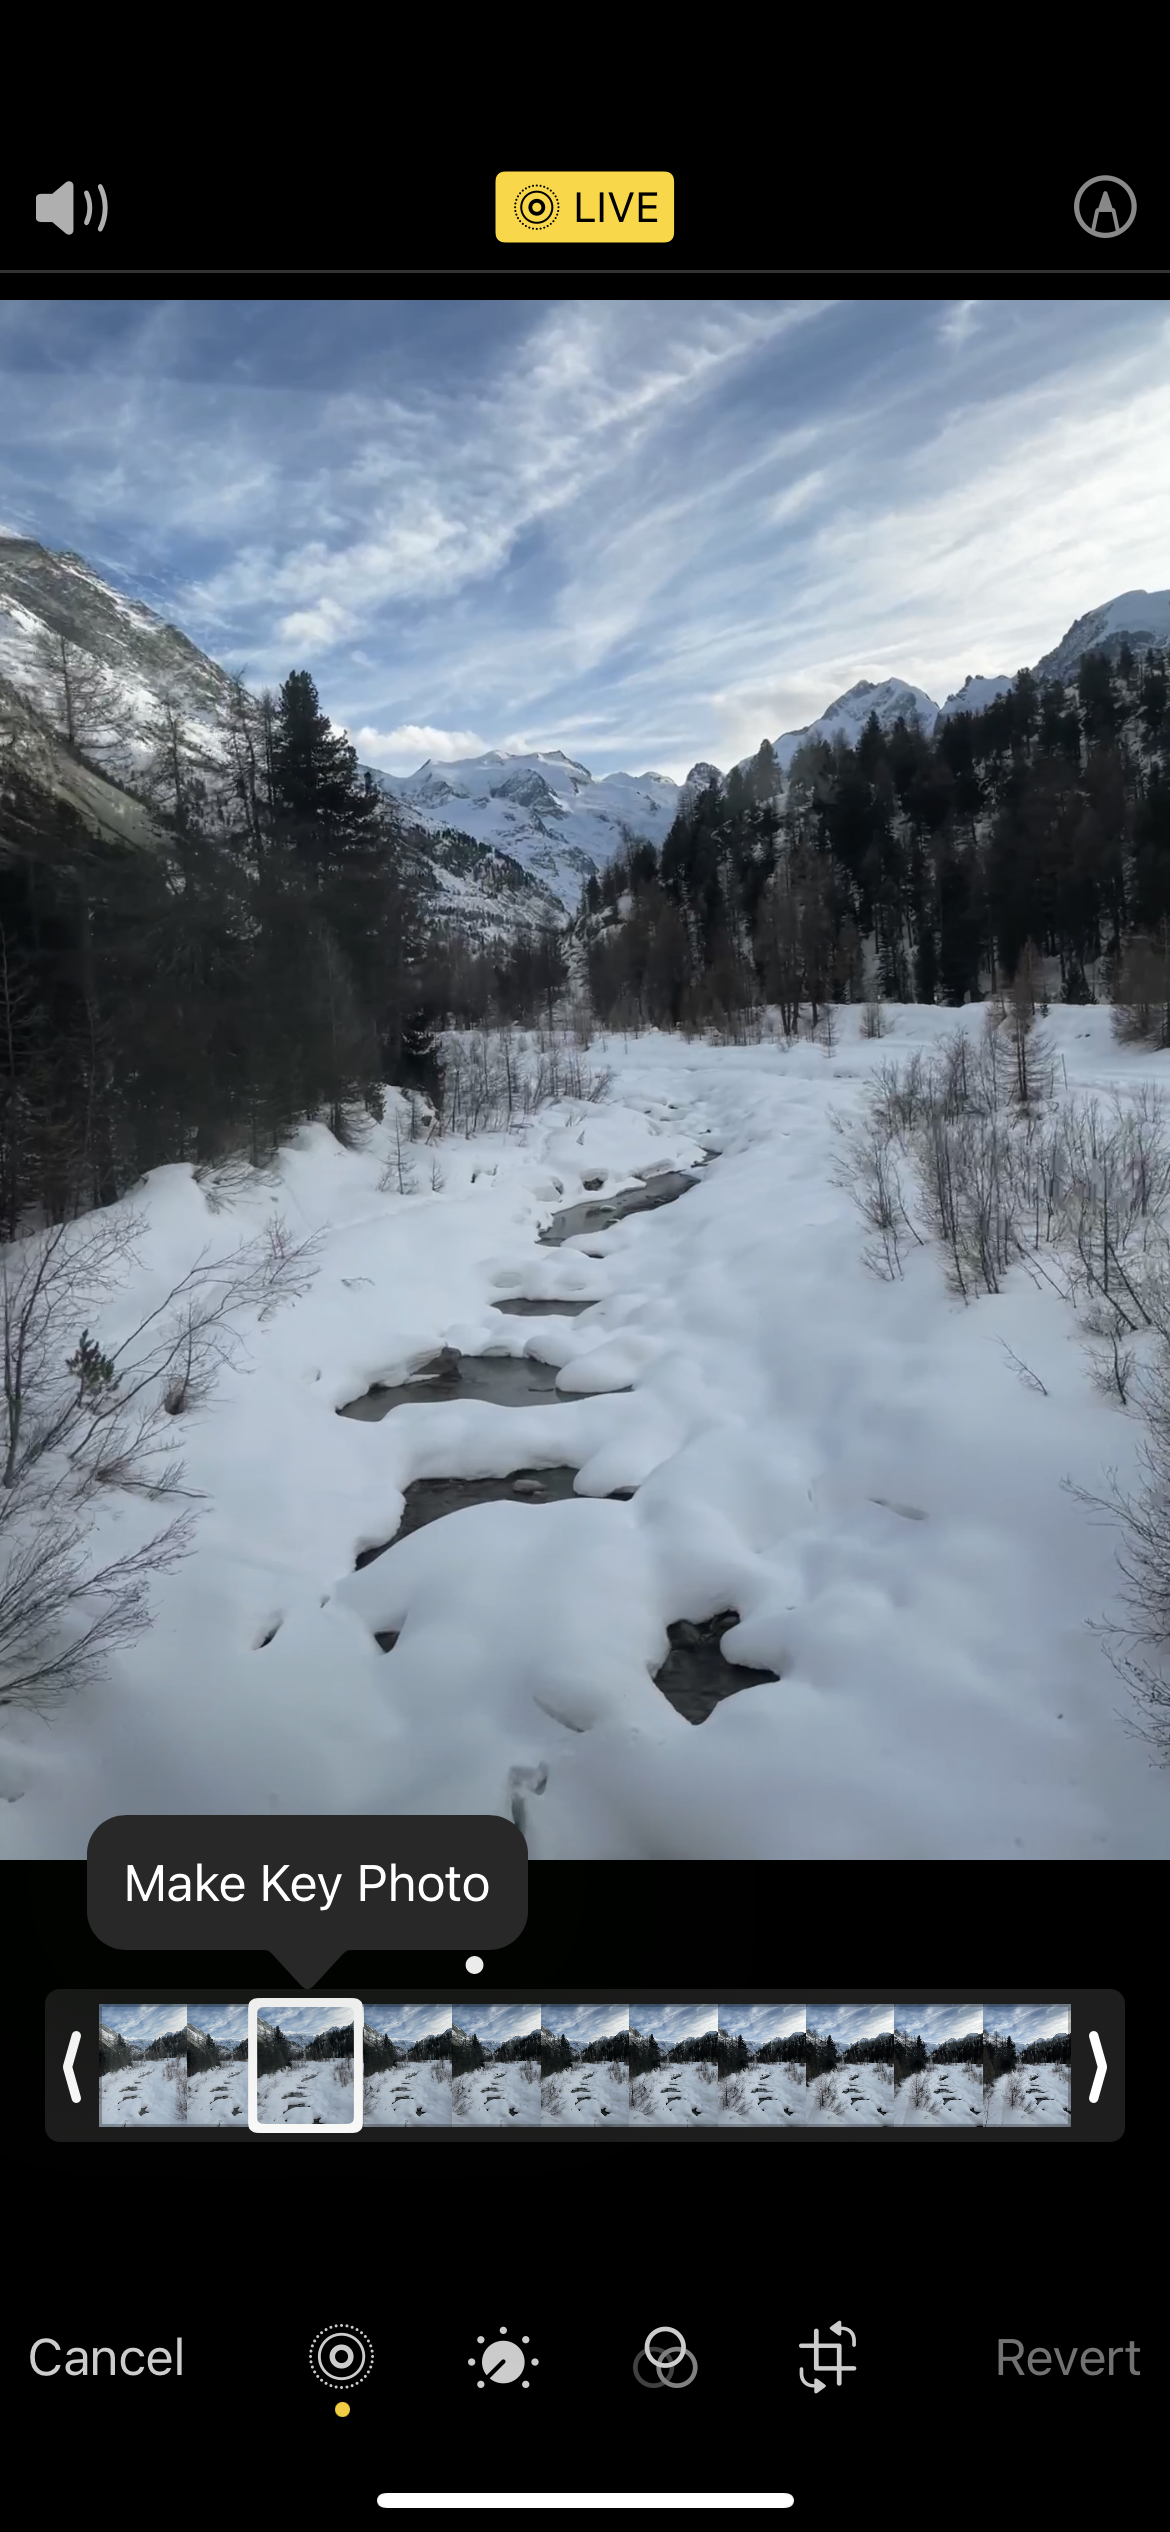
Live photos are a feature on most iPhones, where, while you tap the screen to take a photo, the camera actually records a few milliseconds of video. Your capture will save as a photo, but if you tap and hold it, you will be able to see the movement.
Here’s the trick: Tap Edit in the top right corner of the photo. Then tap the icon at the bottom of the screen that looks like a sunburst, to the very left next to Cancel. Here, you can choose the frame you want to set as the saved photo, which will be highlighted by Make Key Photo.
How to make sure you have live photos turned on? Open your camera and look in the top right corner. Tap the same sunburst-like icon at the end and wait until “Live On” appears. If it’s off, there will be a slash through it.
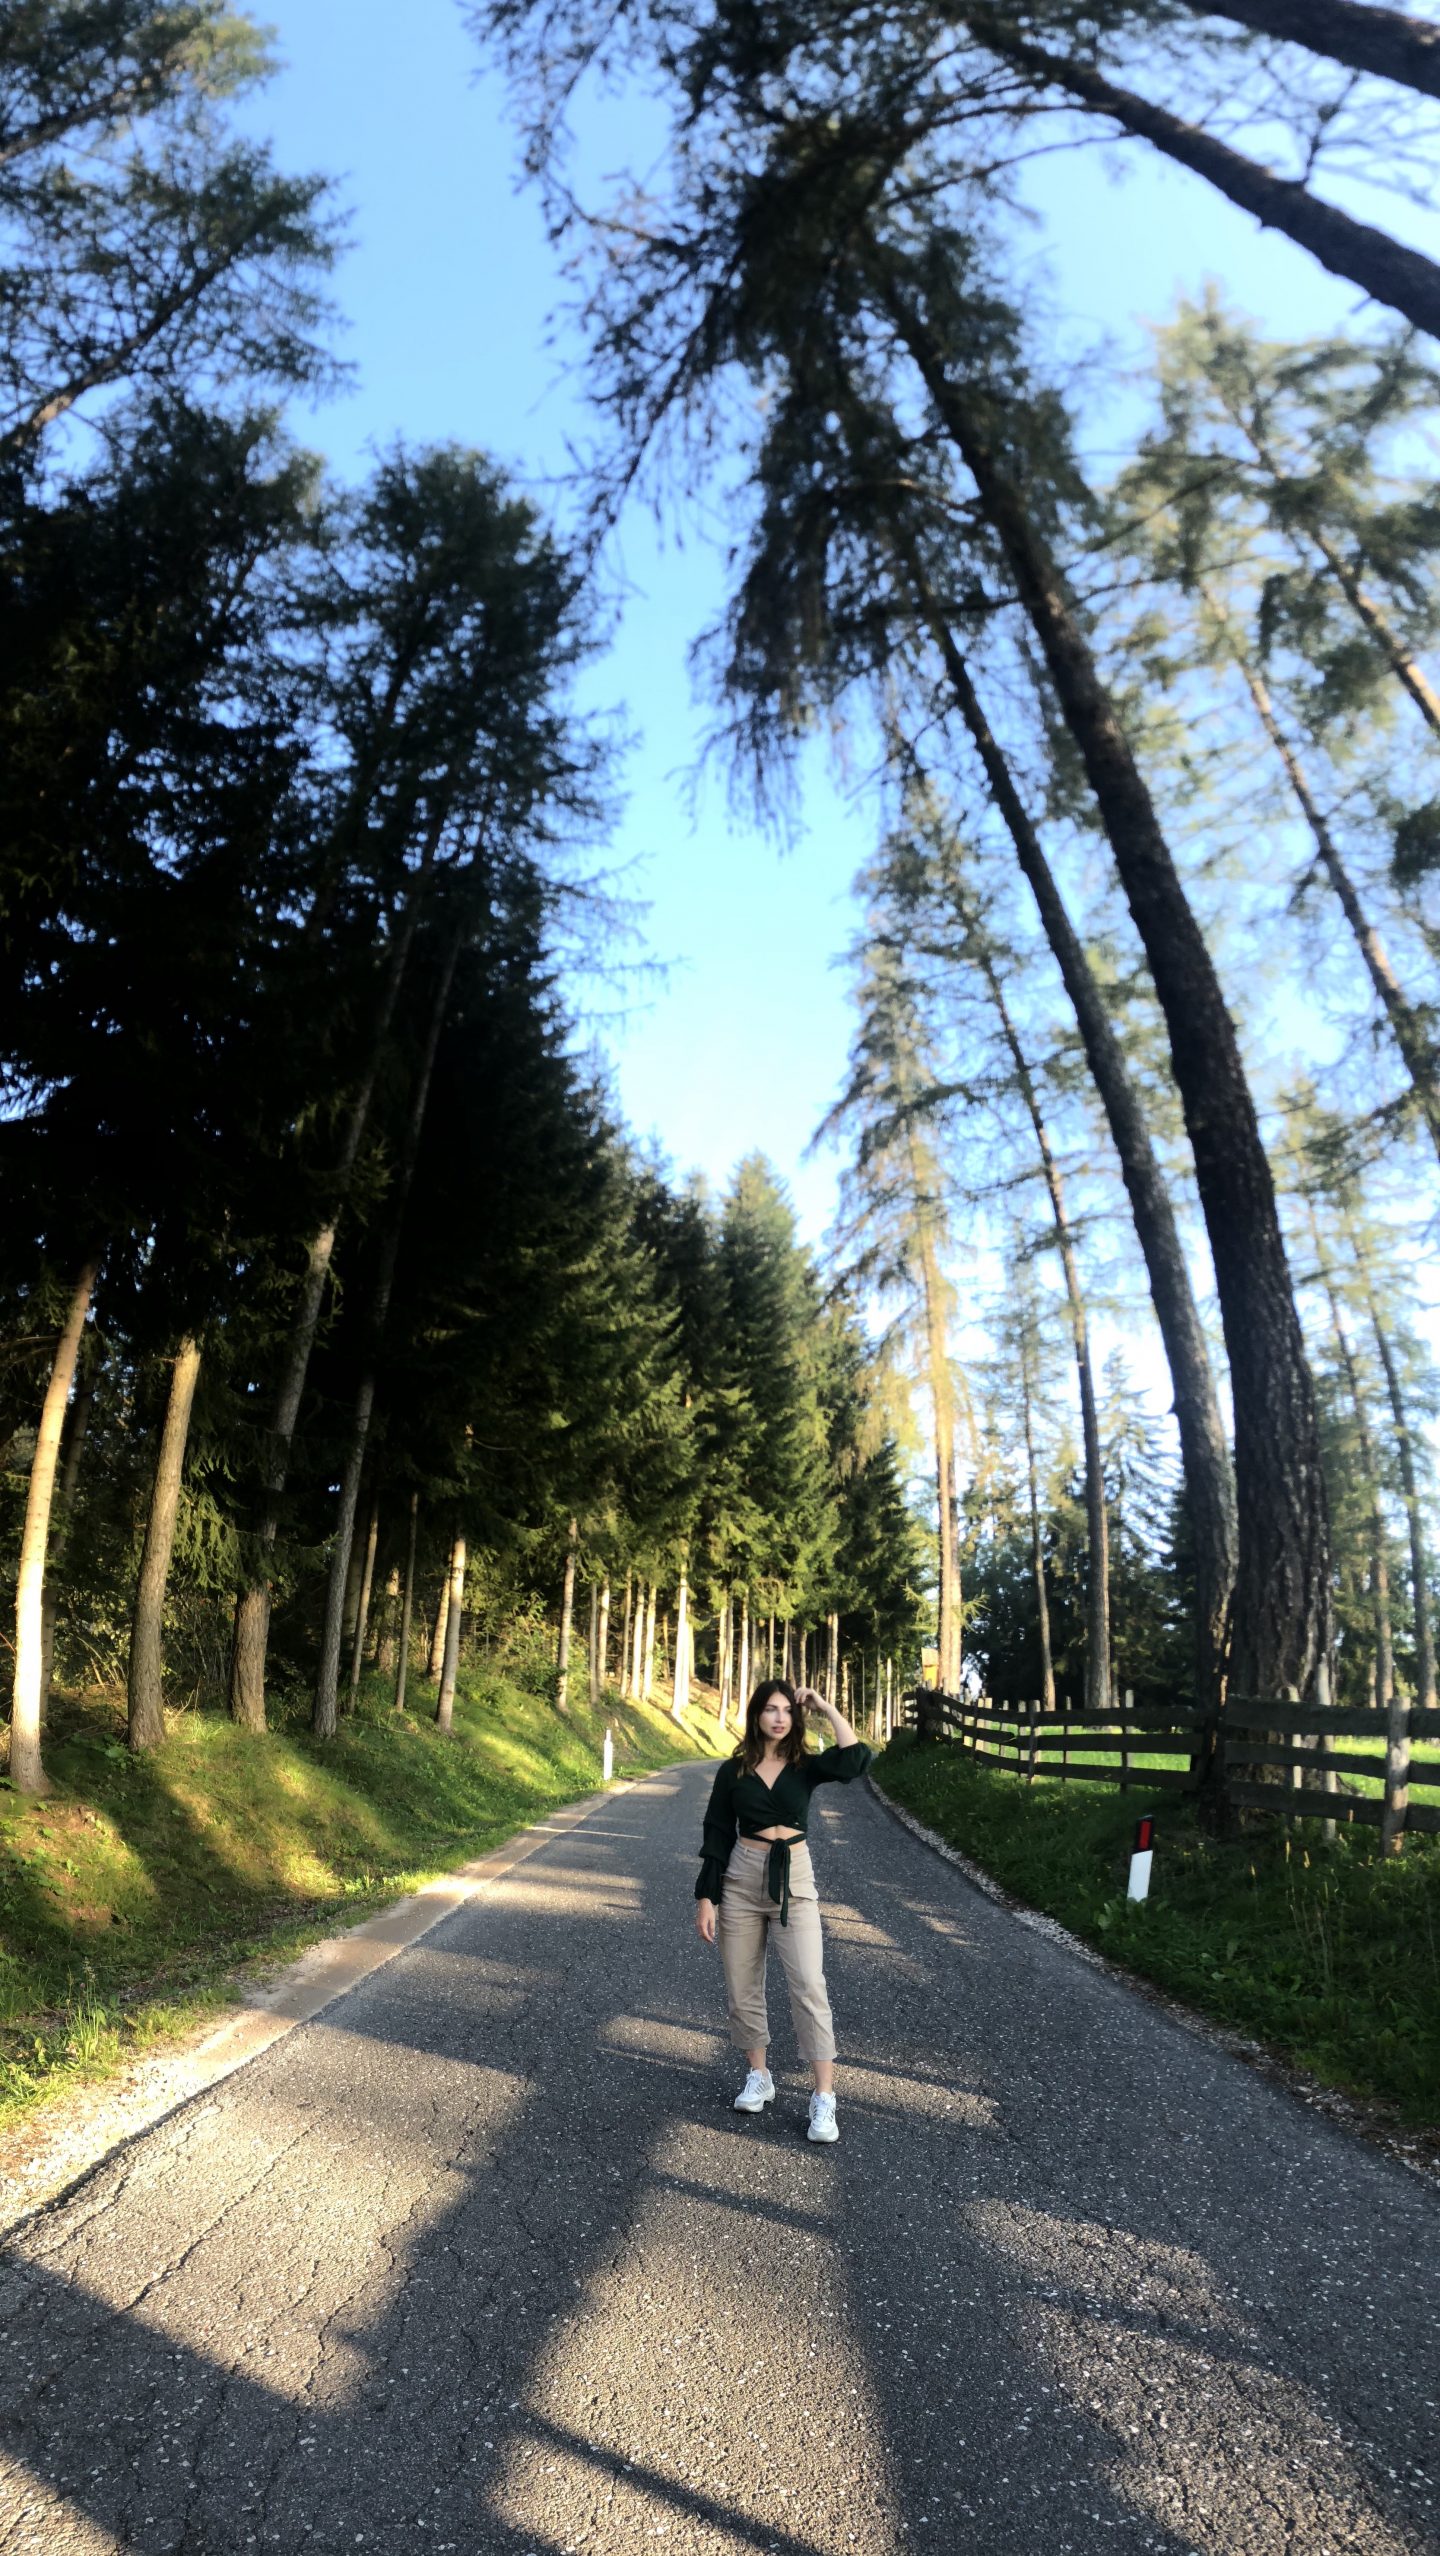
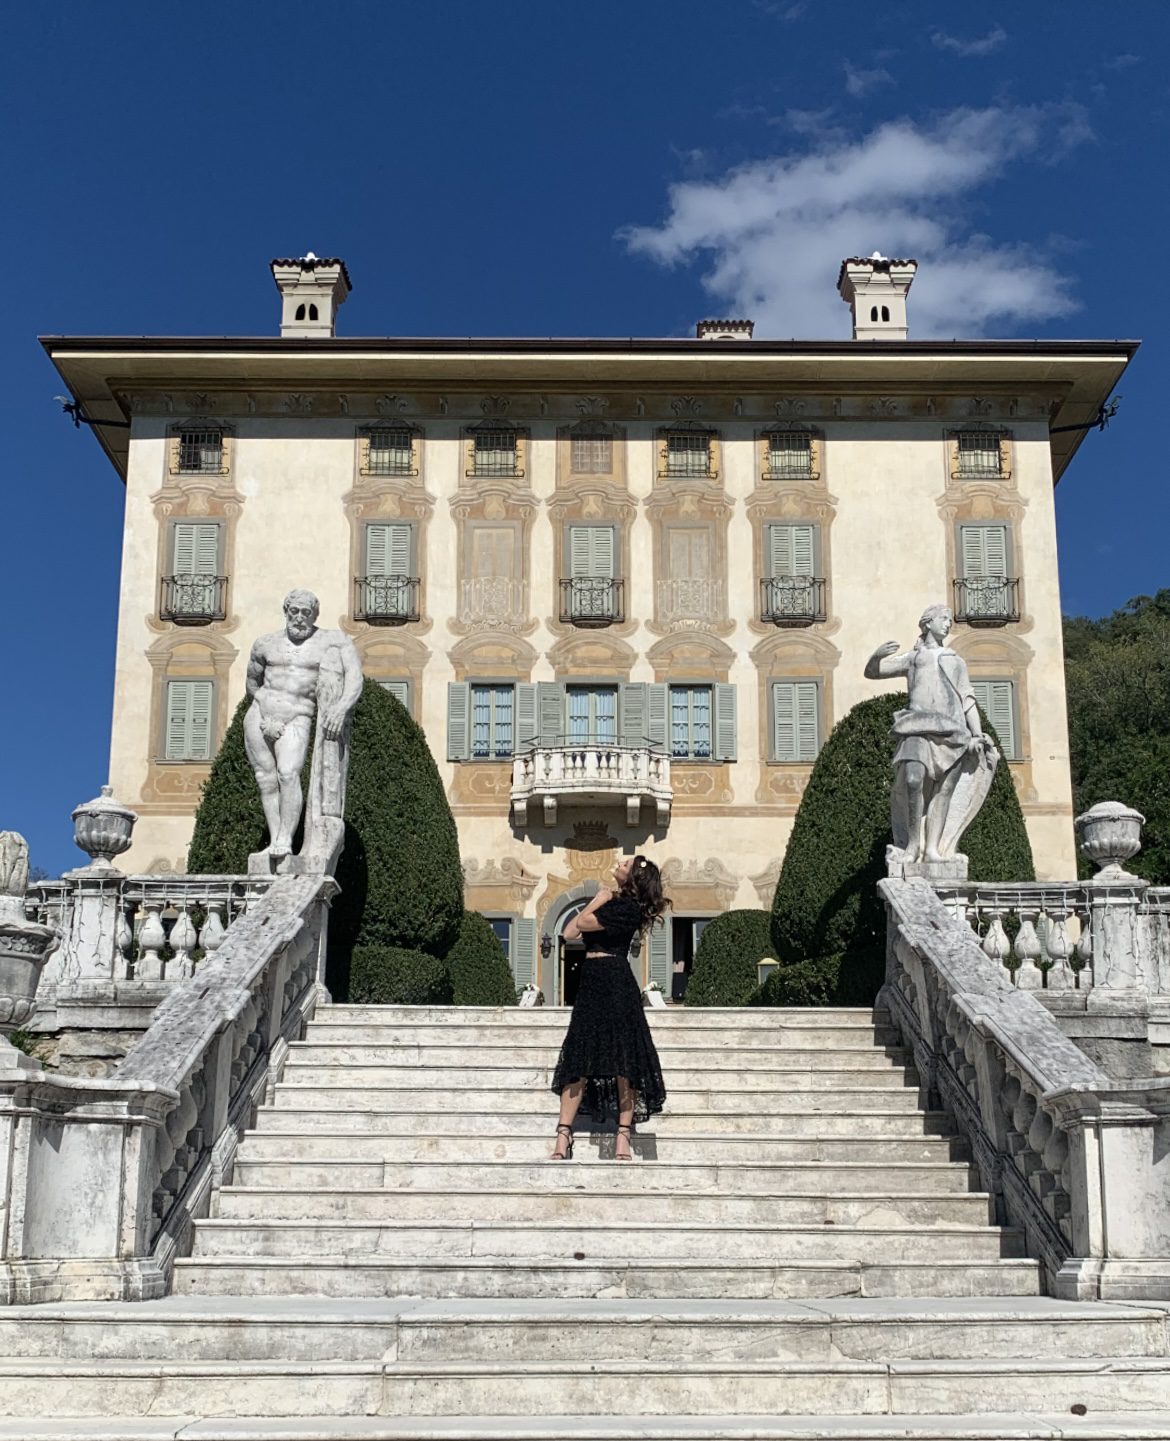
4. Change Up Your Perspective & Show Scale
Want to know why travel photos on our iPhone can be so boring? Because we shoot everything from the same angle.
This is especially the case at well-known places, so I encourage you to think outside the box to create a unique shot!
High angles and low angles can immediately add more interest to your photo. Another thing that often gets overlooked is using the foreground of the image to create context and interest; for example, shooting behind something or widening the frame to contextualize a moment or a place.
These are also techniques for helping to create a sense of scale. By showing how big or small something is, you create more interest in the photo. You can create scale using tools on your phone (like the one I’ll talk about next), but the easiest way is to place a person or easy-reference object in the landscape.
5. Use Panorama Vertically to Capture More Scenery

This is one way to create a sense of scale. I’ll say, this isn’t the sharpest photo I’ve ever taken but it’s the first time my boyfriend and I experimented with this photo technique! If you don’t have wide-angle capabilities on your iPhone model, then this is a trick you can use to get more of the landscape in your photo.
Switch over to the Panorama shooting mode and, instead of taking your picture from left to right, turn your iPhone horizontally and take the picture going from down to up, still following the line on your screen.
The result? More scenery in your travel photos!
The style isn’t for everyone, but it’s a great way to experiment and get creative with your travel shots. No more boring travel photos here!
6. Ditch the Selfie for Self Timer
Sellfies have their moments but if you want to up your travel photos, then you have to kick them to the curb!
Instead, harness the power of the built-in self-timer on your iPhone and take your time to compose and set up a shot.
You can lean your phone against something, build a makeshift tripod with your backpack, or buy an inexpensive iPhone tripod for the best shots (more info on this in a bit).
You can do a self-timer of 3 or 10 seconds. It can take a while to set up the right shot, especially if you are traveling solo, but skipping the selfie is worth it in order to get a beautiful photo you’ll be looking back on forever.
Pro Tip: If you do feel the temptation to take a selfie (let’s be real, it’s simpler and faster than setting up the self timer – and it’s just fun!), then I suggest you update your settings to Mirror Front Camera. If you go to Settings and then Camera, you’ll find Mirror Front Camera under the Composition Category. Toggle this on and your front camera will take a mirrored selfie – exactly how it appears to you. If this is off, it means the end photo will be flipped and the landscape will look different from what you see in your camera!
7. Brighten Up Photos Within the Camera App
iPhone photo editing settings have improved so much over the past few models. Right within the app, you can modify your photo, making quick fixes to Highlights and Shadows, bringing out detail with the Brilliance or Sharpen adjustments, and control color with Saturation and Vibrancy.
8. Download Lightroom & Install Lightroom Mobile Presets

My preferred editing platform will forever be Adobe Lightroom!
The Lightroom app is free for mobile and you can even create or install Lightroom presets to make editing faster and your style more consistent.
Check out my top tips for editing travel photos in Lightroom.
Pro Tip: There are lots of other photo editing platforms out there and one that I like to add special effects to my photos is Lens Distortions. You can add sunbursts, snow, rain, and much more to enliven your photo.

Try some of my Lightroom presets free when you subscribe to my newsletter!
9. Framing: Avoid Zoom, Take Advantage of Wide Angle
iPhones come with a lengthy zoom, but the quality lessens the further you zoom in, leaving you with a pixelated and blurry photo. Instead, fill the whole frame and get as close to your subject as possible to capture as much detail as clearly as possible.
Wide angle, instead, is an awesome feature to take advantage of. This feature can make your landscape photos stand out by capturing more scenery.
Even though a wide-angle makes it easier to get everything you want in the frame, you should still pay attention to composition and focus to arrange your photo as beautifully as possible.
The last thing to keep in mind is distortion. When shooting wide, the edges of your photo can look distorted, as if they are curving in. The best thing to do to avoid this is to toggle on the Lens Correction feature in Settings > Camera, as well as shoot straight on with the horizon, instead of tilting the phone up and down.
10. Harness Portrait Mode & Change the Aperture (Depth of Field)
When you’re shooting people as part of your travel photos, play around with changing the depth of field and shooting in Portrait Mode. The lower aperture creates a blurrier background.
This mode is only practical when shooting a subject, on which the focus is automatically set. Your travel photo may or may not call for a blurry background, so I suggest experimenting to see what fits your photography style better and the situation at hand.
11. Preserve Your Go-To Settings

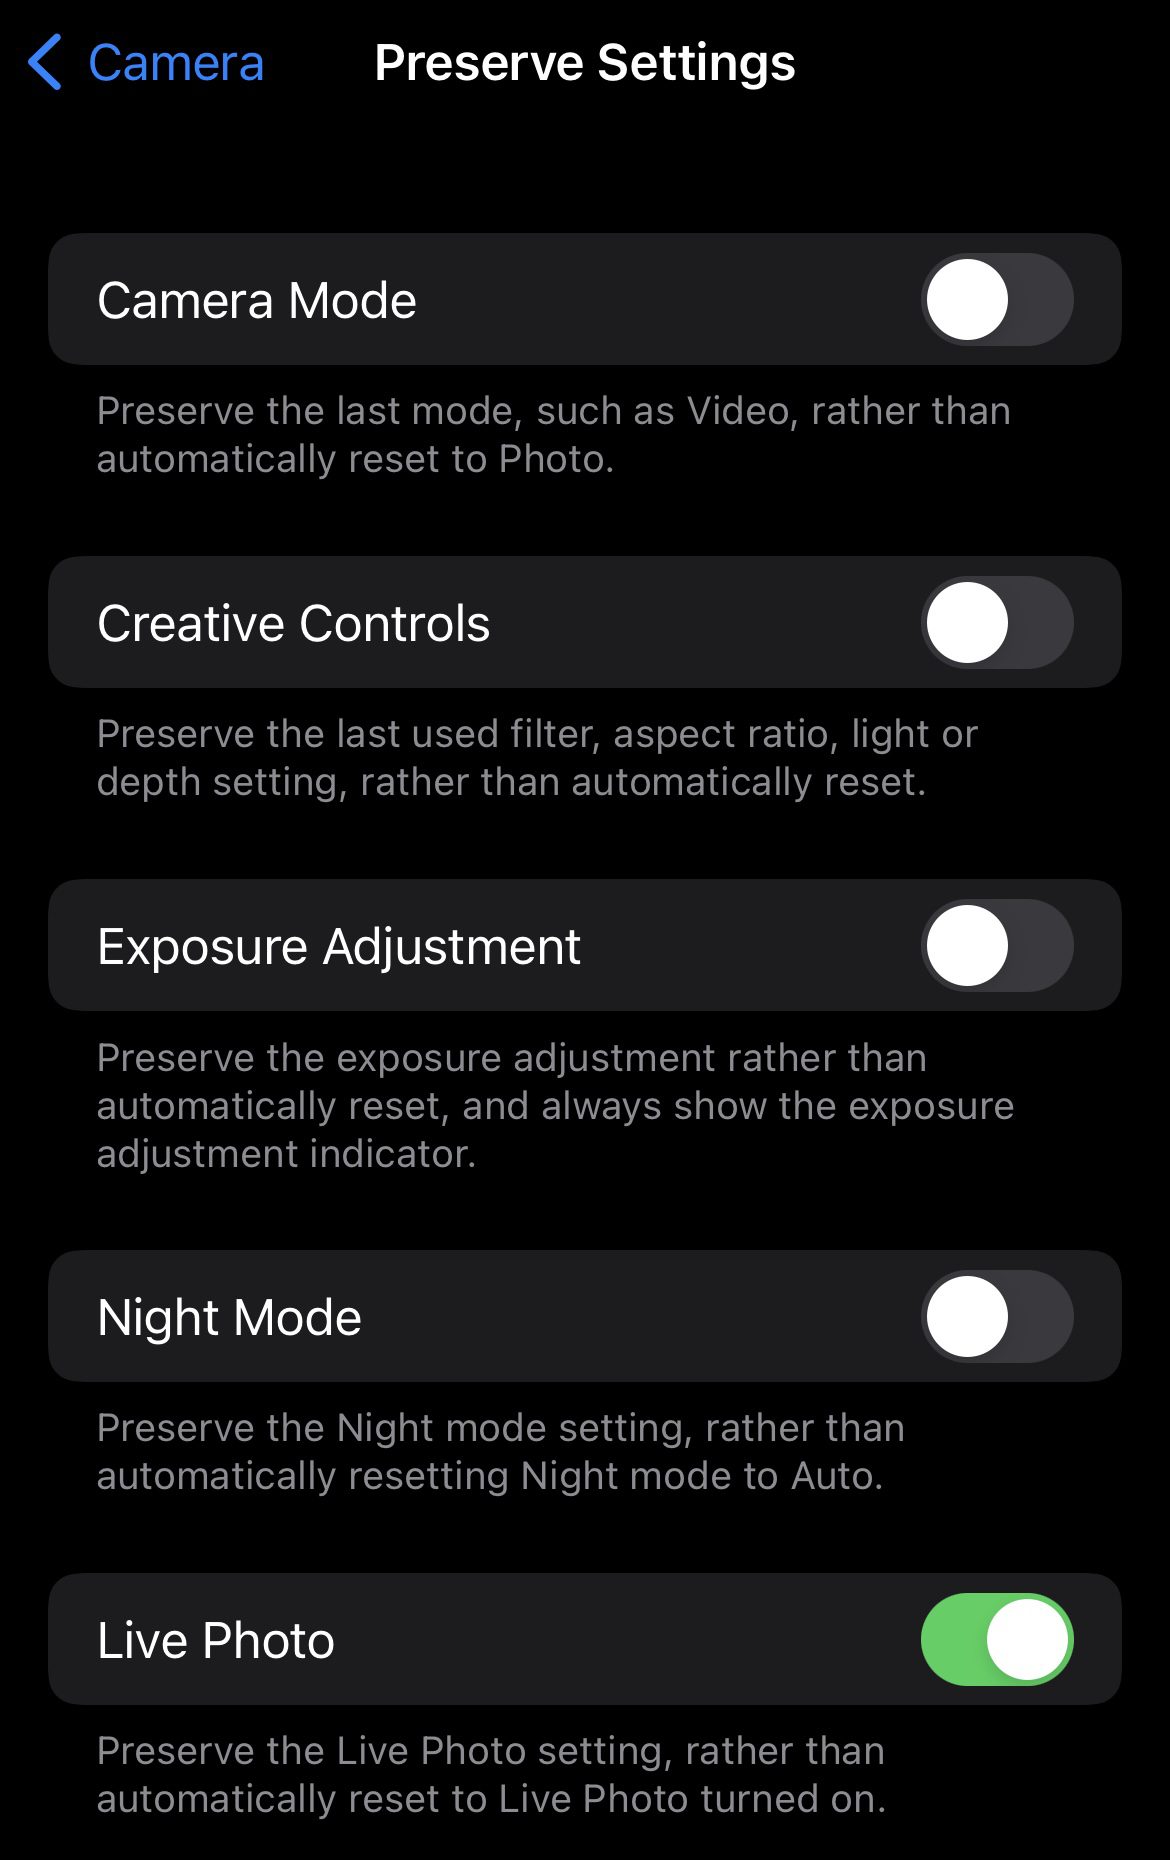
Starting to find your rhythm with your iPhone photography style? Then you may want to consider heading back into your Settings to toggle on and customize how your iPhone camera works.
In the photo above, you can see there are several options that you can always leave on or have reset every time you access the camera.
12. Practice Storytelling
Nailing iPhone travel photography is more than just getting the settings right and taking advantage of tools.
What makes photos great are the stories they tell, the emotions they evoke.
Instead of just taking a picture once you reach the peak of a hike or a special monument, take photos along the way. Give context to your travels by capturing details, moments, and places that are not necessarily notable, but recognizable to you.
Capturing movement, for example, can bring your photo to life: a blurry vespa, waves in motion, the twirl of a fork in spaghetti. Photos of movement can be felt and imagined when you look at them, telling a story.
All this will not only make you better at capturing photos that evoke emotion. You will value looking back at all the little things and details you photographed, that make your journey complete.
iPhone Tips for Travel Videos
13. Play Around With Your Settings – 4K, HDR, Frame Rate
Your iPhone has many different video capabilities. If you go to Settings > Camera, you’ll find categories for Record Video and Record Slo-mo, in which you can control the quality of your video, also based on the file size you are comfortable with storing on your phone.
Another setting you should consider toggling: HDR. This feature allows for better capture of a wider range of colors and keeps tones balanced. It’s best to toggle on when you are in extreme conditions – low-light or a lot of light since it works to evenly balance colors.
And you can also change the resolution and frame rate at which you are shooting. In your settings panel, you’ll see all the frame rate options you have and Apple also explains how each one impacts the quality of the video and its storage.
If you have one of the newer models, you should also experiment with the Cinematic setting that creates more depth of field.
Pro Tip: In this panel, you will also find a toggle to Lock Camera. This means while you’re recording video the phone locks on the recording, eliminating the risk that you accidentally switch to photo or another camera setting in the middle of filming.
14. Hold the Phone with Two Hands & Stay Still
Avoid walking and taking videos simultaneously. iPhones often register bumps in videos with each step you take, which make the finished product look choppy and, well, like it was done on an iPhone.
One of the ways to increase stabilization is to always hold the phone with two hands. And if you do want to walk, take slow, wide steps to try to keep the video as smooth as possible. You could also try to use something to place your arms/elbows on so you have some stability.
This also goes for taking photos and even static videos. We may think we are holding still, but even just tiny movements will show up on video.
15. Use an iPhone Tripod for Extra Stability
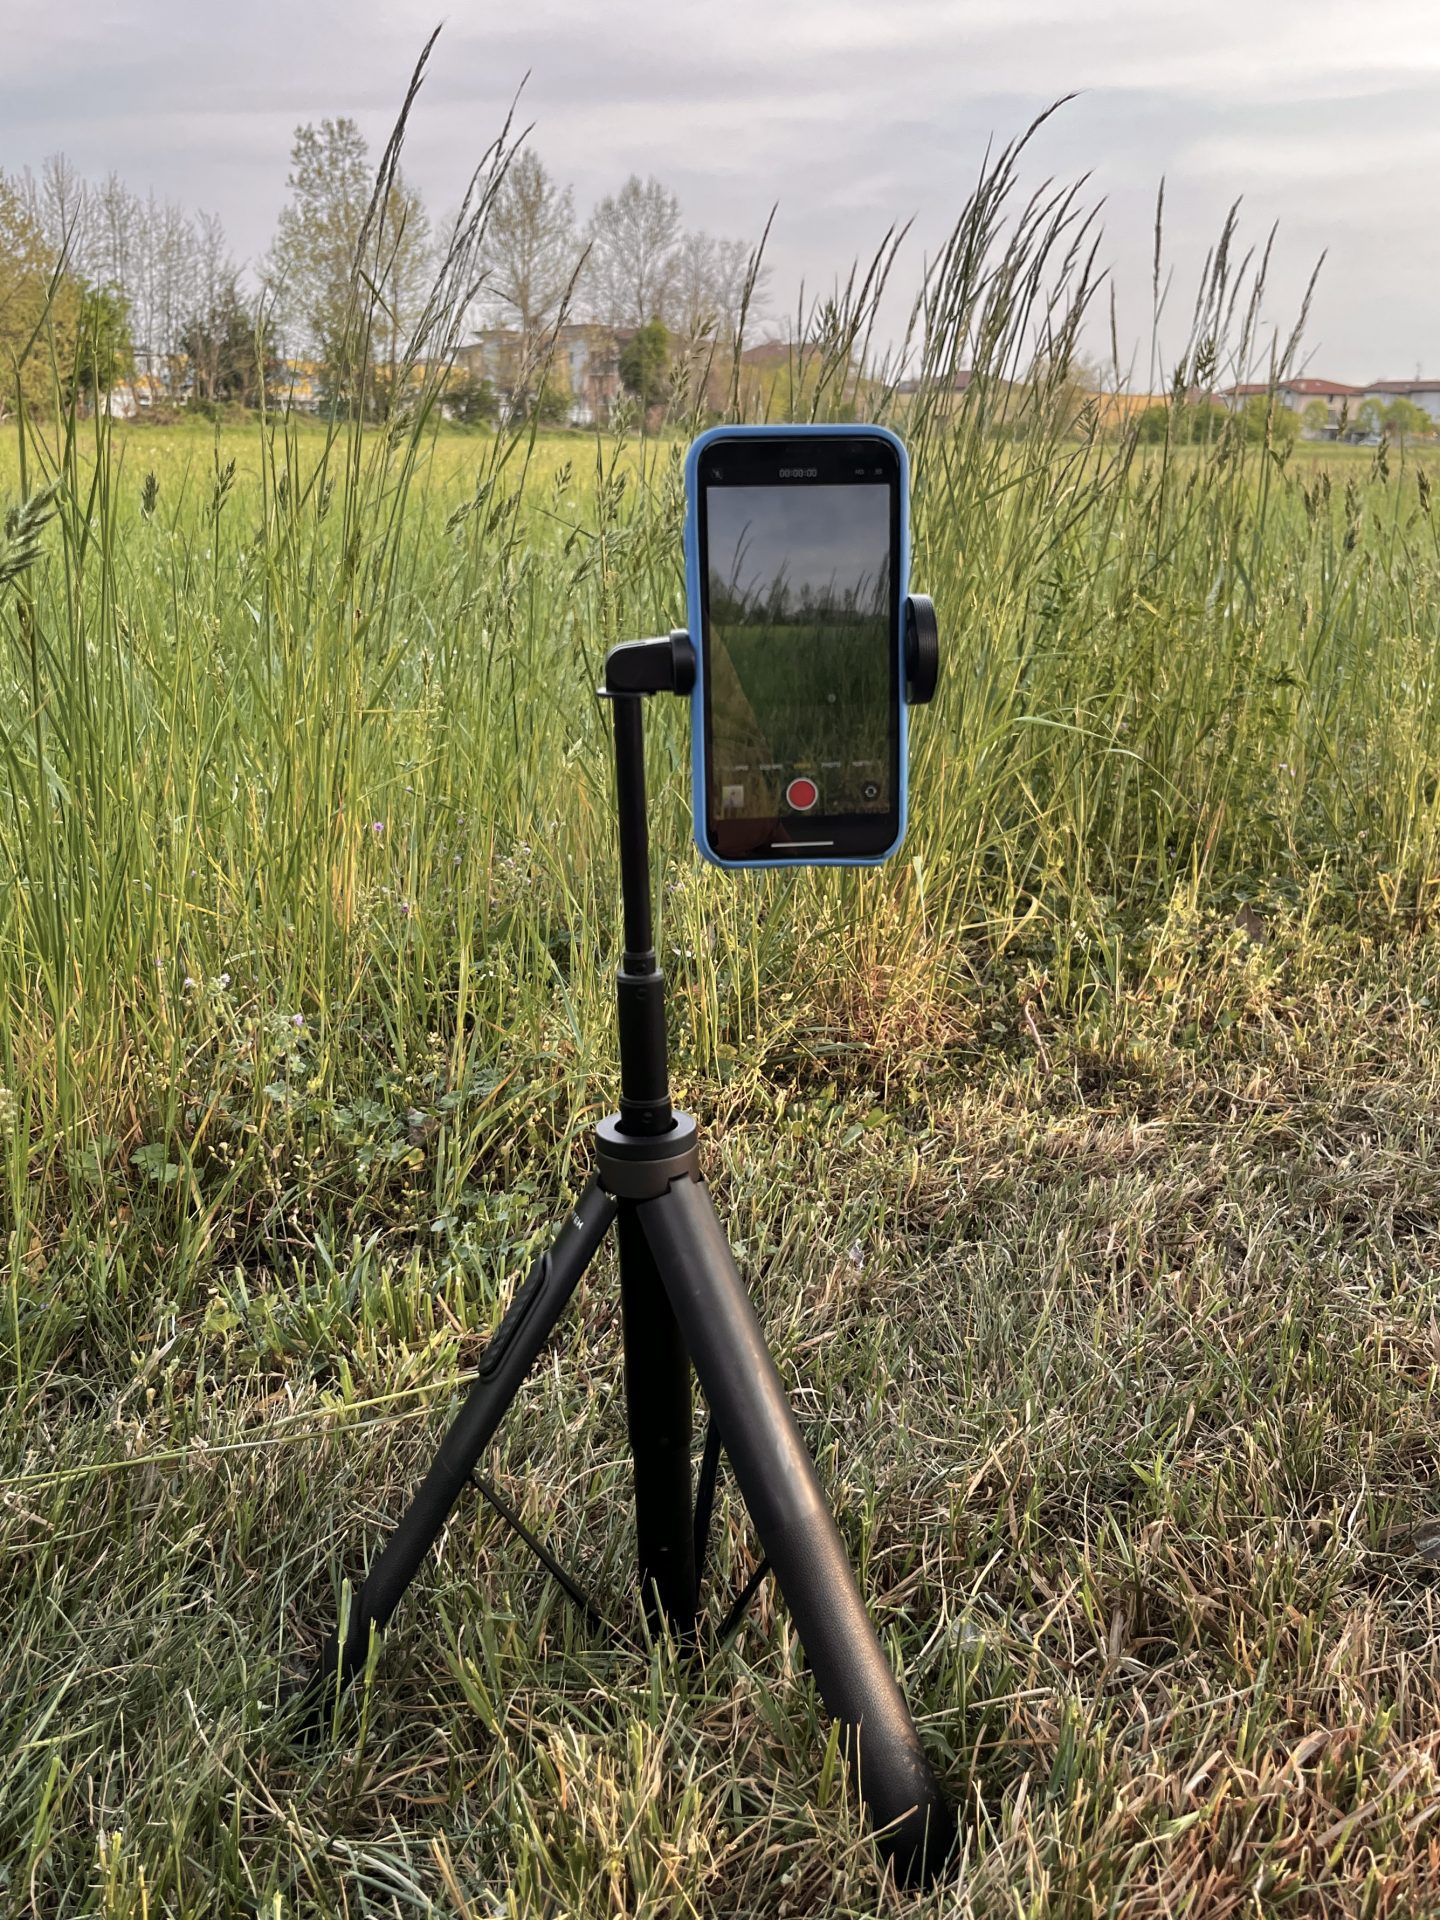
When I want to do video transitions or take a video of myself, I break out my iPhone tripod.
This gear cost me around $30 on Amazon and I use it nearly every day in my day job as a content creator, and it’s so lightweight and compact that it’s a must-bring on any trip.
You can obviously also use this to have more stability while taking your photographs. The tripod even comes with a Bluetooth remote so you don’t have to be standing at it to take the photo, which makes it perfect for solo travelers.
Pro Tip: Don’t forget a portable charger. The last thing you want is to be exploring a new place with a dead phone! The Anker portable charger is my go-to for all my trips.
16. Plan Your Shot
A lot of times I get caught up in the moment of exploring someplace new and rush through photographing and videoing my surroundings, all to end up with average-looking pics and vids of what was an amazing location.
Instead, I encourage you to have patience and take the extra time to actually plan your shot. How do you want to pan the video? What do you want the last frame to land on? How do you want to pose in the shot? Is there a better angle than the one everyone else is taking photos from?
One of my biggest vices being a travel photographer, but also a budget traveler who frequently only goes on trips a few days at a time, is rushing through to see and collect as much information as I can, is that I end up not practicing well what I love doing while I travel: photography. So, next time you go on a trip, set aside even a small block of time to dedicate practicing your craft.
17. Download These Apps For Editing Cinematic Masterpieces
We all need a little help now and then right? Well, I use a few apps to get my Instagram Reels looking as perfect as possible.
CapCut and Inshot are my go-to free video editing apps that help me make video clips more interesting with transitions or allow me to alter the settings and play around with colors, brightness, and more edits. Even just small adjustments can make a video look ten times better.
18. Make Smoother Videos with an iPhone Gimbal
Another budget-friendly accessory to up your video game is a gimbal for your phone. A gimbal allows you to attach your phone to a mechanized instrument you hold in your hands. From the instrument you can control what you’re filming and when while making smooth transitions, pans, and practically any other move you need to make.
Start with a budget-friendly one – mine is from Qimic and it’s perfect for beginners (it’s also a mini tripod!) Then if you really want to take your creativity and options to another level, invest in a 3-axis gimbal like the DJI OM.
Best Practices for iPhone Travel Photography

19. Shoot at Sunrise or Sunset
My biggest iPhone travel photography tip: plan your itinerary around what is most important to you to photograph. If you can get to those locations when the lighting is good, when nobody’s around (cough cough sunrise) then you will have the most success at taking a beautiful photo.
To help plan your itinerary around what you want to shoot most, I suggest using a combination of Location Scout, Google Maps Trip Planner, and the Weather app.
Location Scout is a website where you can look up locations and other photographers who have been there share their photos and tips for how to get a similar shot.
I wrote a whole post on how I use Google Maps Trip Planner to not only plan itineraries, but also integrate my top photo locations I want to hit while on my trip. I recommend you check it out for all my tips!
Then I use the Weather app to know roughly what time sunrise and sunset are at my destination, since those times offer the best lighting conditions for shooting.
20. Keep in Mind Size Restraints on Social Platforms
One thing I always forget about when shooting photos is that some social media platforms have maximum dimensions you can publish.
To make sure when you go to post that everything you want is in the frame, go into your iPhone and change the shooting dimensions you are seeing on your camera.
You can do this by tapping the arrow button at the top of your camera screen and tapping the icon that either says Square or has an aspect ratio like 4:3. Then your camera will automatically switch to that aspect ratio and you can see what will be captured/fit within maximum social media aspect ratios.
Here are all the aspect ratios to take note of:
- Instagram Post – 4:5
- Instagram Story – 9:16
- Facebook Post – 16:9
- Facebook Story – 9:16
- Twitter – 16:9
- TikTok – 9:16
Pro Tip: When you select a photo to post in Instagram and it then takes you to the editing screen, use the sharpen tool to bring some extra clarity and life into your foot. Sometimes with large file sizes being used on apps or transmitted from one device to another, the quality can go down and doing a final sharpen (no more than +20/25) can help your photo stand out.
21. Set Your Photo Format to Most Compatible, Not High Efficiency
This iPhone travel photography tip is one to make your post-production life either!
If you want to edit your photo on your computer later (like I prefer using Lightroom on desktop) or if you just want to have it on your computer to send or archive, you’ll want it in .jpg format.
iPhones often automatically toggle on a setting called “High Efficiency” that takes your photo and saves it as an .heic format. It reduces the file size, so you can essentially take and store more photos on your phone.
However, this makes using them anywhere else a pain because most platforms accept certain file formats and .heic isn’t one of them.
To make sure you are shooting in .jpg, go to your Settings > Camera > Formats and then choose Most Compatible.
22. Back Up Everything to iCloud
No matter what device you use to take photos, you should always back them up on something! iPhone makes it easy to back up photos directly to your iCloud account.
To toggle this, go to Settings and tap the very top, where you see your name. Then tap iCloud and toggle on Photos.
If you’re worried about space, select Optimise iPhone Storage to save smaller file sizes.
Final Thoughts
Nailing iPhone travel photography doesn’t have to be confusing, hard, or intimidating. But taking your photos and videos from simple point-and-shoots to creative, well-composed, and beautiful captures will take some time and practice.
My hope is that these tips can help guide you to making the most of your iPhone and, most importantly, capturing valuable memories you’ll look back on forever!
What’s your iPhone travel photography goal? Let me know in a comment!
Save these tips to Pinterest for later reference!

With an iPhone (or any smartphone) in hand in this day and age, you can start taking amazing photos and videos. I hope these iPhone travel photography tips have helped you feel inspired and excited to go out and shoot!
XOXO
Michela