Last updated on January 16th, 2024 at 02:20 pm
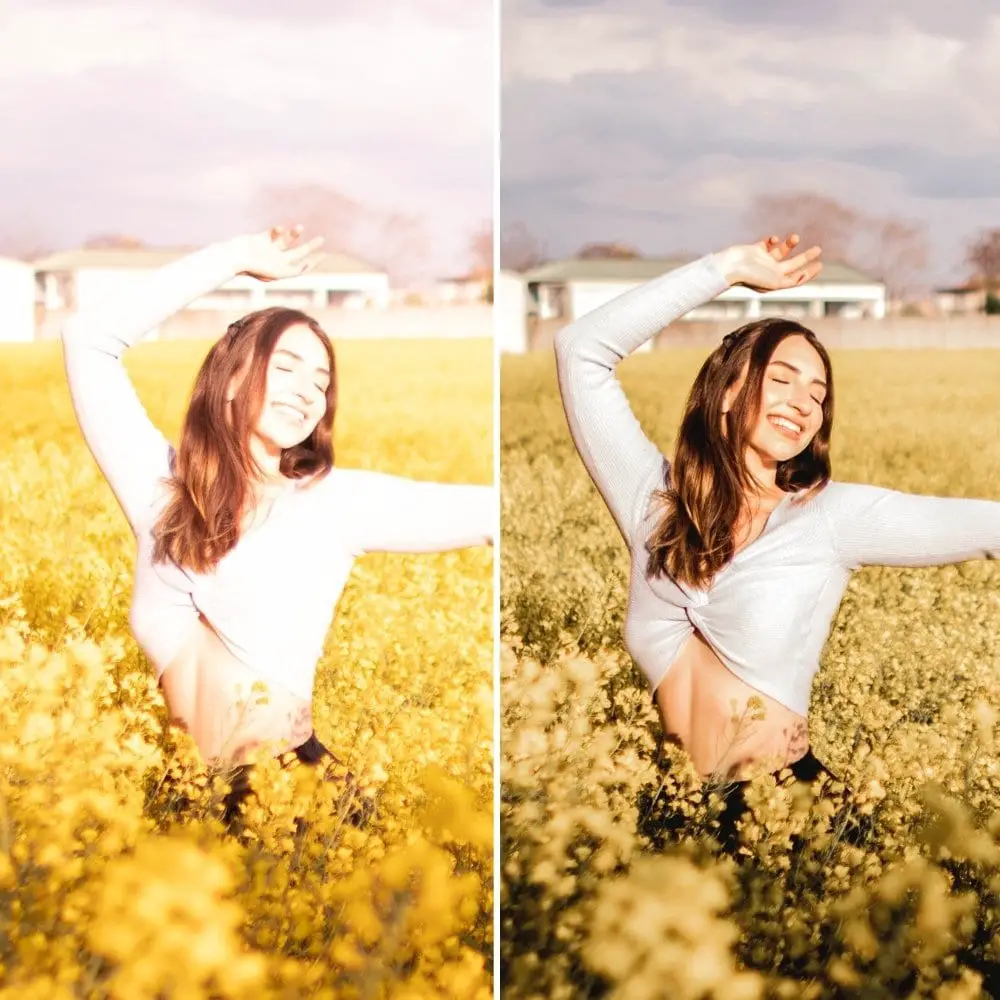
Adobe Lightroom can be the godsend we need as photographers when we upload a photo that is incredibly overexposed. It’s no secret that Adobe Lightroom is a must-have for photographers to correct harsh conditions in photos, as it’s the most capable, user-friendly photo editing software out there. Don’t panic when you discover your photo is overexposed. There is a chance it can’t be saved, but there are steps you can take to bring detail back into the photo. Try these simple but essential steps on how to fix an overexposed photo in Lightroom.
If you want to quickly solve your problem, I have a preset I created a long time ago for my own overexposed photo problems. It should dramatically improve the exposure of your photo, but like with all presets, it will require some of your own manual adjustments.
You can download it for free as part of The Travel Library if you’re interested, as well as more Lightroom presets to play around with!

If you’d rather dive right into the sliders yourself, I don’t blame you. Let’s get into the steps to fixing an overexposed photo!
Some of these links are affiliate links which means if you make a purchase through them, I make a small commission. Read my full disclosure!
Tips for Avoiding Overexposed Photos
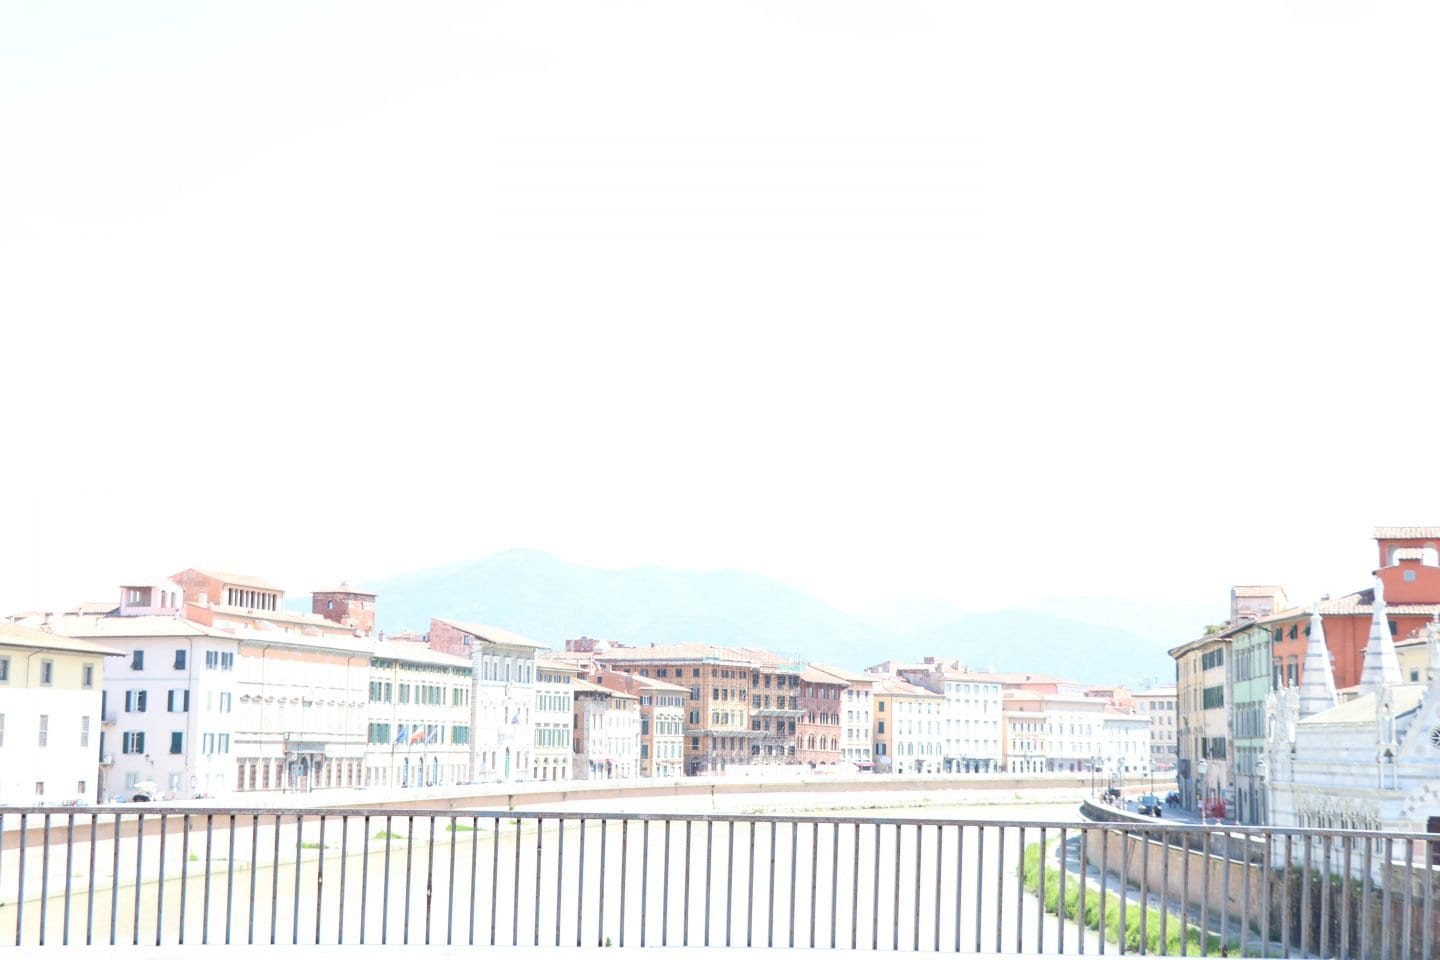
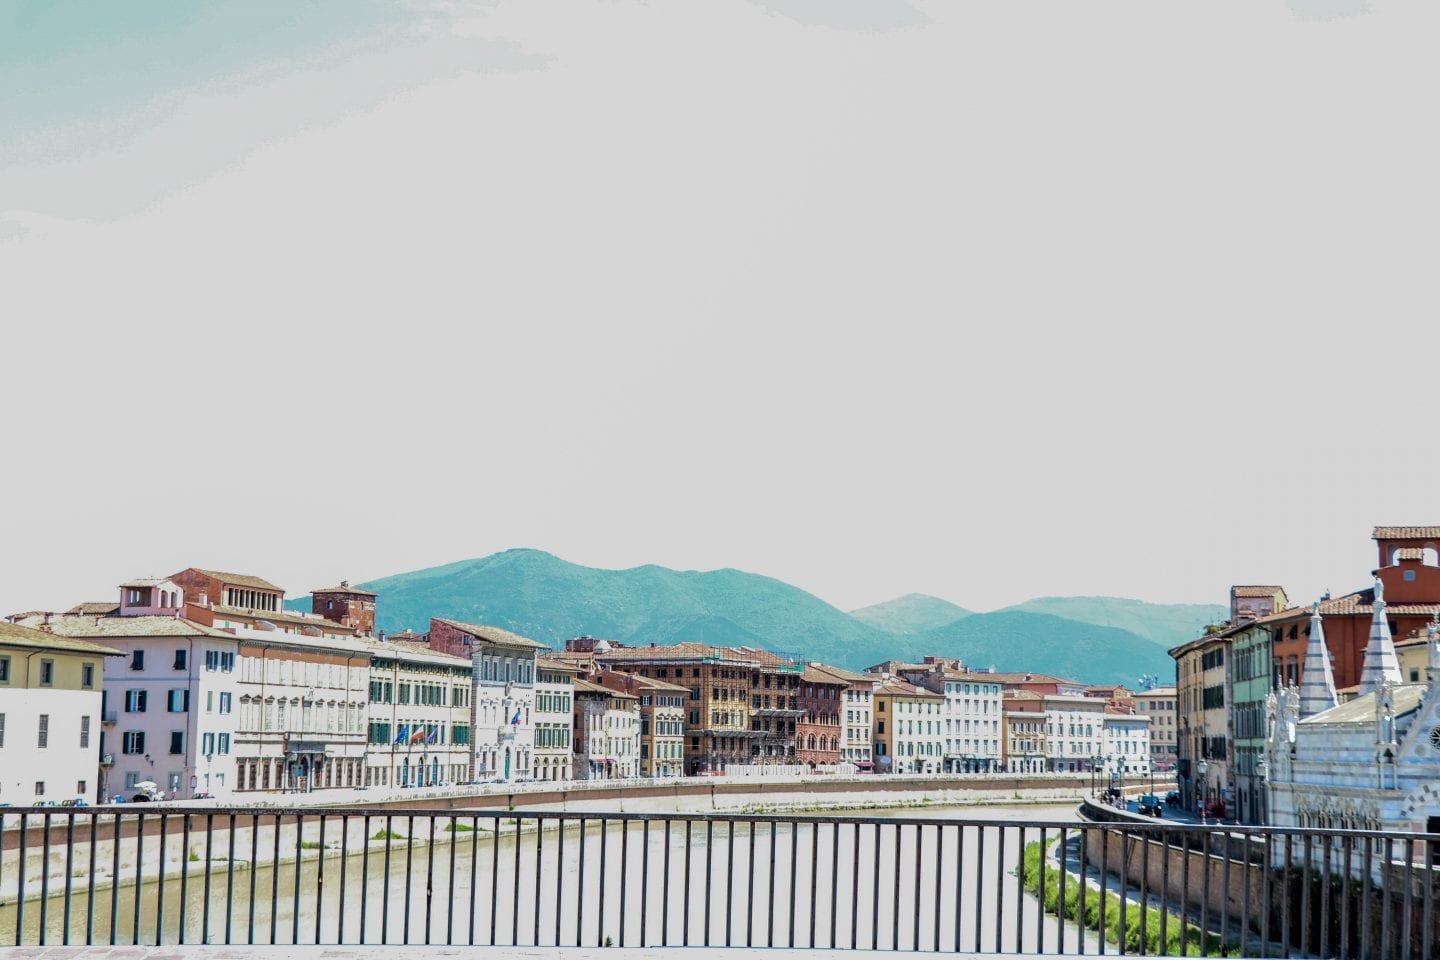
- Always check your ISO. When shooting in manual mode, you can still set your ISO to Auto, which means the camera’s choosing what ISO to set. ISO controls the brightness of the photo, so even though the photo looks balanced in your lens, your ISO may be too high making your photo too bright!
- If you’re shooting in direct sunlight, shoot underexposed. If the photo looks perfectly lit on your camera view screen, chances are once you upload it to your computer, you’ll see a lot of detail in the photo is lost because of such bright lighting conditions.
After five years of photography, I still make the mistake of not shooting underexposed enough to compensate for bright sunlight. Don’t be too upset!
How to Fix an Overexposed Photo in Adobe Lightroom
The overall goal of correcting an overexposed photo is to bring back detail in the photo that has been washed out by too much light entering the sensor of your camera.
Especially in bright lighting conditions, like direct sunlight, it’s easy to overexpose your photo.
The tools used in Lightroom to correct the photo don’t have to be used in this order, but it is usually the order I go in. That’s because the tools that I resort to in the later steps often can make dramatic changes to the photo.
It may be necessary, but you will most likely want to make dramatic changes if you don’t have to, which is why I use tools with a subtler effect first to see if they can give me the result I’m looking for.
Step One: Highlights Slider
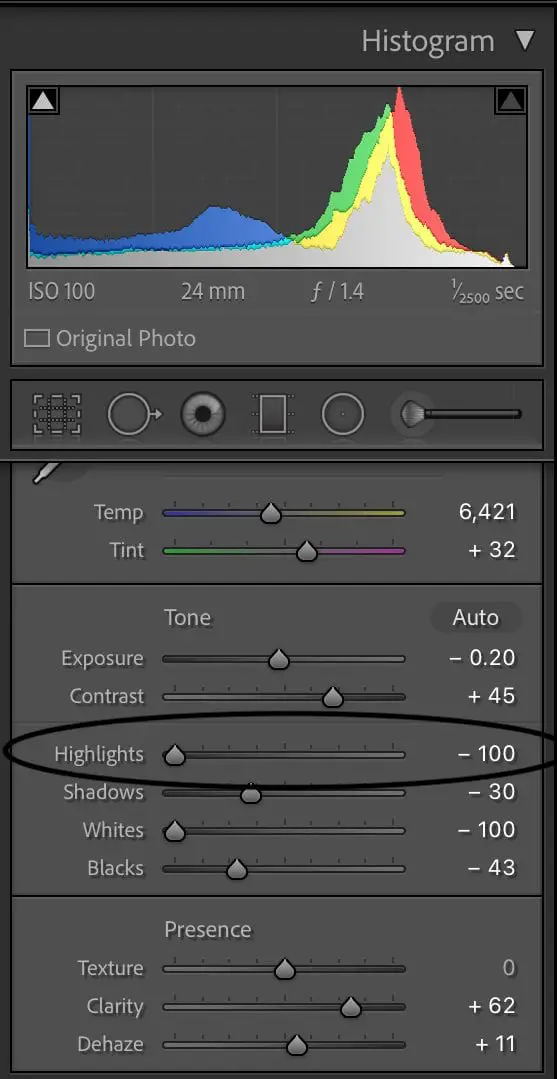
Firstly, you’ll want to slide the Highlights all the way to the left. I do this in my regular editing style anyway because there is often a lot of detail that goes missing in the background of a photo. This is especially true if you are taking portraits or shooting in bright sunlight, from my experience.
Bringing the highlights down helps us dim some of the brighter parts of the photo without having to dip into the actual Exposure tool yet. The Exposer slider is one of those tools that can make a dramatic impact on a photo with just a little adjustment, so save that for later.
Step Two: Whites Slider
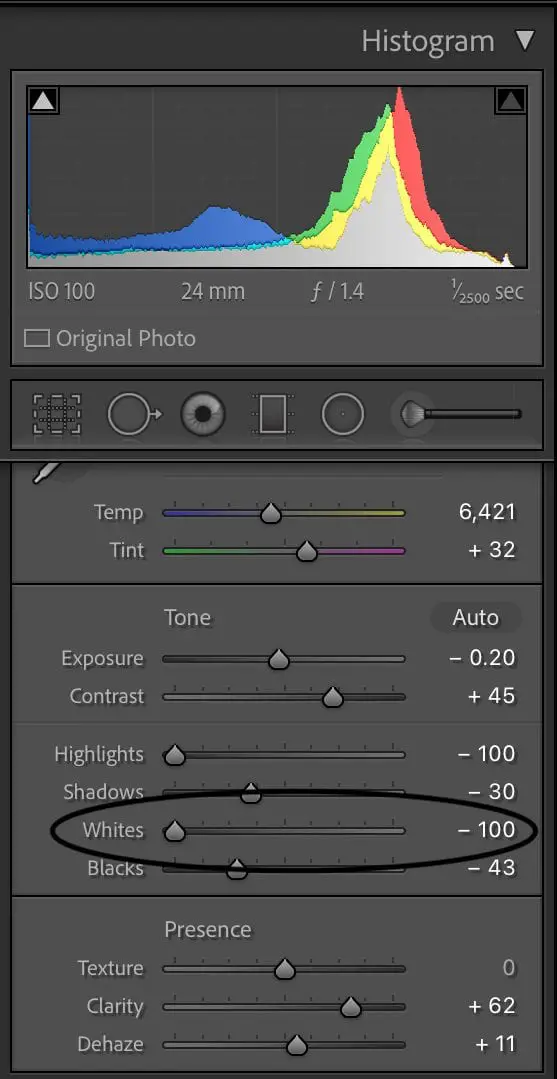
Similar to how the Highlights slider tones down brighter areas of the photo, like light on the face or bright skies, the Whites slider will bring down the whites in your photo.
By bringing the Whites slider all the way to the left, there’s a chance your photo will become really dim and flat. However, it should salvage more of the detail in your photo that was lost in the exposure.
Step Three: Exposure Slider
You would think if you were trying to figure out how to fix an overexposed photo in Lightroom that you would just play around with the Exposure slider.
The problem is the Exposure slider controls the light on the entire photo. You can make already bright areas extra bright and really dark areas super dark.
This is why starting with the highlights and whites of the photo individually will hopefully result in a better looking photo. You’re individually controlling two areas of the photo, rather than the brightness of the entire photo.
So, once you’ve brought down your highlights and whites, you can make an appropriate adjustment to the Exposure slider that keeps the brightness of the photo even.
There is no specific number to set the Exposure slider to, since it will depend on the individual photo. You will likely need to bring the exposure down, so keep sliding to the left until the photo recovers more detail, but before it gets too dull.
The settings in all of the other screenshots are the exact settings used in the example photo at the beginning and end of this post and you can see I actually didn’t use the Exposure slider at all. It really just depends on the photo and how much rescuing it needs!
Step Four: Dehaze Tool

The Dehaze tool is one of my favorites in Lightroom, especially for editing my travel photos. Just a small tweak to the slider can make a huge difference in creating punchy detail in your photo.
When I say just a small tweak, I mean it. While it brings forth detail in a photo, it also tends to darken a photo. This may help when fixing an overexposed photo, but in general the photo can appear over-edited.
Try sliding the Dehaze tool to the right a little bit at a time and see if it brings out more detail or if it is making your photo look too processed.
Step Five: Tone Curve
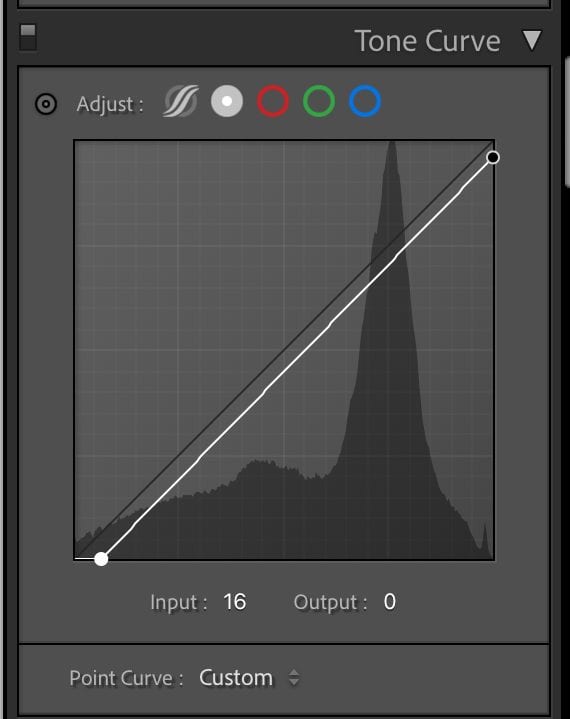
The Tone Curve is typically the last place I go when fixing an overexposed photo in Lightroom. The photo potentially looks too dark at this moment, since we’ve been bringing down all of the light to recover details.
Using the Tone Curve, you can try darkening your blacks. Do this by creating a point at the lower-left intersection of the x and y-axis and then dragging it to the right along the x-axis. You should see the blacks become darker in the photo.
Darkening the blacks using the tone curve should have less of a harsh effect as opposed to using the Blacks slider.
Extra Tips for Fixing an Overexposed Photo in Lightroom
There are some other tools you can dip into to help fix an overexposed photo.
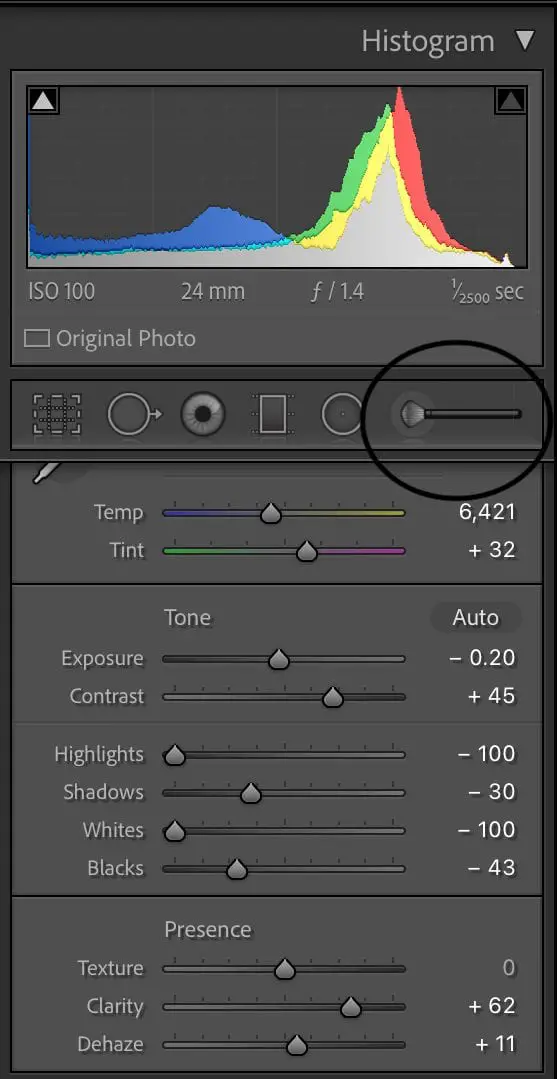
You can use the Brush Tool to adjust specific areas in the photo. Brush over the area where you are still missing detail and then you can bring the highlights or whites further down, adjust the exposure, or try to dehaze this area.
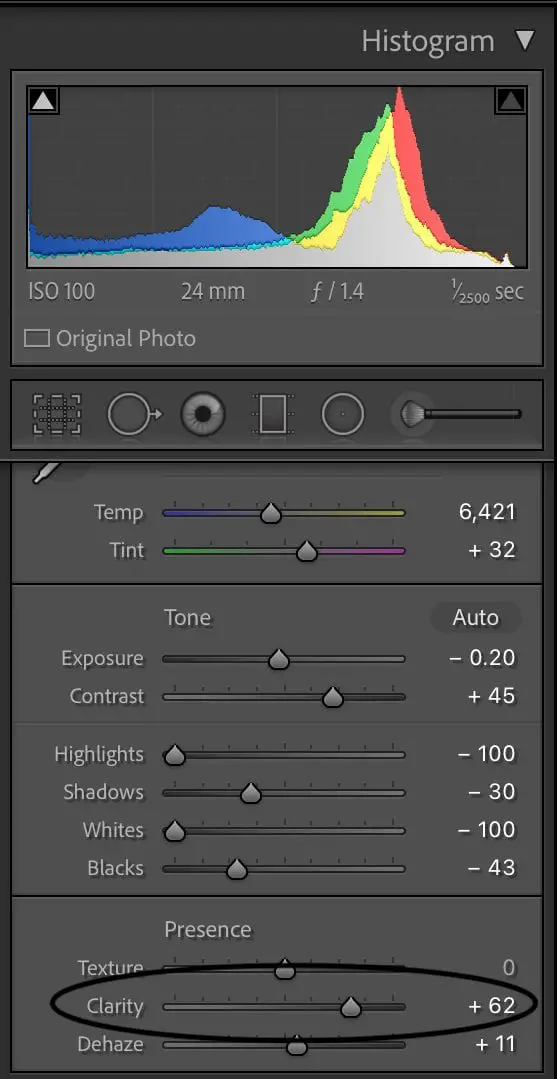
I love using Clarity to make my photos more punchy. It brings everything forward and it could help in bringing forward any details you’ve recovered after fixing the overexposure in your photo.
These are the main tools I use after following my 5-step fix process, but it’s pretty much limitless as to what tools can help you bring back detail in the photo.
You may find you’re able to expose the photo correctly after following these steps, but certain hues dominate areas of the photo when bringing down the exposure (like the photo I used as an example before under “tips for avoiding overexposed photos.”)
If that’s the case, you can go into the HSL tab and play around with the colors controlling the photo to balance the tones of color with the exposure.
If you are still struggling with how to fix overexposed photos in Lightroom, I recommend playing around with the sliders until you see something is working for you! It allows you go get to know Lightroom better, but hopefully following the five-step fix process and downloading the free preset will do the trick.
Free Preset to Help Fix Overexposed Photos in Lightroom
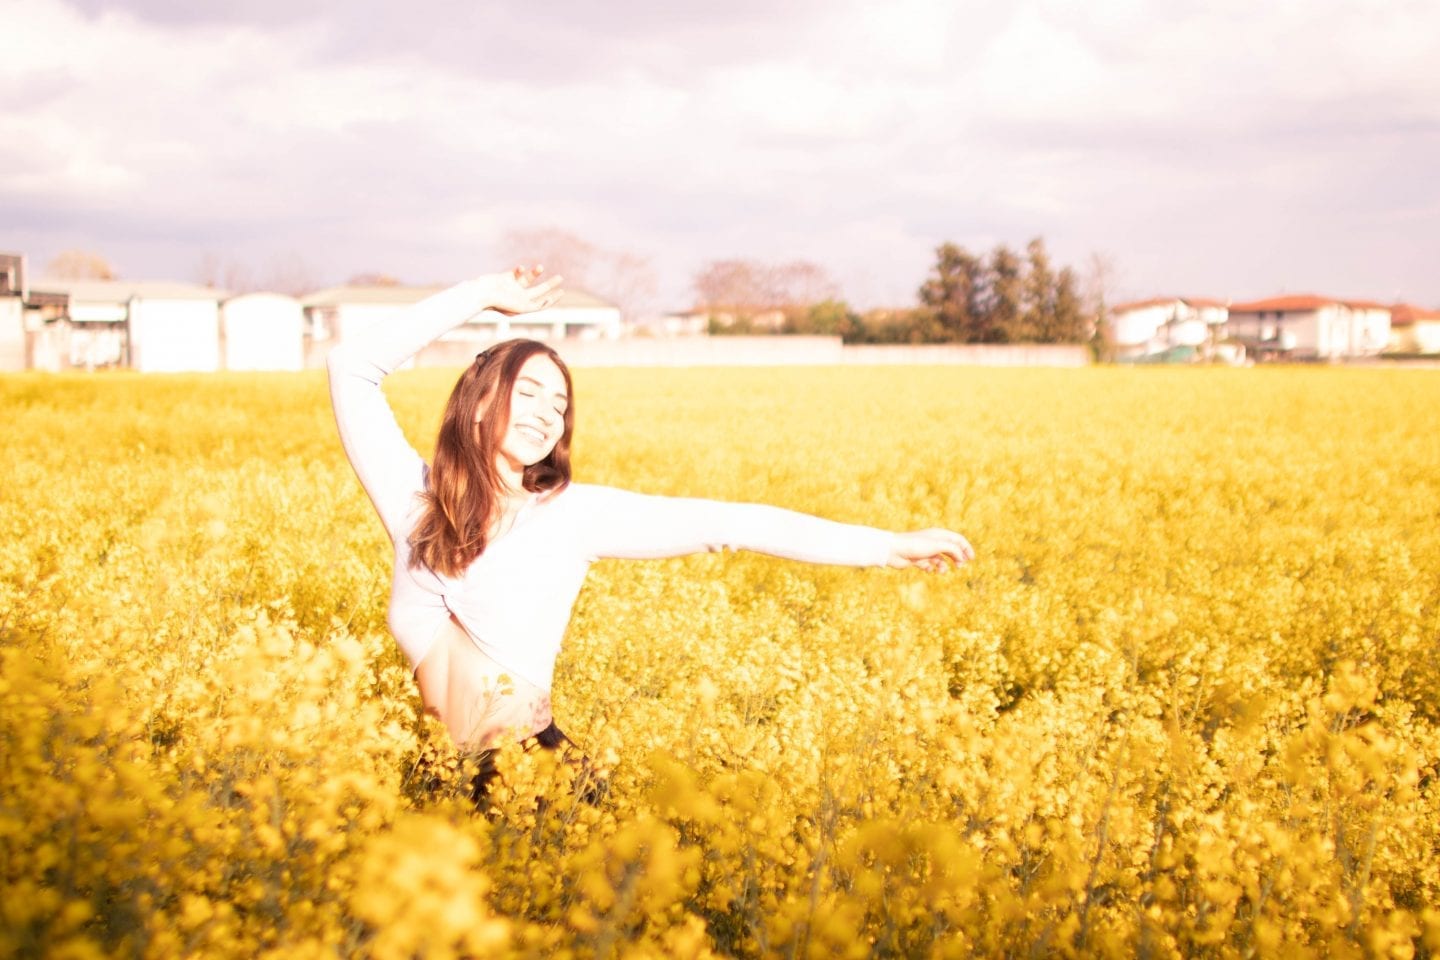
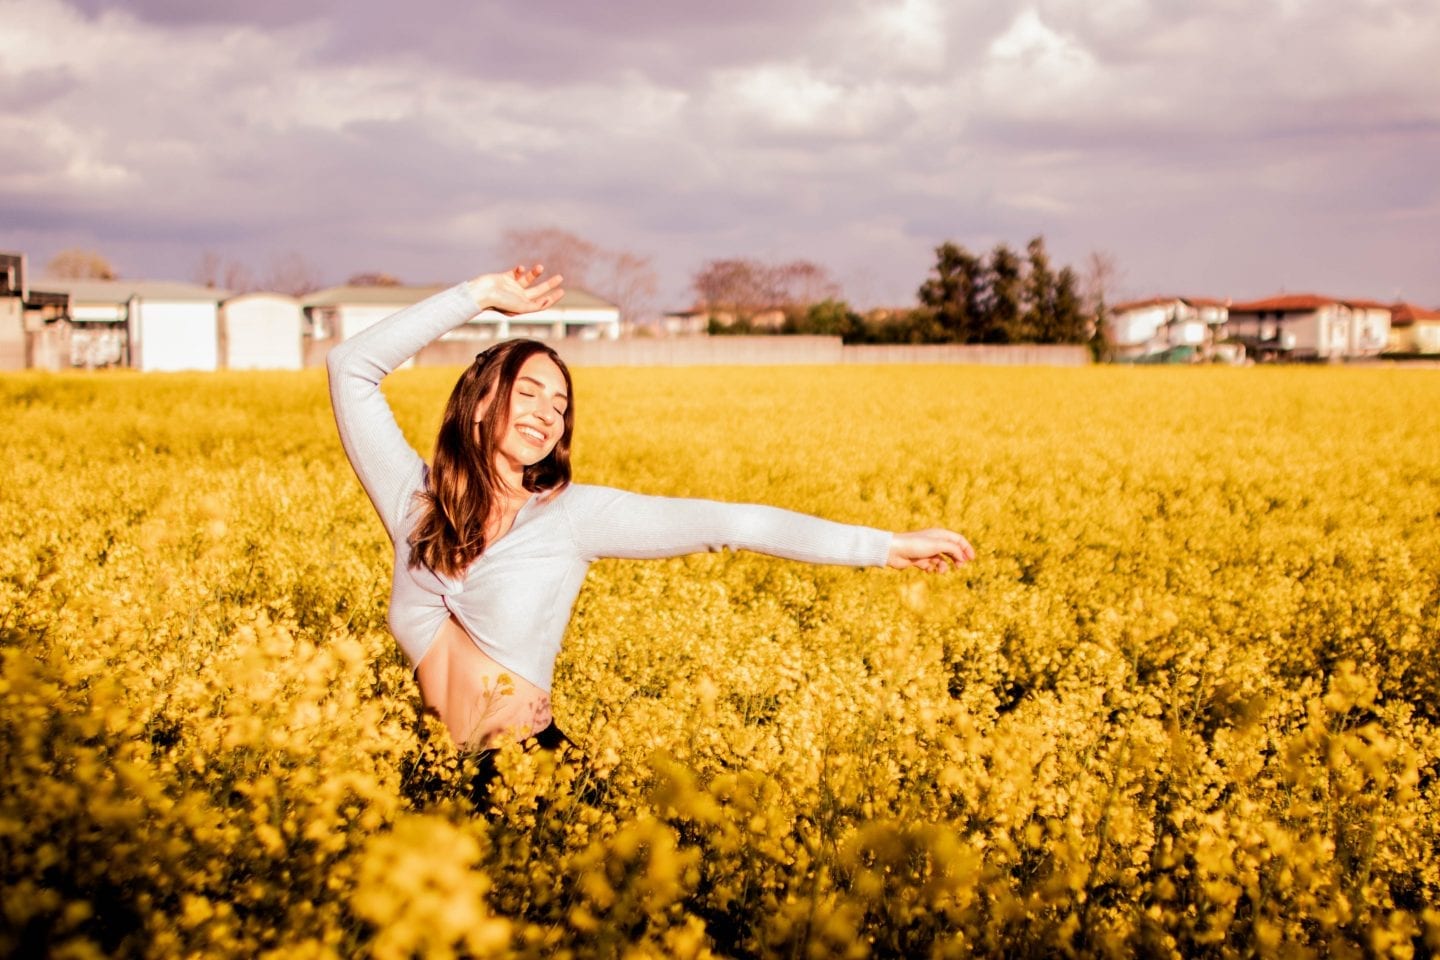
As I mentioned in the beginning, if you want to try to apply the exact settings I’ve used before for fixing overexposed photos, you can download my preset for free from The Travel Library. You’ll get immediate access to your email!
Final Thoughts
Learning how to fix an overexposed Lightroom is simpler than you think!
The unfortunate part is we can do all of these things and more and sometimes still not be able to rescue our beloved photo. It truly just depends on how overexposed a photo is, but don’t let that get you down!
I’ve had photos that I could fix and many more that I wasn’t able to. It sucks mourning what would have been a great photo. But more photo opportunities come along and if anything, you get more practice in learning the ins and outs of Lightroom!
Have you ever had an overexposed photo nightmare? Any tips I forgot to mention? Leave a comment and share!
Save this five-step guide to Pinterest for easy reference!
Hopefully you’re staring at a beautiful photo right now, with the exposure just right!
XOXO
Michela


