
Last Updated on January 16, 2024 by Michela
Travel and photography go hand in hand – it’s inherent in us to want to see a gorgeous place, and then second nature to also capture its beauty and memory in a photo. But, upping your travel photography can be a bit intimidating! There’s so much equipment on the market at all different price ranges. Whether you’re just starting out in photography or maybe you’re really trying to up your game, these travel photography gear essentials are everything that I owe to my photography to even being the least bit good! These are the perfect accessories and investments to make into your travel photography, at all different price points but the same excellent quality.
This article is going to be super in-depth on these products so you know if they are the right piece of equipment for you. Use the table of contents below if you want to skip around!
And while I love to talk about budget travel, a lot that comes with photography is investing in quality products that perform and will last.
So I’m only talking about products and travel photography gear essentials that I use and love and truly think are worth the investment!
That in mind, some of these links are affiliate links, meaning I receive a small commission at no extra cost to you if you make a purchase through the link! It helps keep my blog afloat and I appreciate any support! You can see my full disclosure if you have any questions.
WANDRD PRVKE Series Photography Pack Backpack
The first thing you think of when it comes to travel photography gear essentials is what’s going to protect that precious camera of yours! I am head over heels for the WANDRD PRVKE Photography Pack Backpack.
I spent hours and hours researching what kind of camera backpack I should get, one that wasn’t crazy expensive but not dirt cheap.
One that protected my gear, but wasn’t so big that I couldn’t comfortably walk around with it.
Plus, one that had a nice clean look to it, that didn’t just look like a normal boring camera bag!
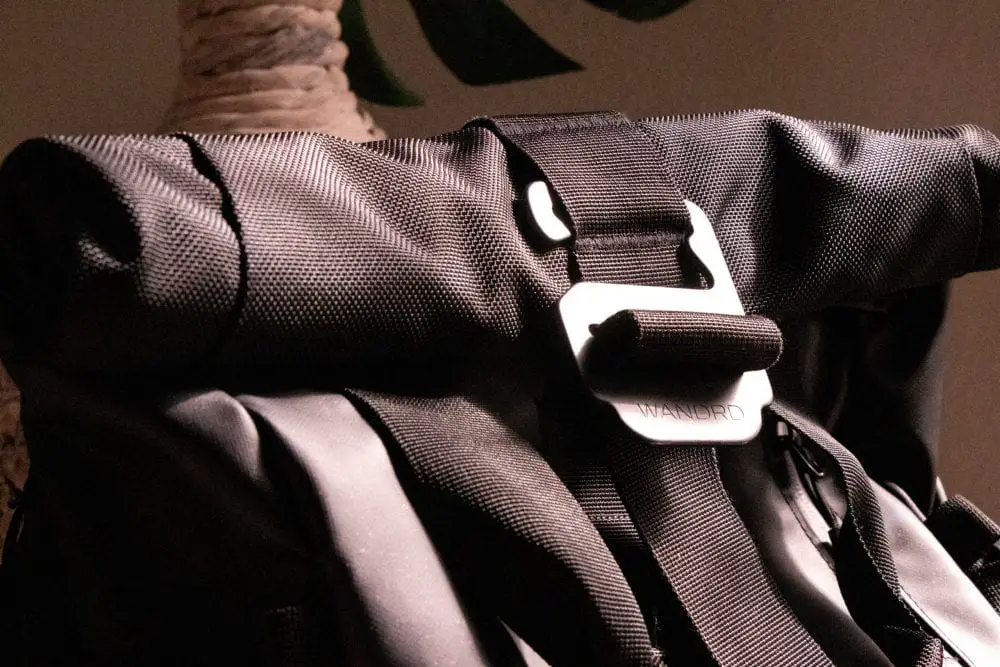
If there’s anything that’s totally revolutionized my travel photography gear it is this backpack.
The thing is, this backpack is all-around thoughtfully made for travel with every detail from safety to storage to efficiency and to comfortability.
It actually doesn’t even have to be a camera backpack, but if you’re at this article I’m guessing you want to know what it’s like with the photography pack.
These are the features I love that make it a great backpack even if you’re just traveling:
- Storage – So many pockets, so much space for your stuff!
- Comfort – Padded Straps, Extra Hip Straps, Stylish look/Not Too Bulky
- Durability – Weather-resistant material, Rain Case Included, Heavy-Duty Zippers
Read my extensive review here on the WANDRD PRVKE Series Photography Backpack, where I go into crazy detail about all of its features!
MeFoto GlobeTrotter S Travel Tripod

The next travel photography gear essential is a tripod! You never know when you’re going to need stability for the perfect shot.
When researching the perfect travel tripod there are 3 main things you want to keep in mind – you want it to be light, durable, and versatile.
You don’t want to be lugging a heavy and bulky tripod around while you’re traveling! The weight really adds up both in your suitcase and when you’re lugging it around with you out and about.
The other thing to always consider is the budget. The prices of tripod usually correlate most closely to the quality of the material it’s made out of.
So there are 3 types of tripod materials out there and if you are researching on what tripod is best for travel, you’ll come across this distinction a lot and the pros and cons of each.
Tripods are usually made out of metal, aluminum, or carbon fiber.
In terms of price, carbon fiber is the most expensive, then metal, then aluminum. In terms of quality, however, carbon fiber is the highest quality for travel photography, then metal, then aluminum.
The MeFoto GlobeTrotter S Travel Tripod is a carbon fiber tripod. Carbon Fiber is the lightest of the three materials while still maintaining its durability. Which, also makes it the more expensive option. Here’s why I still recommend investing in this tripod!
Safety
Your camera will be sitting on this tripod, a piece of equipment worth at least $600 to thousands of dollars. You need a tripod you can trust, that won’t be flimsy because god forbid if it isn’t sturdy enough, you could damage your camera.
Transport
The Globetrotter S tripod is incredibly easy to transport. It’s that light but durable concept that I mentioned before, which is what we want when traveling!
Versatility
This kind of tripod also has a ton of versatile features. There’s a bag hook to weigh the tripod down, spikes to add to the feet of the tripod in rough terrain, and a ball head top so you’re able to achieve any angle when setting up your camera.
Long-Term Use
Overall, it’s a better long-term investment. Flimsy aluminum tripods may be cheap and I totally think they are an okay option for beginners! But if a tripod keeps breaking or you’re too scared to use it because it may fall over with the weight of your camera, then I recommend just save up a little more and get a tripod you can use for the next ten years rather than the next year.
SD Card to iPhone Adapter
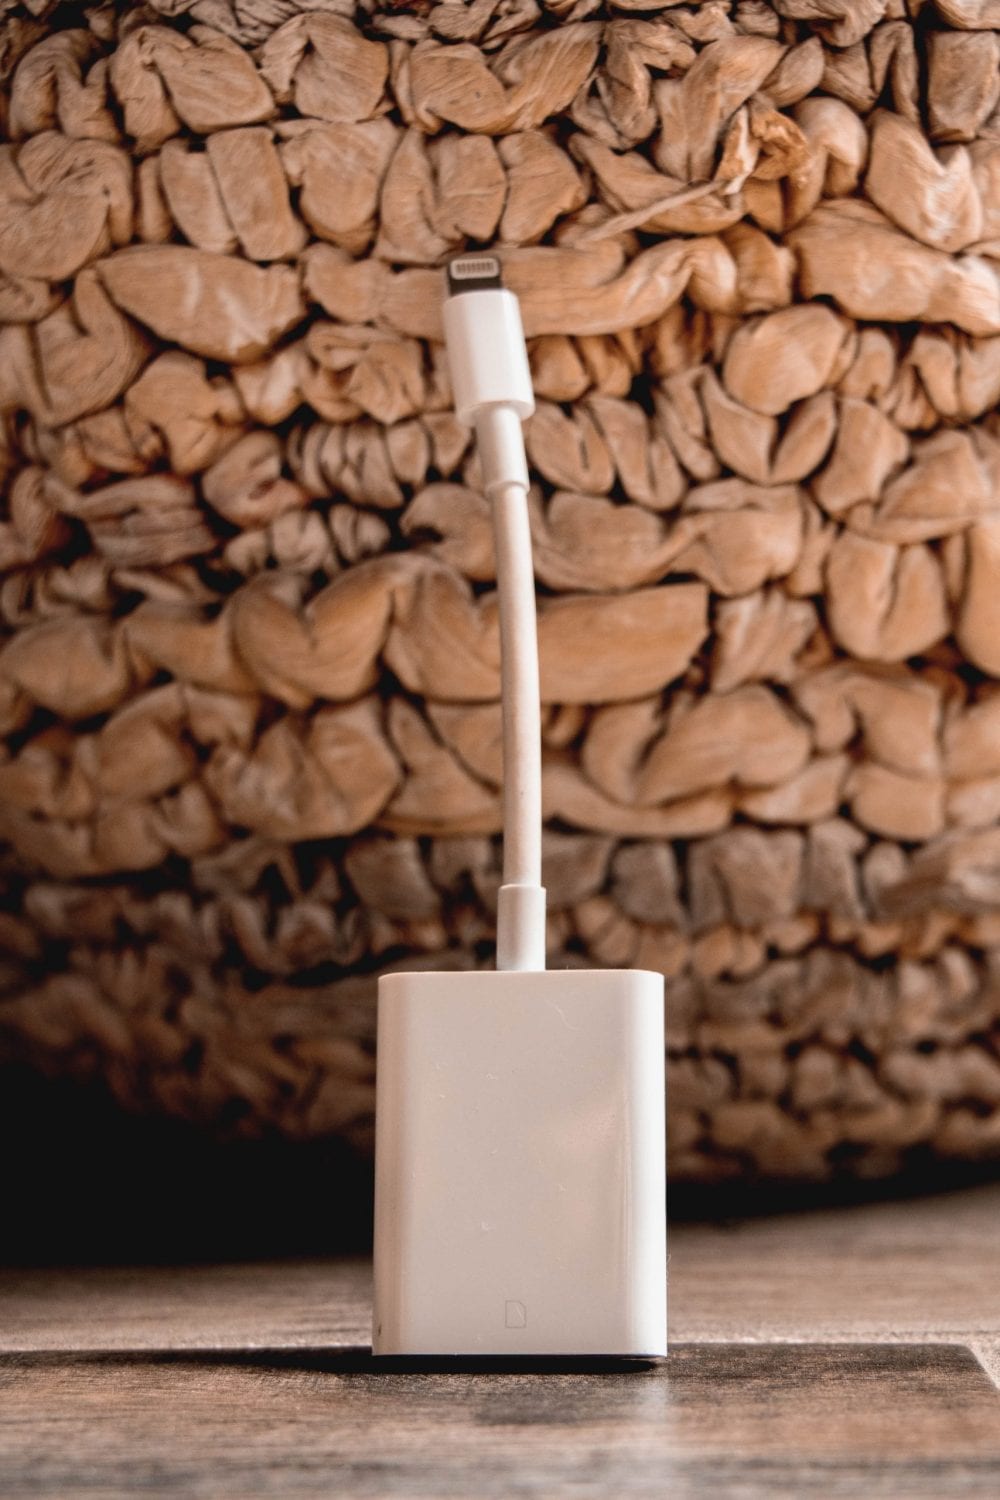
This is potentially my FAVORITE tool I’ve ever purchased! Plus, it’s one that doesn’t break the bank! It’s only $25 on Amazon but such a nifty tool you didn’t know you needed in your travel photography kit.
An SD card to iPhone adapter allows you to instantly transfer DSLR camera photos to your phone.
You take the SD card straight from your camera, stick it into the adapter and then attach the adapter to the same place you’d charge your iPhone and you can immediately import your camera photos onto your iPhone.
This is literally perfect for on the go access to your photos. I can upload my pictures from my camera to my phone, edit them in Lightroom mobile, and post it straight to Instagram. Or just get in some editing if I don’t have my laptop!
Plus it’s a tiny tool – a travel photography gear essential that adds no weight to your camera bag!
Remote
A remote is awesome for taking pictures of yourself if you’re traveling solo. Just a little bit of setup with your camera and then you can click away at the remote to control the shutter opening & closing – aka taking a picture!
You can get away with buying a basic and inexpensive remote but you have to make sure it is compatible with your camera.
This is another great travel tool for photographers that’s small and useful to have on hand.
Even if you’re not traveling solo and would like a group or couple picture somewhere, the remote is perfect for that!
My Passport Portable External Drive

I always travel with my My Passport for Mac Portable External Drive to be prepared for plenty of “what if” situations.
What if my computer runs out of storage?
What if my computer breaks?
Or my computer is stolen?
And the list goes on. This is where the portable external drive comes in. I recommend as soon as you import your photos to your computer (I usually do it straight into Lightroom) to then back them up immediately onto your external drive.
The external drive offers you tons of extra storage for emergencies or simply if your computer doesn’t have the storage space. It’s also super easy to transport and small for traveling.
I did tons of research when trying to find a good portable external drive. I personally love the My Passport for Mac portable external drive because it comes in different sizes (mine’s 1 TB), it’s really sturdy, and it’s really easy to use.
It’s also super affordable in comparison to other brands! You get good quality for a good price and that’s what I like to see!
Prime Lens

It can be hard figuring out what lens to buy. f you’re going to invest in any lens besides your kit lens, I recommend the first one be a prime lens. This is a lens that is fixed at one focal length.
The reason why I recommend this is because the kit lens can pretty much get you a basic looking photo of anything. There’s not too much “special effects” you could say.
But a prime lens, because it is at one focal length, is able to go to a lower aperture which means you can create that beautifully blurred background in your photos.
The good thing is prime lenses have a wide price range so you can choose whether to start small or invest at the start. I personally have the 50mm f/1.8, which as you’ll find, is the cheaper one.
I’ve had it for three years and only now am I getting the itch to upgrade to something new! So I think this is a good purchase for those wanting to up their game, but still on a budget!
Extra Thought: Now, I recommend this lens first because I just think it gives you such a different look than what a kit lens can achieve. But that being said, a prime lens really only matters if you’re taking a picture of a subject. So, if you’re like me, and you like to be in your own pictures, then great! A prime lens could be for you.
If you are concerned more with landscape shots, then I would say skip the prime lens for now!
Extra SD Cards
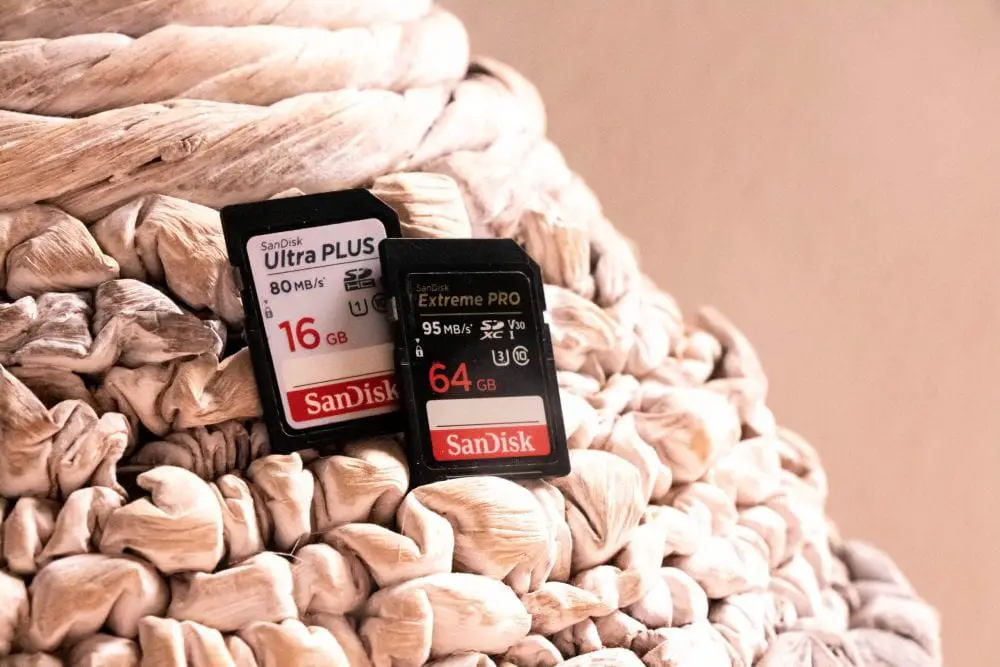
This is may be a no-brainer, but I think it’s important to always remind you of the simple things when putting together your travel photography gear essentials! Even as simple as packing a few extra SD cards.
Firstly, if you’re anything like me, you lose literally everything. SD cards are so tiny and they can be so easy to misplace! So it’s always good to have extra.
Secondly, if again you are like me, you basically take a picture of absolutely everything and run out of room on your SD card so quickly! Again, another reason to have back up!
SD cards can vary in price depending on the size and quality, but my go-to is always a 64 GB Extreme Pro. It’s the perfect good quality but also budget-friendly for the amount of storage you get!
Adobe Lightroom Mobile
I can’t write a photography article without mentioning my favorite Adobe Lightroom! I truly believe post-production and editing are where a photo can really become magical.
And Lightroom is the tool that makes magic happen!
Specifically, when it comes to travel photography, I always make sure I have access to my Lightroom Mobile app.
It’s free to download on your phone, or if you invest in Adobe Lightroom (I tell you why you need to in this post), then you can sync your account to your mobile app.
And that wraps up my travel photography gear essentials!
I know I talked about a lot, so feel free to ask questions by leaving a comment below!
And Pin this on Pinterest if you thought it was valuable!

I don’t leave for a trip without packing any of my travel photography gear essentials! What are your gear essentials? Let me know if you have a product you love that I should try!
XOXO
Michela
Michela is a travel writer and photographer living in northern Italy. She is passionate about helping people make the most of their travels by sharing advice gained from her personal experiences, off-the-beaten-path destinations and time-saving quick itineraries. Browse her top articles or have her help you plan your itinerary to your dream destination!